When making a tax payment through TaxCaddy, you'll be prompted to add a signature to your checks. You have the option to either upload a new signature that can be applied to future payments or apply a signature that you've previously uploaded.
TaxCaddy.com on PC, Mac, or tablet
Follow these steps to add a signature to a tax payment voucher when using TaxCaddy.com on your PC, Mac, or tablet.
To add your signature, select
ADD SIGNATURE
on the check summary.
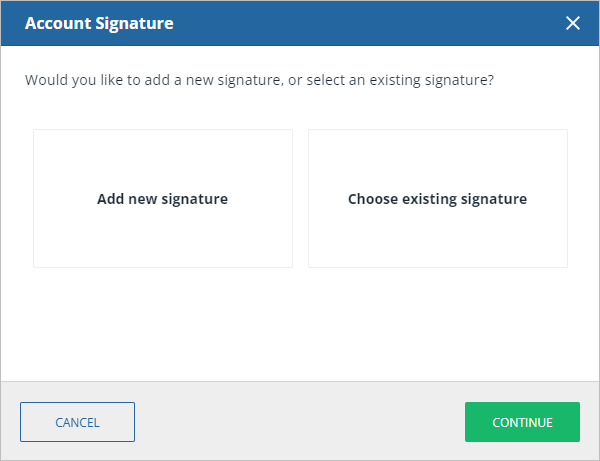
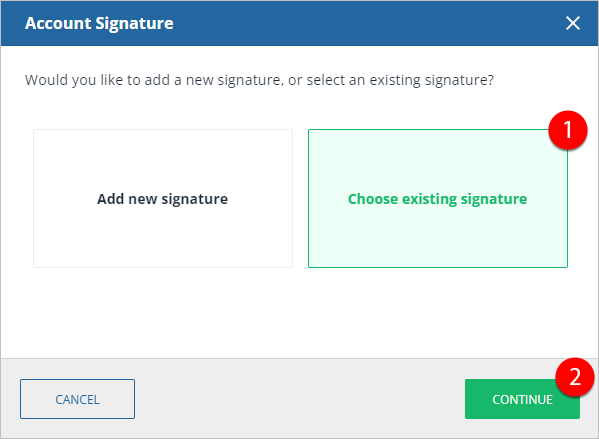
The
Account Signature
window will appear, giving you the option to either:
Add new signature
: Draw or upload a new signature to attach to your checks.
Choose existing signature
: Select a previously added signature to reuse.
note
You will automatically be directed to
Add new signature
if you haven’t previously added a signature.
Add new signature
Using
Add new signature
, you'll be able to add a new signature file. You will have the option to either draw your signature in TaxCaddy, or upload an existing file that already contains your signature. Once added, these signature files can be reused when needed at a later.
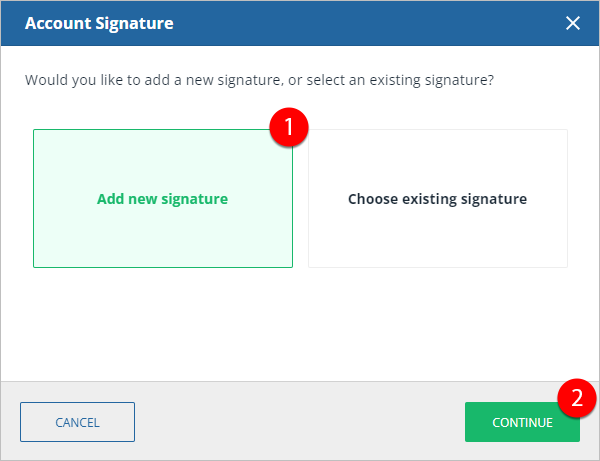
To add a new signature, select
Add new signature
and select
CONTINUE
.
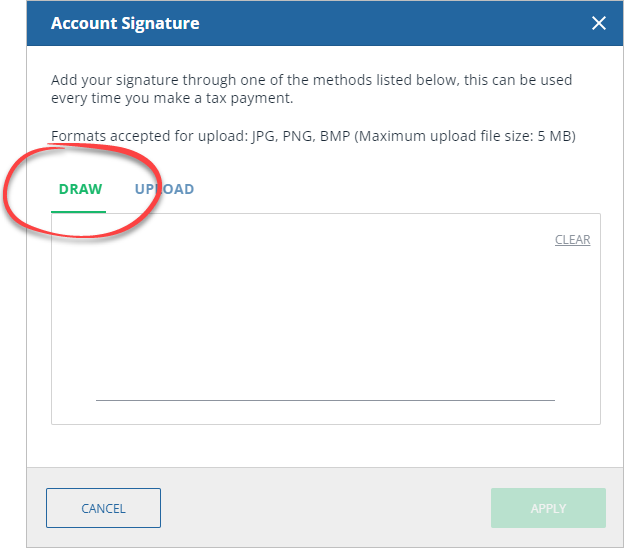
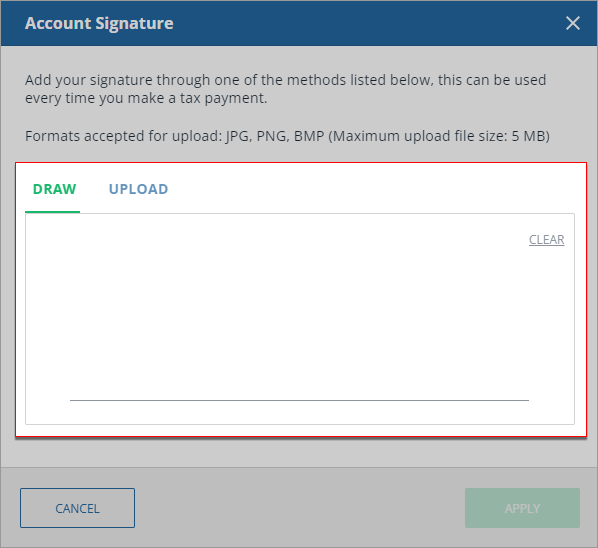
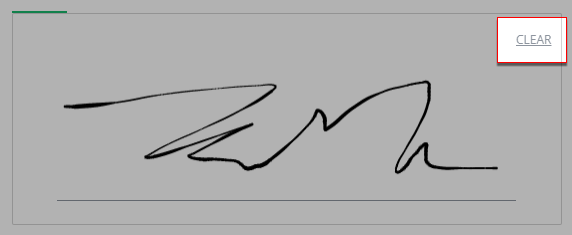
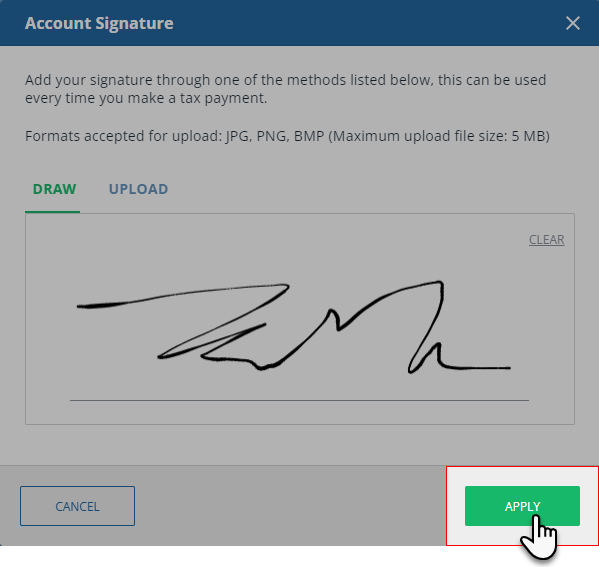
Draw
Select the
DRAW
tab of the
Account Signature
window
.
Write your signature in the field provided.
If the signature you write is unsatisfactory, you can select
CLEAR
to restart.
Once you complete your signature, select
APPLY
to add it to your check.
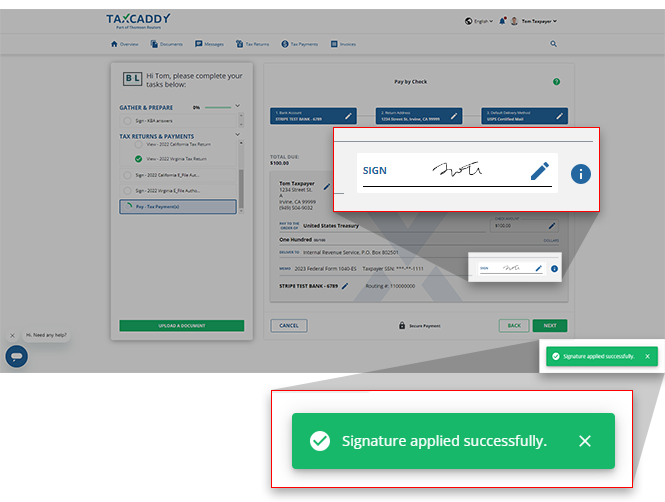
You will see your drawn signature on the check summary along with a toast notification indicating that it's been successfully applied to your check. You can select
Edit
if you want to replace the current signature with another one.
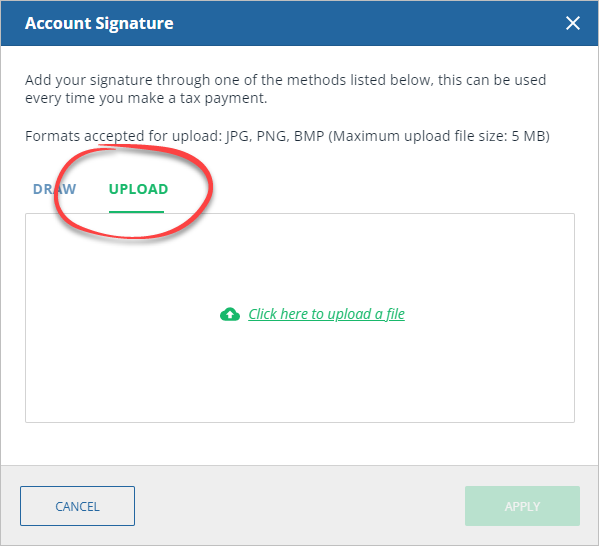
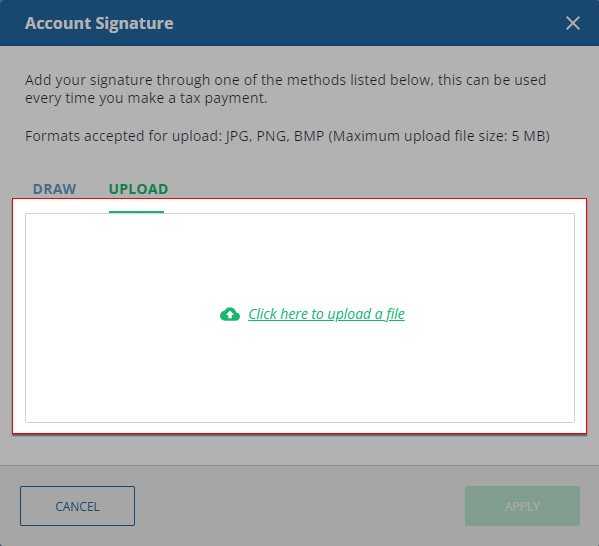
Upload
Select the
UPLOAD
tab on the
Account Signature
window.
Select
Click here to upload a file
to open your device's file explorer.
Select the image file that contains your signature. Image files need be a JPEG, PNG, or BMP and under 5MB in size.
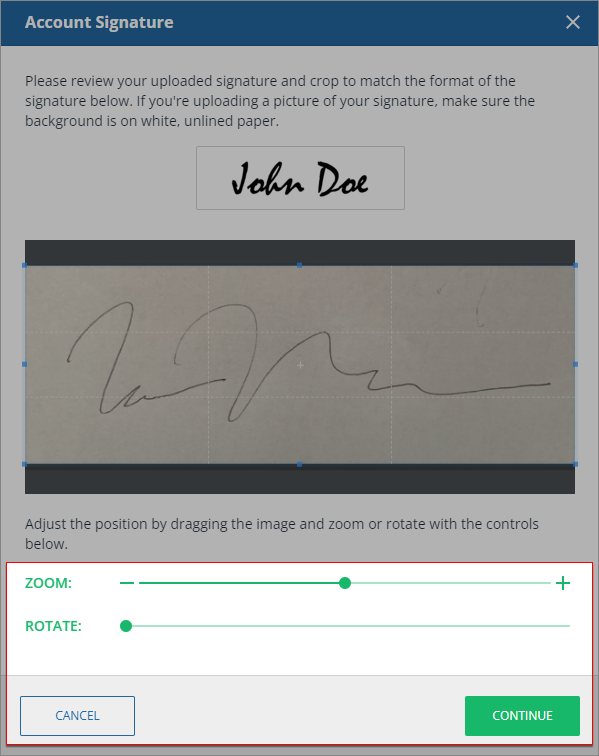
You can use the
ROTATE
and
ZOOM
tools to adjust your signature image. Once you're satisfied, select
CONTINUE
.
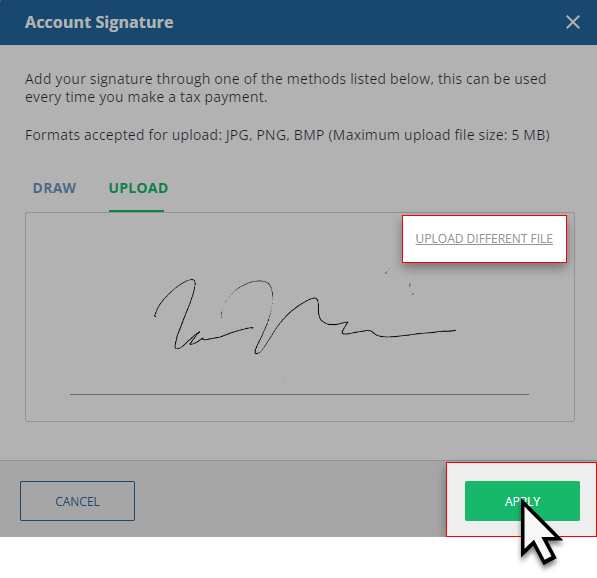
Your signature image will appear in the
UPLOAD
tab. Select
UPLOAD DIFFERENT FILE
to select a different image, or select
APPLY
to add the signature to your check.
Your selected signature will appear on the check summary and a toast notification will indicate that it's been successfully applied to your check.You can select
Edit
if you want to replace the current signature with another one.
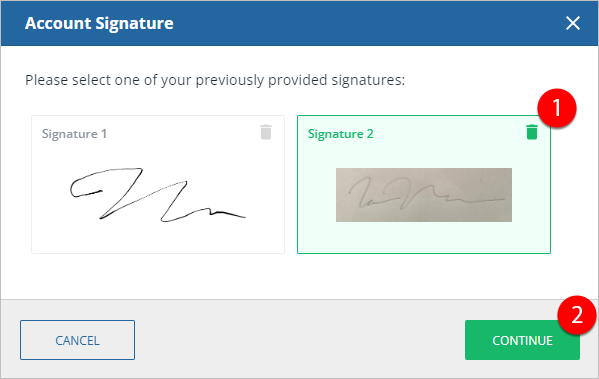
Choose existing signature
Once you add a signature to a check, you can then reuse that signature file for later checks paid by mail. When selecting an existing signature, you can select from up to 6 previously added signatures to add to your checks.
To use a previously added signature, select
Choose existing signature
and select
CONTINUE
.
Previously uploaded signatures will appear in the
Account Signature
window. Select the signature you want to upload to your check and select
CONTINUE
.
note
You will be able to store 6 signatures at a time. To delete a signature, select
Delete
on a signature to make room for a new one.
Your selected signature will appear on the check summary and a toast notification will indicate that it's been successfully applied to your check.You can select
Edit
if you want to replace the current signature with another one.
iOS mobile app
Follow these steps to add a signature to a tax payment voucher on your iOS mobile phone app.
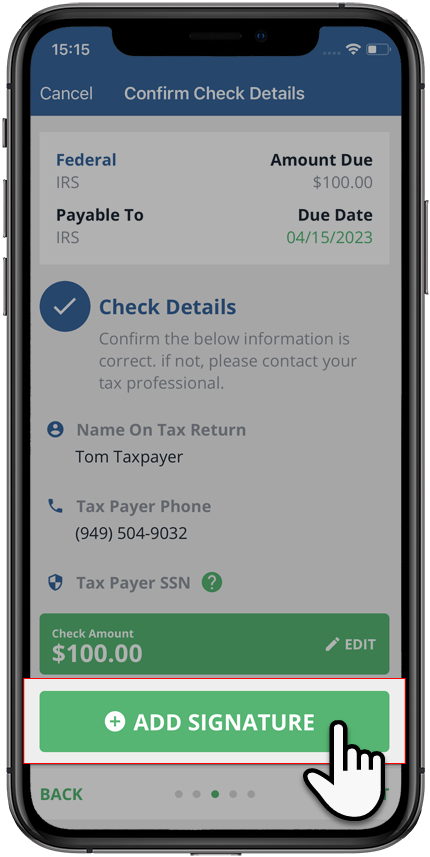
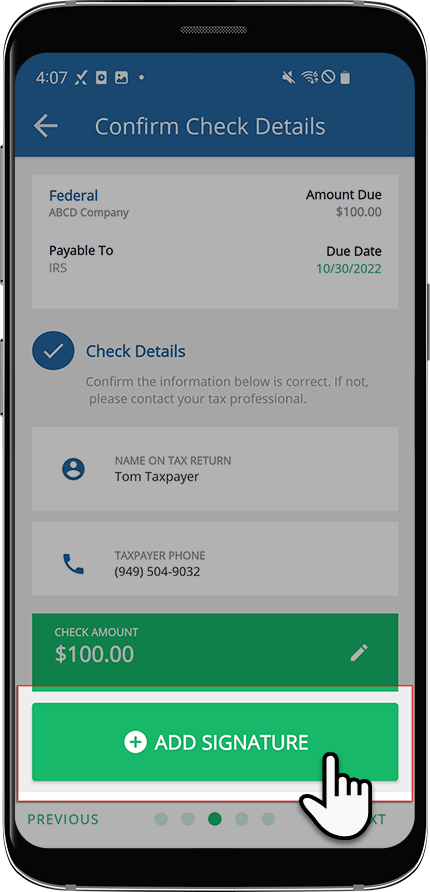
From the
Confirm Check Details
screen, select
ADD SIGNATURE
.
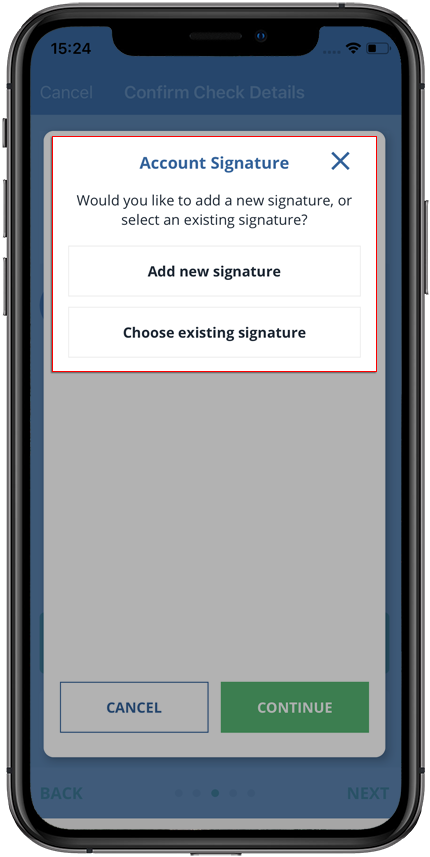
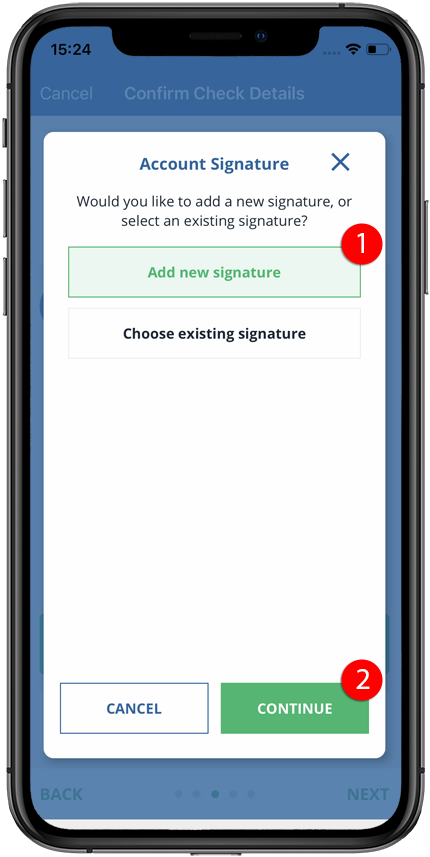
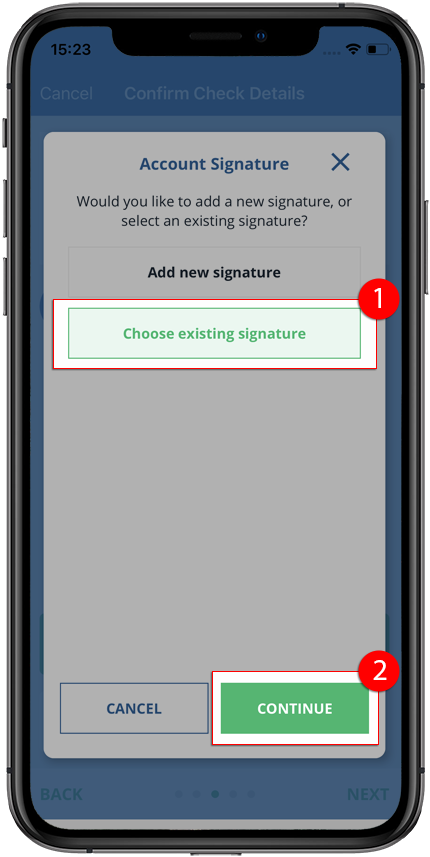
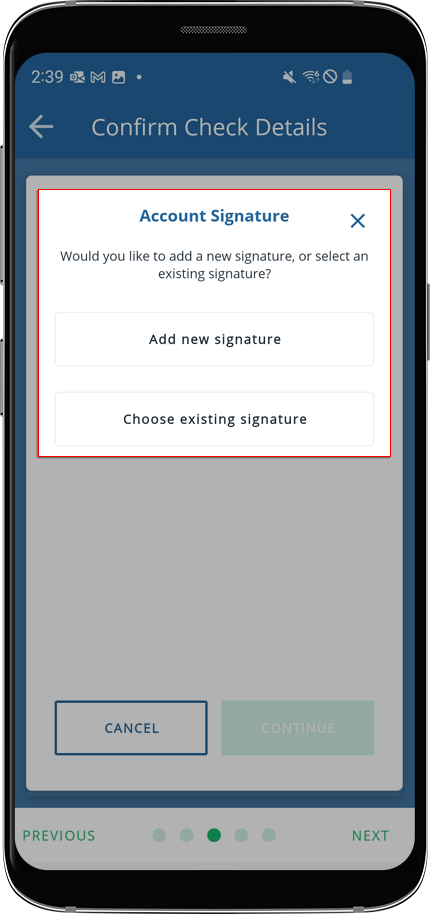
The
Account Signature
window will appear giving you the option to either:
Add new signature
: Create or upload a new signature to attach to your checks.
Choose existing signature
: Select a previously used signature to reuse.
note
If you haven’t previously added a signature, you will automatically be directed to the
Add new signature
feature.
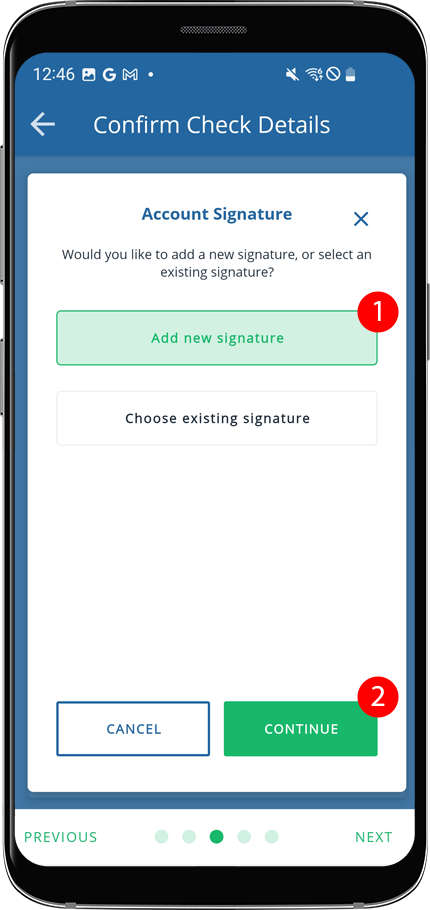
Add new signature
Using
Add new signature
, you'll be able to add a new signature file. You will have the option to either take a photo of a document containing your signature, or upload an existing file that already contains it. Once uploaded, these signature files can be reused when needed at a later .
Select
Add new signature
, and select
CONTINUE
to add a new signature.
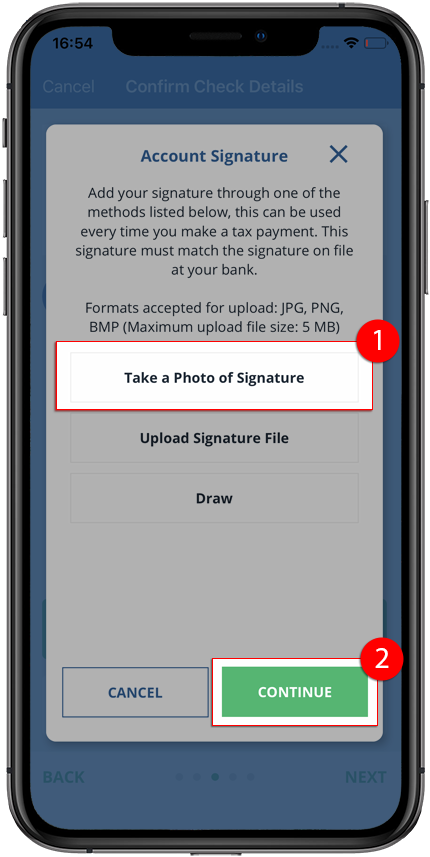
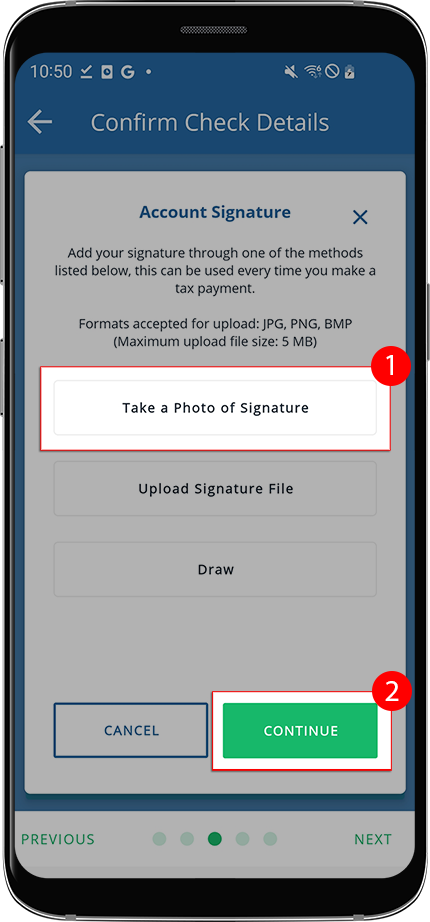
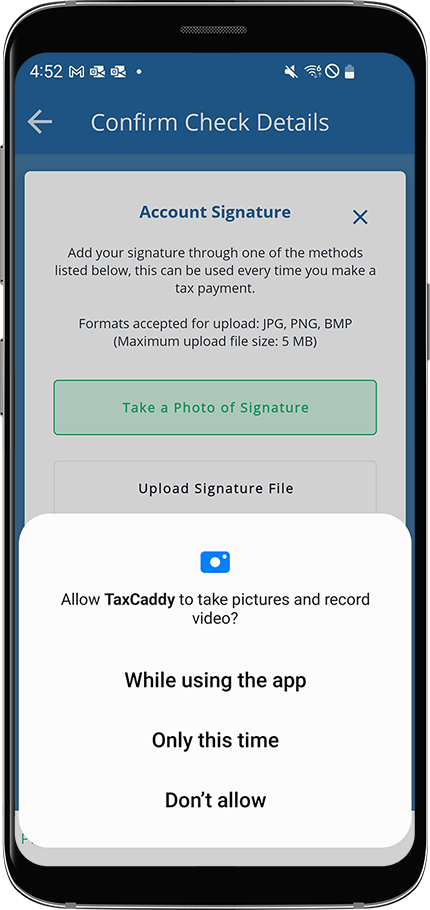
Take a photo
Select
Take a Photo of Signature
, and select
CONTINUE
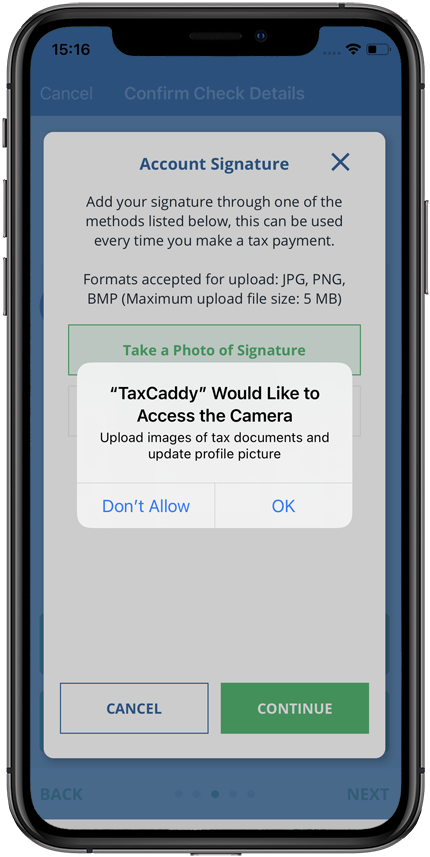
.
You will be prompted to open your device's camera. You may have to grant the TaxCaddy Mobile App permission to access your device's camera to take your photo.
Take a photo of your signature using your device. Be sure to include your entire signature in the image.
Crop, zoom, and rotate in
Edit Photo
to perform any necessary edits to your image, then select
Done
to continue.
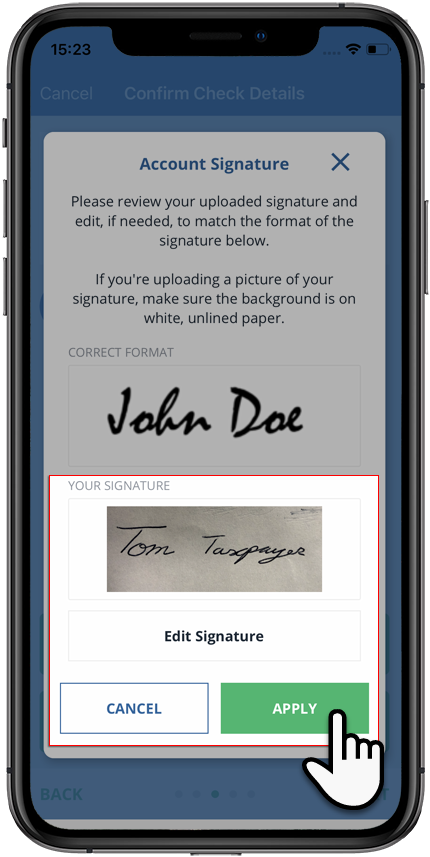
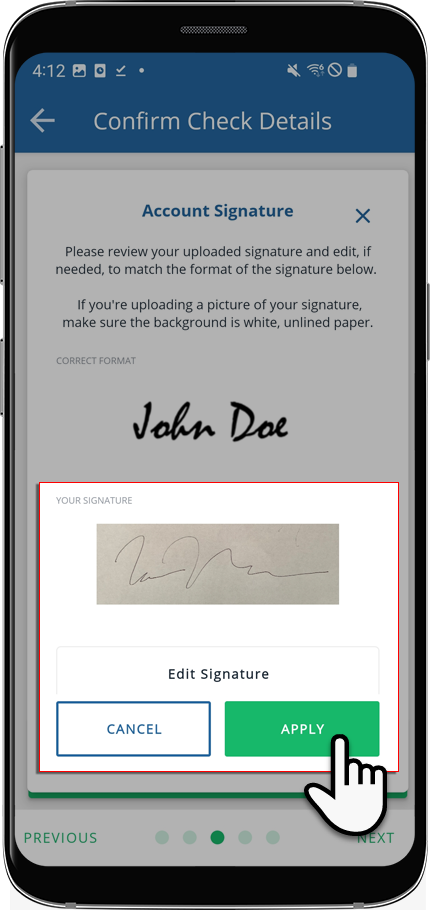
Your signature will appear under
YOUR SIGNATURE
. If the image is not to your satisfaction, select
CANCEL
to cancel adding a signature, otherwise, select
APPLY
to add this to your check.
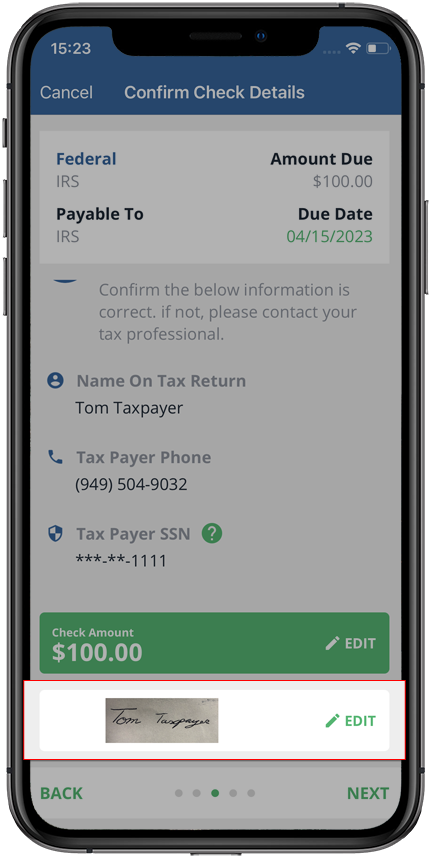
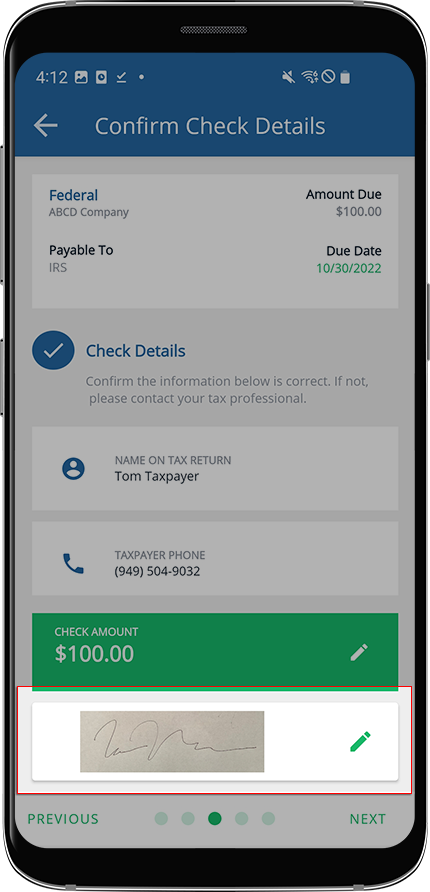
Your signature will appear at the bottom of the
Confirm Check Details
screen. You can select
Edit
if you want to replace the current signature with another one.
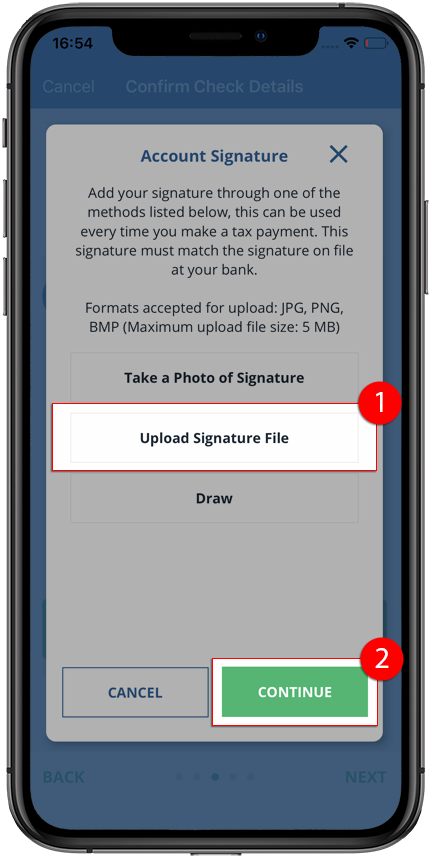
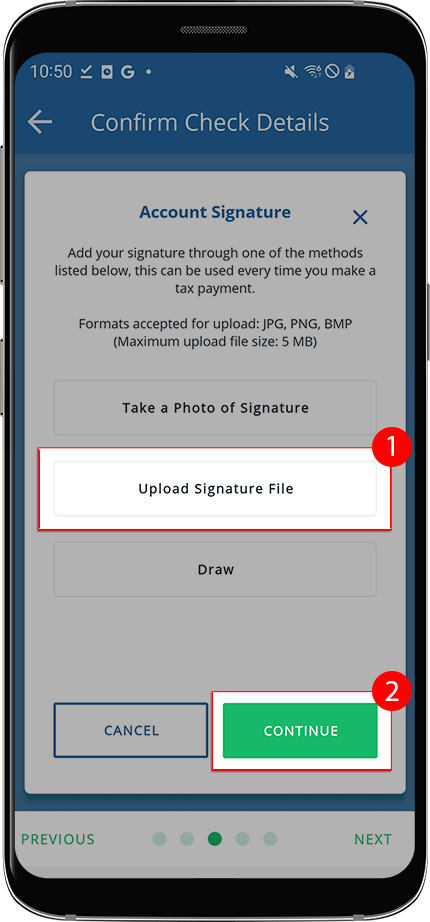
Upload signature file
Select
Upload Signature File
, then select
CONTINUE
.
Your device's file explorer will open. Select the signature photo you'd like to add to your check.
note
Image file types need to be a JPEG, PNG, or BMP and under 5 megabytes in size.
Crop, zoom, and rotate in
Edit Photo
to perform any necessary edits to your image, then select
Done
to continue.
Your signature will appear under
YOUR SIGNATURE
.If the image is not to your satisfaction, select
CANCEL
to cancel adding a signature, otherwise, select
APPLY
to add this to your check.
Your signature will appear at the bottom of the
Confirm Check Details
screen. You can select
Edit
if you want to replace the current signature with another one.
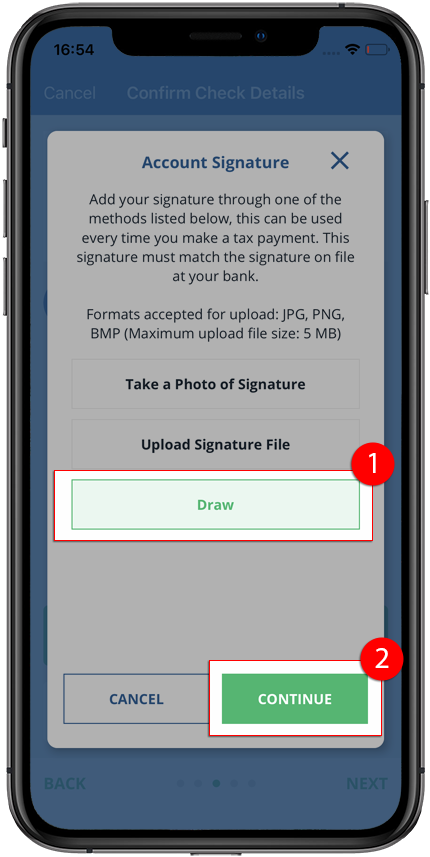
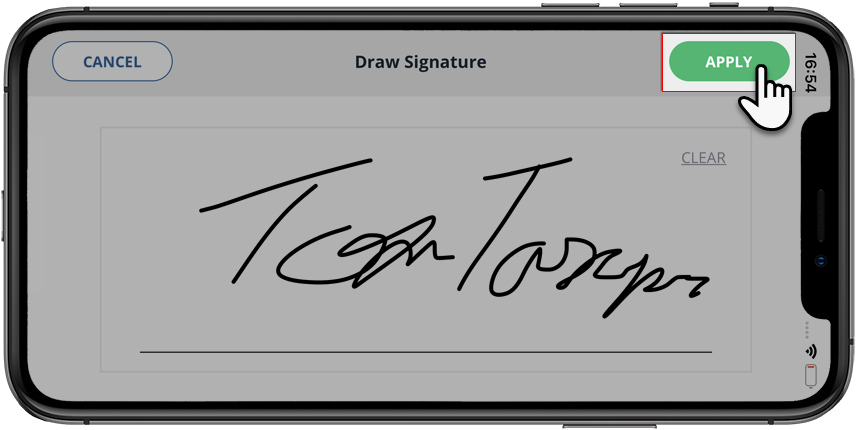
Draw a signature
Select
Draw
, then select
CONTINUE
.
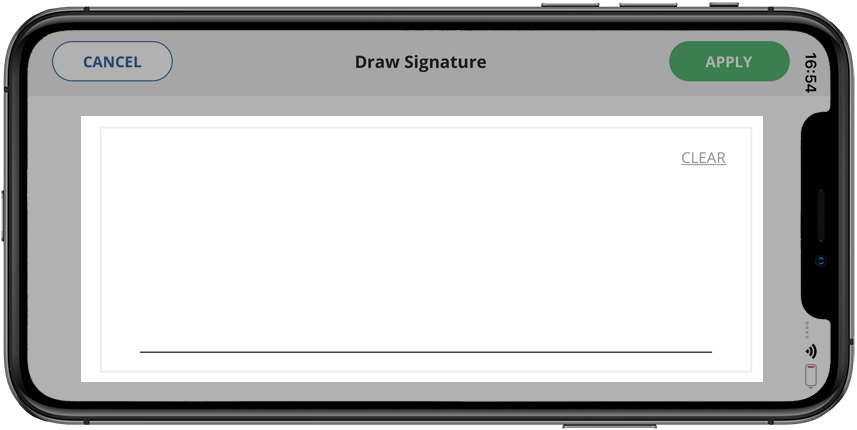
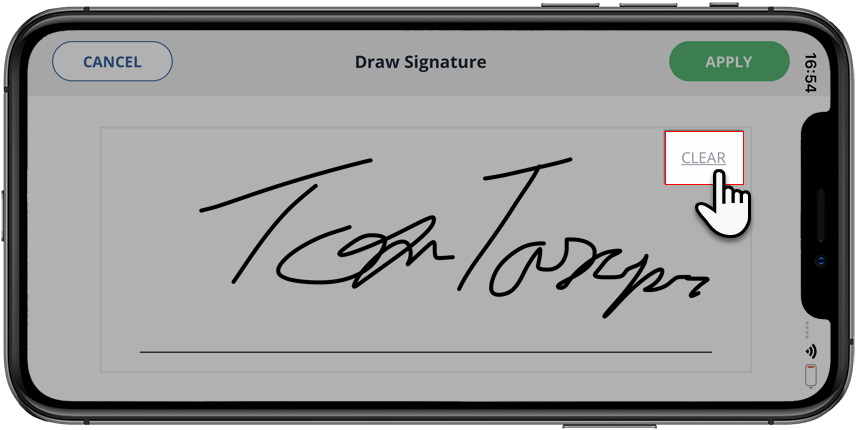
The
Draw Signature
window will appear on your screen. Draw your signature in the field provided.
If the signature you write is unsatisfactory, you can select
CLEAR
to restart.
Once you complete your signature, select
APPLY
to add it to your check.
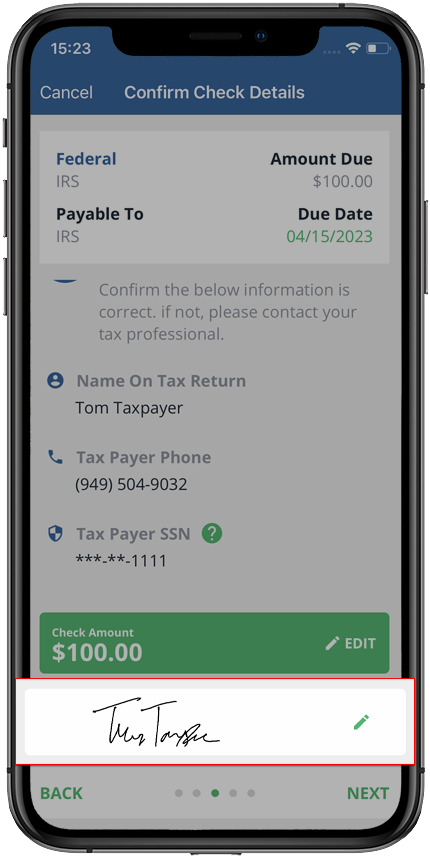
Your signature will appear at the bottom of the
Confirm Check Details
screen. You can select
Edit
if you want to replace the current signature with another one.
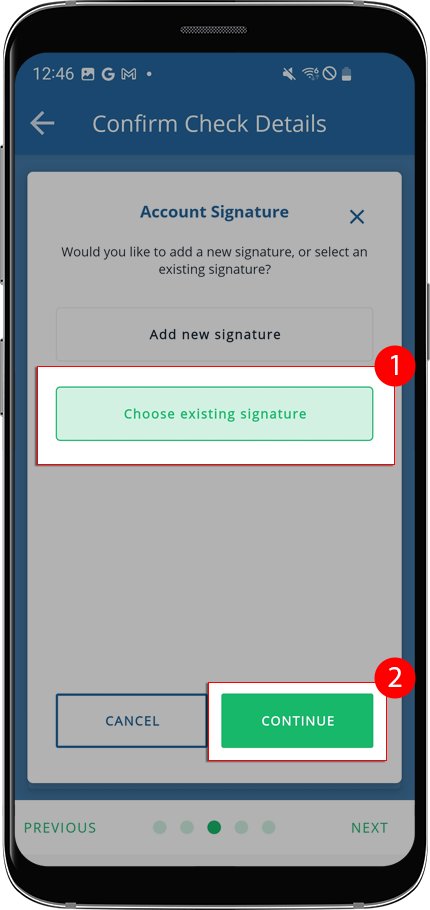
Choose existing
Once you add a signature to a check, you can then reuse that signature file for later checks paid by mail. When selecting an existing signature, you can select from up to 6 previously added signatures to add to your checks.
To use a previously added signature, select
Choose existing signature
and select
CONTINUE
.
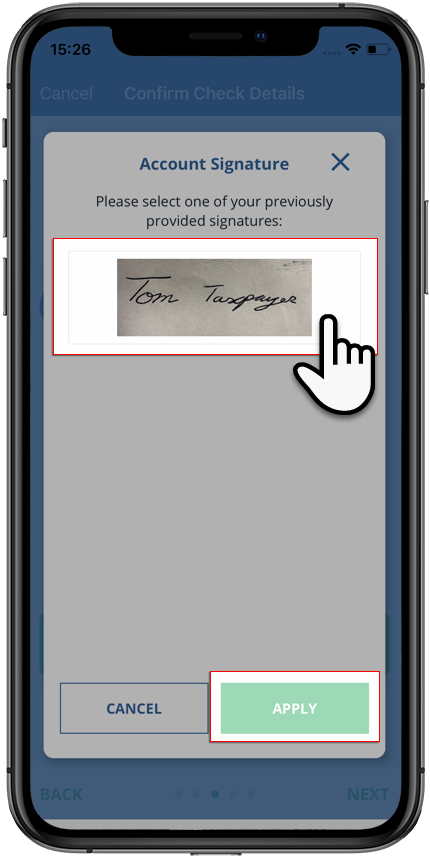
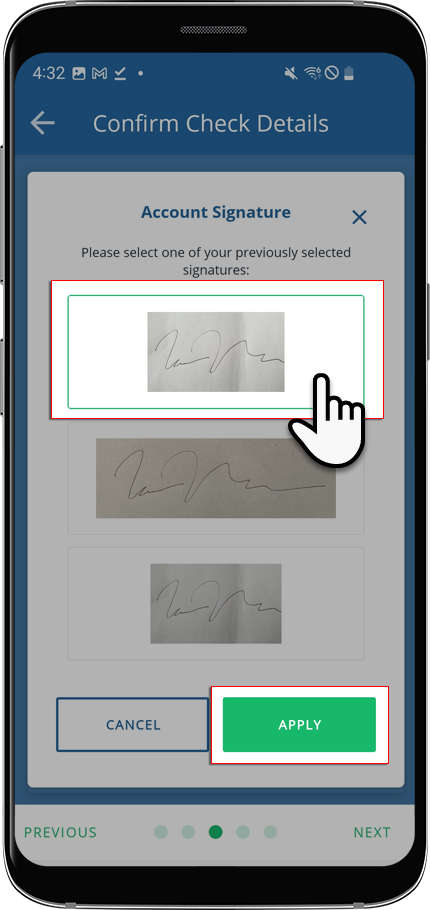
Previously uploaded signatures will appear in the
Account Signature
window. Select the signature you want to upload to your check and select
APPLY
.
note
You'll be able to store 6 signatures at a time. To delete a signature, select
Delete
on the signature to make room for a new one.
Your signature will appear at the bottom of the
Confirm Check Details
screen. You can select
Edit
if you want to replace the current signature with another one.
Android mobile app
Follow these steps to add a signature to a tax payment voucher on your Android mobile phone app.
From the
Confirm Check Details
screen, select
ADD SIGNATURE
.
The
Account Signature
window will appear giving you the option to either:
Add new signature
: Create or upload a new signature to attach to your checks.
Choose existing signature
: Select a previously used signature to reuse.
note
If you haven’t previously added a signature, you will be automatically directed to
Add new signature
.
Add new signature
Using
Add new signature
, you'll be able to add a new signature. You will have the option to either take a photo of a document containing your signature, or upload an existing image file of it. Once uploaded, these signature files can be reused when needed at a later.
Select
Add new signature
, and select
CONTINUE
to add a new signature.
Take a Photo of Signature
Select
Take a Photo of Signature
, and select
CONTINUE
.
You will be prompted to open your device's camera. You may have to grant the TaxCaddy Mobile App permission to access your device's camera to take your photo.
Once your device's camera opens, take a photo of your signature. Be sure to include your entire signature in the image.
Crop, zoom, and rotate in
Edit Photo
to perform any necessary edits to your image, then select
OK
to continue.
Your signature will appear under
YOUR SIGNATURE
. If the image is not to your satisfaction, select
CANCEL
to cancel adding a signature, otherwise, select
APPLY
to add this to your check.
Your signature will appear at the bottom of the
Confirm Check Details
screen. You can select
Edit
if you want to replace the current signature with another one.
Upload Signature File
Select
Upload Signature File
, then select
CONTINUE
.
Your device's file explorer will open. Select the signature photo you'd like to add to your check.
note
Image file types need to be a JPEG, PNG, or BMP and under 5 megabytes in size.
Crop, zoom, and rotate in
Edit Photo
to perform any necessary edits to your image, then select
OK
to continue.
Your signature will appear under
YOUR SIGNATURE
. If the image is not to your satisfaction, select
CANCEL
to cancel adding a signature, otherwise, select
APPLY
to add this to your check.
Your signature will appear at the bottom of the
Confirm Check Details
screen. You can select
Edit
if you want to replace the current signature with another one.
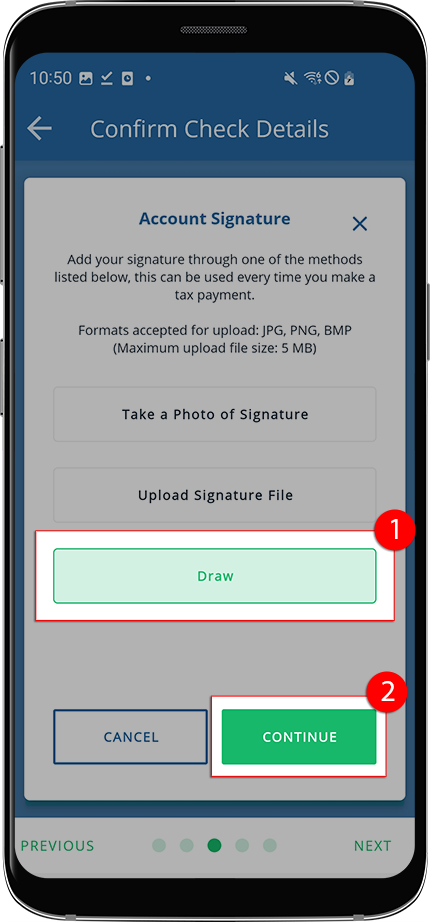
Draw a signature
Select
Draw
, then select
CONTINUE
.
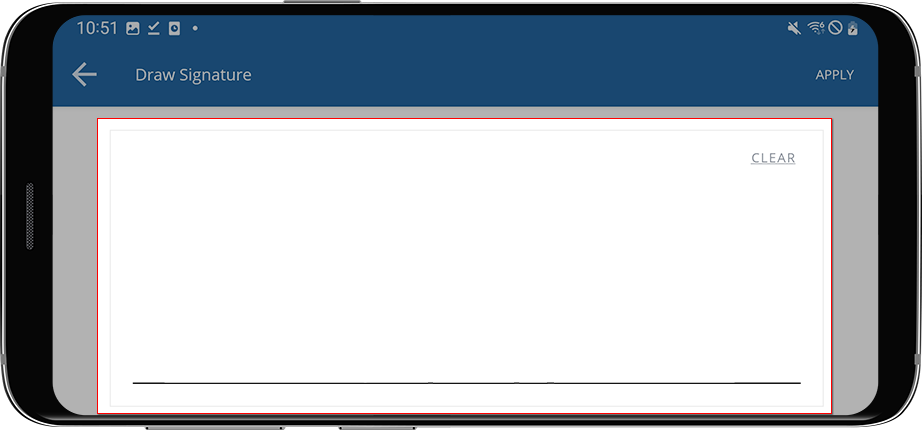
The
Draw Signature
window will appear on your screen. Draw your signature in the field provided.
If the signature you write is unsatisfactory, you can select
CLEAR
to restart.
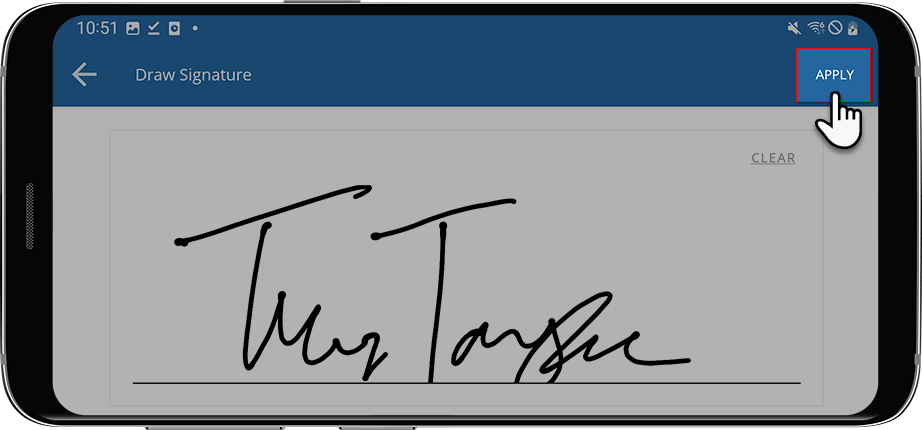
Once you complete your signature, select
APPLY
to add it to your check.
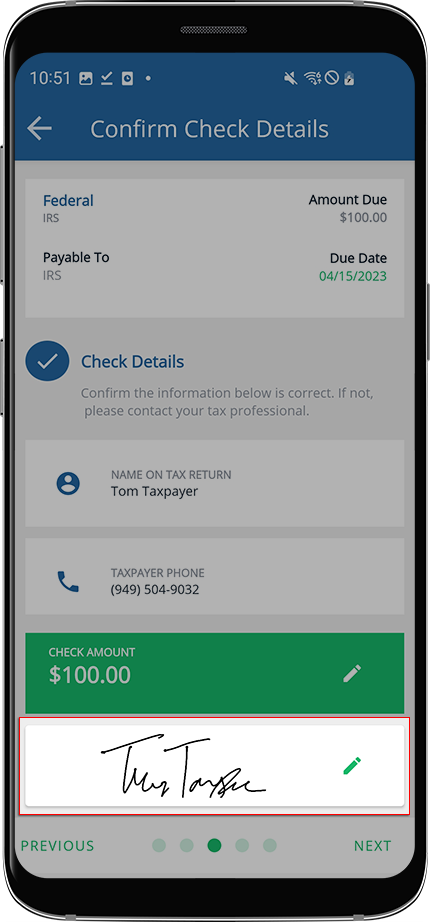
Your signature will appear at the bottom of the
Confirm Check Details
screen. You can select
Edit
if you want to replace the current signature with another one.
Choose Existing
Once you add a signature to a check, you can then reuse that signature file for later checks paid by mail. When selecting an existing signature, you can select from up to 6 previously added signatures to add to your checks.
To use a previously added signature, select
Choose existing signature
and select
CONTINUE
.
Previously uploaded signatures will appear in the
Account Signature
window. Select the signature you want to upload to your check and select
APPLY
.
note
You will be able to store 6 signatures at a time. To delete a signature, select
Delete
on a signature to make room for a new one.
Your signature will appear at the bottom of the
Confirm Check Details
screen. You can select
Edit
if you want to replace the current signature with another one.


 Article,
29 min read
Article,
29 min read