Print from UltraTax CS to GoFileRoom

Follow these steps to set up integration between these 2 applications.

Initial set up

tip
The initial set up steps have been completed by default in the Virtual Office and SAAS environments.
  • To turn on the integration between UltraTax CS and GoFileRoom (GFR), each workstation needs to perform a Desktop Setup.
  • Thomson Reuters recommends downloading and installing the UltraTax CS licenses to ensure that they are up to date for integration purposes. Review Download and install licenses via CS Connect.
  • Configure GoFileRoom indexes to UltraTax CS values.
  • You can print UltraTax returns to GoFileRoom without installing the
    GoFileRoom Add-in
    . You'll only need to install the add-in if you want to edit documents.

UltraTax CS and GoFileRoom configuration options

  1. Select
    Setup
    ,
    Office Configuration
    , then
    Onvio
    tab.
    note
    This 1st step only applies when the
    Onvio
    tab is available.
  2. Select
    GoFileRoom
    from the Document management dropdown
  3. Select the
    GoFileRoom
    tab.
  4. Select
    GoFileRoom Options
    to access the Configuration window.
    note
    If you haven't signed in to GoFileRoom via QuickLaunch or through MS Office, you'll be prompted to sign in.
  5. Select the GoFileRoom Drawer for which you'd like to establish mapping. You can select different drawers from the dropdown.
The following sections contain usage tips for the Index Mapping and Tax return type mapping sections of the Configuration window.

Index mapping

  • GoFileRoom Index represents the GFR
    Add
    screen for the selected drawer.
  • UltraTax CS Property represents a value that will be passed to that screen from UltraTax CS.
  • Values available from the dropdown include: UT Client ID, UT Client Name, Date Printed, Document Name, Document Type, UT Year, Period End, and Map Each Return Type.
  • An option exists to use Custom Static Text to define a value that won’t change. It's recommended not to map the UltraTax Name with the Client Name because typically they are slightly different, which will cause a new client to be created when the PDF returns are added to GoFileRoom.
    Instead, use static text such as “PREPARER COPY AWAITING REINDEXING.” This way, the new client that gets created when the return is sent to GoFileRoom is very obvious as to what it is.
    If you search for a client by their name, you won’t see this 2nd incorrect client and get confused. If you need to find the preparer copy before the next day you can search by the client ID With Auto Reindexing turned on, the document will be re-indexed overnight and the duplicate client will no longer exist. Review Auto re-indexing overview.
These are the details you'll get in GoFileRoom when searching for the Client ID.
  • SMITH, JOHN & MARY: SMITH001
  • PREPAPER COPY AWAITING REINDEXING: SMITH001

Tax return mapping

note
The Tax return type mapping section of the Configuration window only applies when the Index Mapping option, File section, is set to value "[Map Each Return Type]."
  • The Tax return type mapping section gives you more space for detailed indexing. It's possible to map a separate File Section for each type of return, and then a corresponding document type.
  • When utilizing the Tax return type mapping options, both the File Section and Document type of each printed document are dynamically indexed using the options specified within the Tax return type mapping fields.
Recommendation:
Select
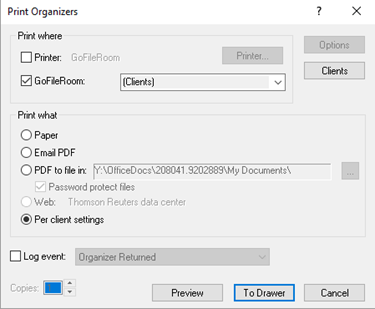
Prompt to view/verify return indexes when printing to GoFileRoom
in the Configuration window when printing to GoFileRoom. This allows for a final review of the index information prior to sending the return data to GoFileRoom. Corrections to any index information, if necessary, are possible from the GoFileRoom window, which appears at print time when this option is selected.

Print client e-file statuses

  1. Open
    Utilities
    and select
    Electronic Filing Status
    .
  2. Select the client ID to print, then select
    Print
    .
  3. Select
    GoFileRoom
    in the Print where section, then select
    GoFileRoom
    .

Print eSignature documents to GoFileRoom

Set up steps if you're not licensed for Onvio:
  1. In UltraTax CS, select
    Setup
    , then
    Office Configuration
    tab, then
    eSignature
    tab.
  2. Select the
    Enable electronic signatures (eSignature)
    checkbox .
  3. Select the
    GoFileRoom
    checkbox.
Set up steps if you're licensed for Onvio:
  1. In UltraTax CS, select
    Setup
    , then
    Office Configuration
    tab, then
    eSignature
    tab.
  2. Select the checkbox
    Enable electronic signatures (eSignature)
    .
  3. Select the
    Onvio
    tab.
  4. In the
    Document Management
    dropdown, select
    GoFileRoom
    .
Once set up, UltraTax CS will post all successfully signed and retrieved documents via CS Connect to GoFileRoom.

Print the preparer copy of a return

  1. Open
    File
    and select
    Print Returns
    .
  2. Select
    Preparer Copy
    and select the
    GoFileRoom
    checkbox.
  3. Select
    To Drawer
    to print to GoFileRoom.
    note
    This may say
    Print
    instead of
    To Drawer
    if you try to print to another location at the same time.

Print extensions

  1. Open
    File
    and select
    Print Extensions
    .
  2. Select
    GoFileRoom
    , then select
    To Drawer
    .

Print completed web organizers

When you retrieve completed web organizers from CS Connect, you'll have a chance to print to GoFileRoom immediately. If you need to print to GoFileRoom after the web organizer is retrieved, use these steps:
  1. Open
    File
    and select
    Print Organizers
    .
  2. Select
    GoFileRoom
    in the Print where section, then select
    Per client settings
    in the Print what section.
  3. Select
    To Drawer
    .

Print input screens

  1. Open
    File
    and select
    Print Input Screens
    .
  2. Select
    GoFileRoom
    then select
    To Drawer
    to print to GoFileRoom.
    note
    This may say
    Print
    instead of
    To Drawer
    if you try to print to another location at the same time.

error-icon

Triva isn't available right now.

Check out the support page for our phone number and hours

error-close