
Guest access
Client engagement
Contract Express is designed to offer a smooth path for the gradual engagement of new clients to your business. There are three stages to this:
- Public page- This offers anonymous access to anyone who browses to the page and can act as a “shop front” to your business. This offers a low barrier to new users who can benefit from templates you explicitly make available, which can then form the start of their relationship with your business.
- Invited guest- In this scenario the guest does not need to be a registered user of Contract Express; all you need is their email address. You can invite them to complete a questionnaire, review their answers and the generated documents, and if appropriate grant them access to these documents, perhaps as pdf files.
- Extranet- You can create a sub-site within your license space and invite outside parties to become a registered user of Contract Express. This is especially useful if the client is an organisation and you want many people within that organisation to interact with your templates in Contract Express. The sub-site prevents users inside the sub-site seeing details of users in your license space who are not members of the sub-site. The sub-site can also be “themed” to suit the client organization, say with their logo and corporate colours.
Setting up Contract Express for Guests’ usage
Adding templates to the public page
Before making a template public, you should check that the license allows guest access. Go to
Admin
> License
and check Allow guests
parameter.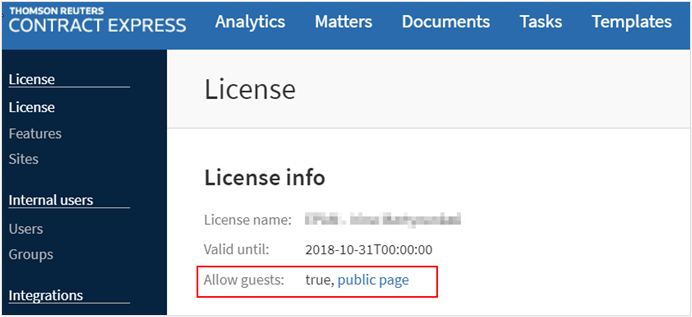
If the
Allow guests
parameter is set to false, please contact contractexpress-support@thomsonreuters.com for licensing information and support.To share a template with guests:
- Go to theTemplatestab and select the required template.
- Check that the template is marked Published.
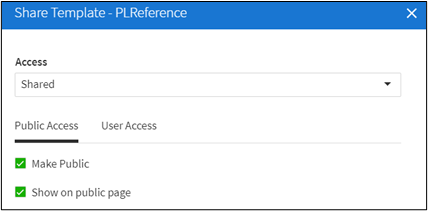
- Click the button in theAccesssection on template details.
- ChangeAccessto Shared.
- SelectPublic Accesstab and checkMake publiccheckbox.
- CheckShow on public page.
This will add the template to the public page which is accessed through the link available from the
Admin > License
section.I
Creating documents from the public page
Guests who access the site through the public page will be presented with a list of templates that have been made available on the public page.

Guests should select the name of the document required which will direct them to the questionnaire as normal. Guests accessing questionnaires in this way will not have access to any other part of the Contract Express site.
Viewing documents created from the public page
Once the users have completed the questionnaire the user may download the generated document.
To get access to the documents generated by guests:
- Go toDocumentsand selectShared documentstab.
- Navigate toWorkspaces>Guestand select the month that the guest user created the Document.
Automatic sharing of documents created from the public page
Only Admins may access Guest folders and generated documents, unless explicitly shared with other users.
It is possible to configure automatic sharing of new guest documents, removing the need for Admins to manually share each document or folder.
To automatically share all new guest documents with specific users or groups of users:
- Go toDocumentsand select theShared documentstab.
- Navigate toWorkspaces.
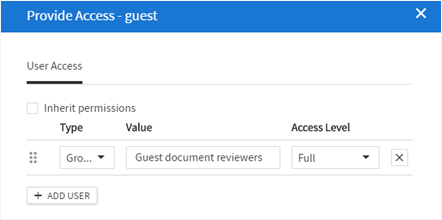
- Click on theAccessoption for theGuestfolder.
- DeselectInherit permissions.
- Add the relevant user or group permissions
note
The sharing permissions will only apply to folders and documents created after the parent guest folder has been shared. Any existing guest documents will still need to be shared manually.
new
eSignature with documents created from the public page
Guests who create documents from the public page can send documents for eSignature. This is only enabled if it has been configured in
Admin > Features
(see Enabling eSignature).When all questions have been completed and the questionnaire has been saved and closed the guest will be able to start an eSignature request. See eSigning documents for more details on eSignature within Contract Express.
If all questions in the questionnaire have not been completed, upon a
Save and Close
the guest will be informed that they are unable to start the eSignature process until the questionnaire is complete.Creating documents as a guest
Inviting guests to complete a Questionnaire
Users can send invitations to complete a new questionnaire to external individuals or to other users of Contract Express. To send an invite to a
new
Questionnaire:- Go to theDocumentstab and clickNew invitation..

- Select the template, for which you want to send the invitation.
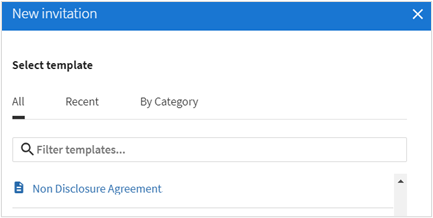 noteTo appear in this list, the underlying templates must have a Published version, be shared with the User sending the invite, and marked as Public.
 - Enter guest’s name and email address.To invite additional guests to complete a separate questionnaire based on the same template, clickAdd guestto add more rows, and enter the guests' names and email addresses.
- Check theGuest access to documents to subject to approvalif you want to manage the guest access to the document during approvals.If this checkbox is selected and the template is setup such that at least one approval will be triggered when the guest fills out the questionnaire, during the approval the availability of the document for the guest user will depend on how it has been setup in the profile. If the template does not have an approval setup, an approval will be applied to the Document with the inviter as the primary approver. This approval can be viewed on the document details page.
- DefineCommentandPIN, if required. If you set the PIN, guest will be asked to enter it before accessing the document.
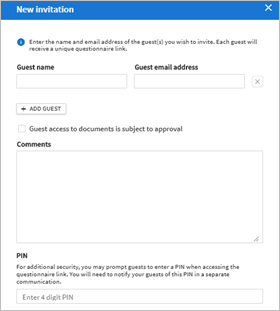
- ClickSend invitation.An email will be sent to the guest(s), which will allow them access to the questionnaire for the selected document (depending on configuration). Each guest will receive a unique questionnaire link that will generate separate document(s). Guests have 28 days to follow this link, after which it expires. The guest may edit this questionnaire as necessary but will not have access to any other part of the site.
The host can view the guests' generated documents under
My Documents
. The sharing will be set to Guest
.Inviting guests to an existing Questionnaire
If you want to send a Questionnaire, in which you have already completed some or all the answers:
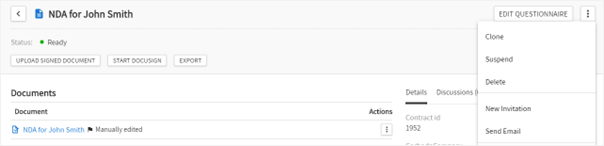
- Go to theDocumentstab and select the required document.
- ClickNew invitationoption.
- Define the parameters for the invitation.
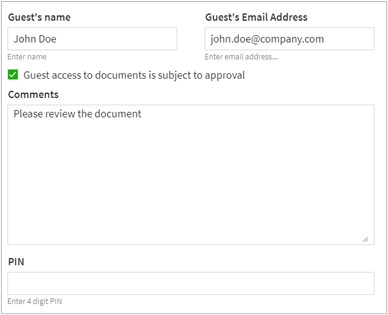
- Enter guest’s name and email address.
- Check theGuest access to documents to subject to approvalif you want to manage the guest access to the document during approvals.If this checkbox is selected and the template is setup such that at least one approval will be triggered when the guest fills out the questionnaire, during the approval the availability of the document for the guest user will depend on how it has been setup in the profile. If the template does not have an approval setup, an approval will be applied to the Document with the inviter as the primary approver. This approval can be viewed on the document details page.
- DefineCommentandPIN, if required. If you set the PIN, guest will be asked to enter it before accessing the document.
- ClickSend invitation.
The Questionnaire that the guest will view through the invite will contain the pre-populated answers. The guest may then edit the Questionnaire as necessary, and the edited version will be updated in the host’s document upon completion by the guest.
Creating documents from an invitation
Upon receipt of the invitation, the guest should follow the link contained in the invitation email.
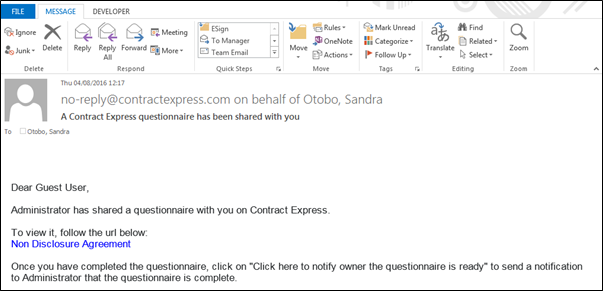
This will direct the guest to the questionnaire of the document they are invited to complete. This link will not provide guests access to any other part of the site.
This link will direct the guest to the same questionnaire session even if the browser is closed and the edited answers will also be updated. If the guest closes the browser then returns to the questionnaire later, the edited answers will appear in the questionnaire.
Notifying sender on Questionnaire completion
Upon completion of the Questionnaire guests can download the generated document (if configured in the profile) and notify the host independently. Alternatively, an automatic email may be sent to the host notifying them that the Questionnaire has been completed by the guest. This can be done by clicking on
Click here to notify owner you have finished making your changes
at the end of the Questionnaire session.Viewing documents created from an invitation
The document shared with the guest will be updated with the guest’s changes to the Questionnaire and applied to the document in the
Documents
page. The host can also view the document created by the user by clicking the link contained in the notification email.Admin users can also see documents created by guest users through the
Documents
tab > Shared Documents
and navigating to the Guest
workspace.