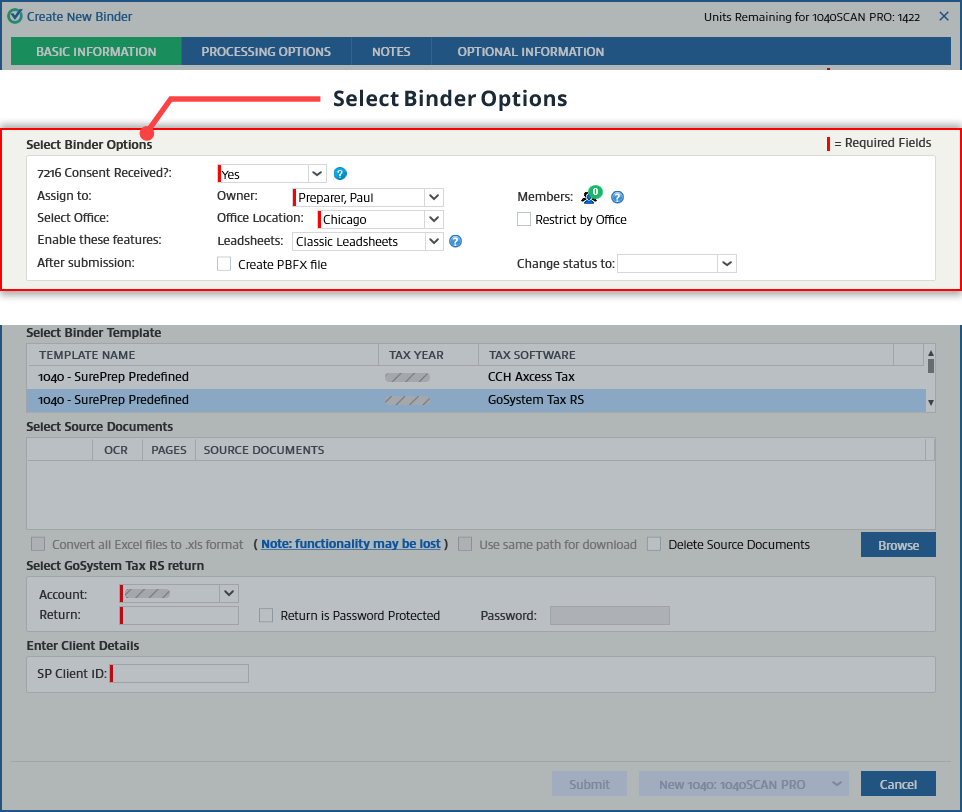
Basic options about how the binder is processed and assigned are available under
Select Binder Options
. For example, the
Select Binder Options
section lets you select the following:
The person responsible for the client (that is,
Owner
).
Should access to a client's binder be restricted to a specific group of users only (that is,
Members
).
If your firm has multiple office locations, you can select the office location the client is associated with.
If your firm prepares returns outside the United States, then you'll need the user's permission, 7216 Consent option.
If your firm opted to use
Leadsheets
then you can select which leadsheets the binder should have.
7216 consent received?
If your firm prepares returns outside the United States then you will need your client's permission to send their information outside the United States - this permission is called 7216 Consent. You will see an
7216 Consent Received?
option if your firm-level options require 7216 Consent from the client.
Setting 7216 Consent option as:
Yes
- lets offshore users access and work on the binder.
No
- restricts offshore users from accessing the binder. These users must be assigned to a user group with 7216 access restrictions permission.
7216 Consent Received?
option only appears when the firm enables 7216 Consent feature on the domain. .
Assign to
Assign to
row lets you select the user to whom the binder is assigned and which members are allowed to access the binder.
Owner
Select
Owner
and select the name of the person to whom this binder will be assigned. The names consist of owners set up in FileRoom.
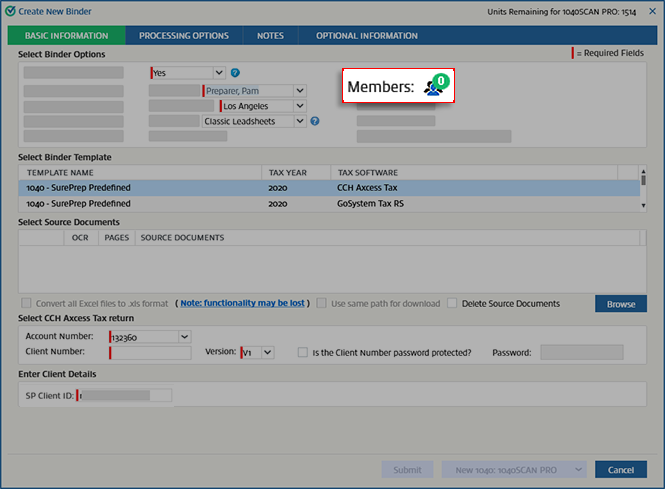
Members
A binder can have one or more members. By default, a binder will have 1 member - the owner. To assign members to the binder in the
Create New Binder
window, select the
Members
icon.
On the
Assign Member
window, select the member to be assigned by selecting the checkbox next to their name.
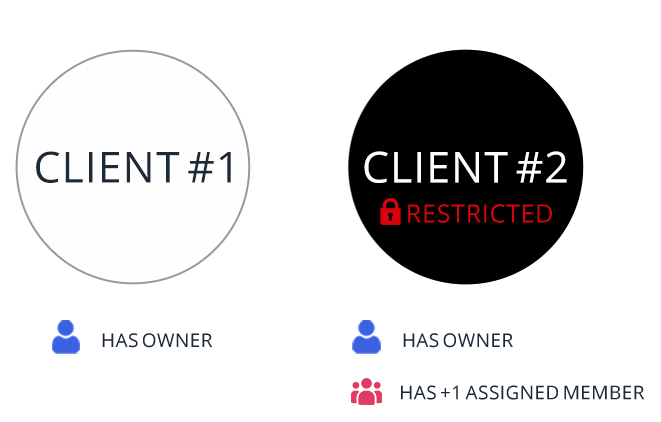
note
Assigning one or more members will restrict access to this binder and the associated client profile in TaxCaddy. Any users following the clients in TaxCaddy will be unfollowed if they are not an assigned member.
If you want to notify the members that they’ve been assigned to a binder, select the
Notify Members
checkbox, then select
Save
.
The number of members selected will be displayed on the
Members
icon.
Adding (assigned) members will restrict binder access to the Owner and assigned members only.
Know about assigning members in SPbinder.
Know about assigning members in FileRoom.
Select office
Office Location
If you're using an office location, select on the
Office Location
dropdown menu, then select the location. Office locations can be configured in
Admin
Account Setup
Office Location
. This setting will be remembered for the current user on subsequent submissions.
note
Required fields are marked with a red line .
Restrict by office
Select the
Restrict by Office
checkbox to restrict this binder by the selected office location.
note
This checkbox will be auto-selected and not available if the
Office Locations
checkbox is selected under
Admin
Enterprise Feature
Binder Access Restriction
.
Leadsheets
The options in this row let you enable leadsheets for the binder. For outsource binders, you can't change these settings.
Leadsheets
Select the
Leadsheets
options to choose whether or not to use leadsheets. Your choice will be remembered, so you won't have to reselect it during the next submission.
None
: Select this option to create a binder without leads.
Classic Leadsheets
: Select this option to create a binder with leads. This will generate leads, references/stamps, and DreamWorkpapers for the binder.
Simplified Leadsheets
: Simplified leadsheets make it easier to enter data from non-standard documents. This is only available for CCH Axcess Tax and GoSystem Tax RS.
note
Leadsheets are not available for custom binders.
Select these service options
The
Select these service options
row is only present for outsource returns and is not available for custom binders.
Expedited processing
If the
Expedited processing
checkbox is selected, SurePrep will process the binder at a faster pace compared to the standard due date. The
Expedited processing
checkbox won’t be visible if the feature is not enabled by your firm.
You can also check your firm's Account Usage History for expedited processing.
note
Additional fees will apply if the
Expedite Processing
checkbox is selected during the binder submission process.
After submission
After submission
row controls what will happen after submission.
Create PBFX file
Select
Create PBFX file
to create a PBFX file at a location that you can use to open the binder without opening FileRoom. This setting will be remembered for the current user on subsequent submissions.
If the
Create PBFX file
checkbox is selected when you select
Submit
, you'll see a window prompting you to select a location to save your PBFX. Go to the location at which you want to save the PBFX file then select
Save
.
When the PBFX is saved, you'll see a confirmation. Select
OK
.
You can open the binder from FileRoom or by opening the saved PBFX file.
Change Status to
Most binders will go through
Documents Uploading
,
SP Processing
, and
In Verification
processes. Custom binders will go through
SP Processing
only. After binders have completed the
In Verification
process (or
SP Processing
for custom binders), their status will be blank by default. To use a custom status, select in


 .
.


 Article