
![]()
Triva isn't available right now.
Check out the support page for our phone number and hours
![]()
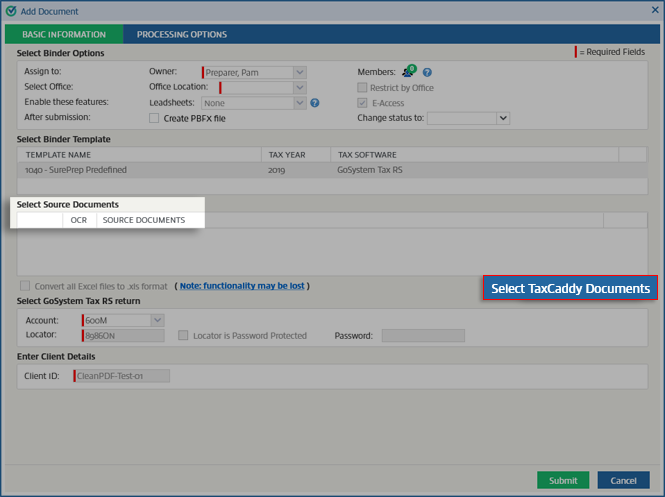
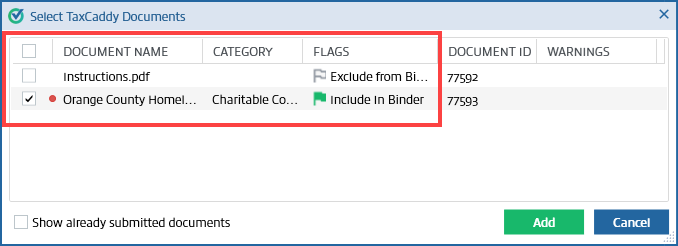
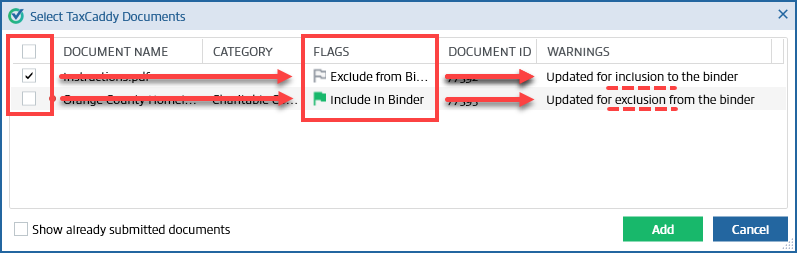
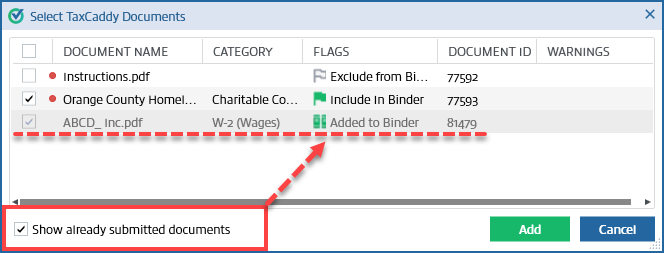
Icons | Description |
|---|---|
Added to binder | Document has already been added to the binder. |
Include in binder | Document should be included in the SPbinder. |
Exclude from binder | Document should be excluded from SPbinder. |
Cannot include in binder  | Document can't be included in the binder. |


 Article