
Create a binder using client's TaxCaddy documents
Follow these steps to create a binder using a client's tax documents gathered in TaxCaddy. See also, Adding documents to existing binders.
note
If your firm uses the 7216 consent feature and you create a binder from TaxCaddy, the TaxCaddy client will be removed from the Clients I'm Following and Client Activity sections of the
Overview
screen of any tax professionals who are are restricted from seeing binders without 7216 consent. - On theOverviewscreen, select a client tile to view the client profile. You can also search for a client and select the client tile from the result.
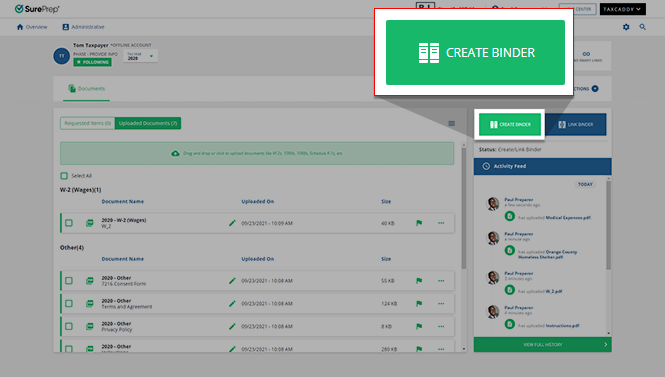
- SelectCreate Binderto create a new binder.
 note
note- TheLink Binderoption allows you to link a TaxCaddy client profile to an existing binder in FileRoom. It only appears when the client profile is associated with a Tax Client ID that matches a binder with the same Tax Client ID in FileRoom.
- Create BinderandLink Binderappear enabled/disabled under different conditions.
Create Binderis disabled if:- There are no uploaded documents in the client's profile
- The client is inNot ConnectedorEnrolledstatus.
noteWhen a document has an alert icon on the document tile, it can't be included in the binder. If your client's profile doesn’t include a Tax Client ID, you'll get an alert that says the following:Unable to create binder due to missing Tax Client Id. Please edit the client record in Client Management.To update your client's information, selectAdministrative,Client Management, then edit the client record.Similarly, if you're creating a binder for a 1041 tax return, you'll need to provide the Tax Client ID associated with a 1041 return. You can provide the Tax Client ID when you create a new 1041 tax return profile or edit an existing 1041 tax return profile from the clients' profile.
 - Your browser downloads a PBFx file. Select the file to open the SurePrep submission screen.

- In theTaxCaddy Service Selectionwindow, select the service type from the dropdown then selectSubmit.
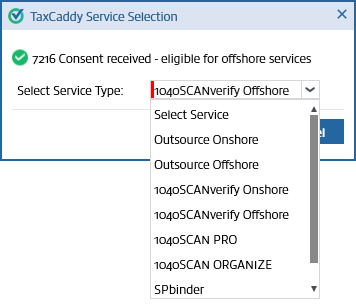 noteSome firms may have their service selected automatically and bypass this step.If a client profile has 7216 Consent as received, you'll get a reminder that offshore services are available for this binder (that is, Outsource Offshore, 1040SCANverify Offshore, 1040SCANverify+ Offshore).
 - On theCreate New Binderwindow, select all applicable options under the Select Binder Options section.
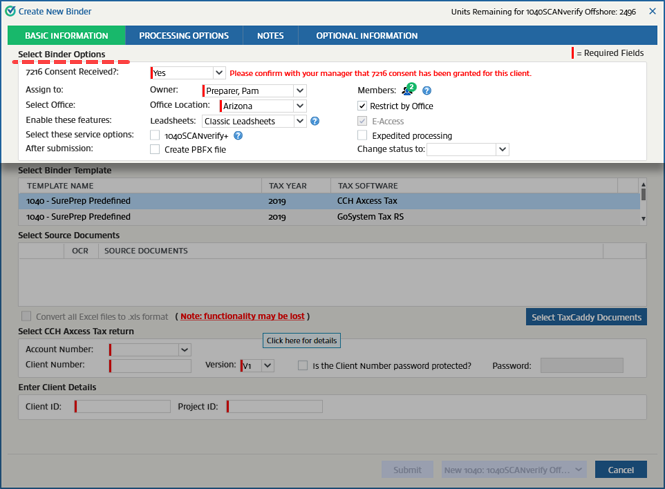 The7216 Consent Received?option will be automatically selected based on the consent in TaxCaddy Client Profile. Applicable to Outsource (Offshore/Onshore), 1040SCANverify (Offshore/Onshore), 1040SCANverify+ (Offshore/Onshore).
 noteIf a consent is already given previously on the Client Profile, then you can’t selectNoas an option unless you have theCan undo 7216 Consent Receivedpermission.You won’t be able to change theOwnerfield unless you're an Owner(user), have theAssign New Ownerpermission or Firm System Administrator.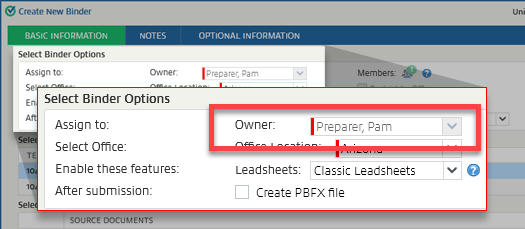
- Select your tax software template under the Select Binder Template section. This will be selected automatically based on the tax software selected for the client in TaxCaddy, however, you can change the selection if necessary.

- Under Select Source Documents, selectSelect TaxCaddy Documents.

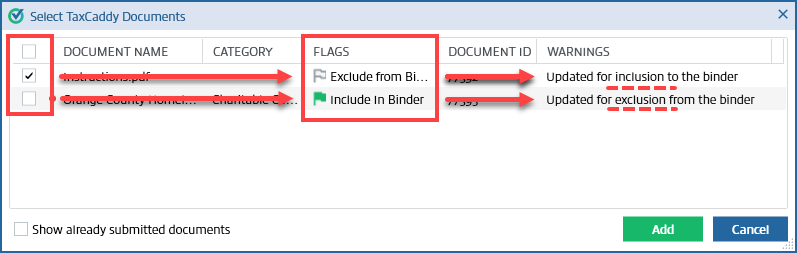
- On theSelect TaxCaddy Documentswindow, mark the checkbox next to the document name to include the document in the binder. You can also clear the checkbox to exclude the document from being submitted to the binder.
 For convenience, documents marked with the Document Flag icon
 will be pre-selected by default.noteA red badge
 will show next to the document name when a taxpayer uploads a new document that hasn’t been viewed by a tax professional. noteDocument Flags don’t prevent you from including or excluding documents from the binder. However, you'll get a warning message as a reminder if you included a document that was meant to be excluded. Conversely, you'll get a warning when you clear a checkbox for a document that was meant to be included.
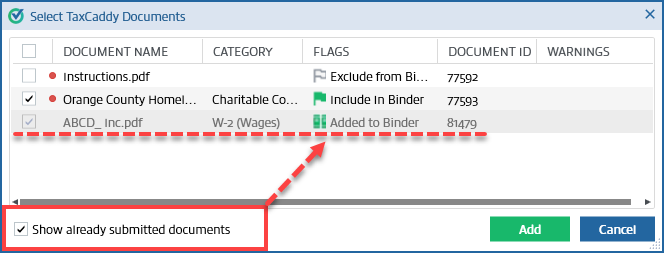
 Documents that have already been added to the binder can't be added again. To view already submitted documents, mark theShow already submitted documentscheckbox.
 noteExcel files with hidden sheets aren't supported. Delete the hidden sheets from the Excel files before uploading the files, make the hidden sheets visible before uploading the files, or don’t upload those files.Documents that haven’t passed SurePrep's document validation process will be isn't available when selecting documents to include in your client's binder. These documents are denoted by the CANNOT INCLUDE IN BINDER text in the Flags column.
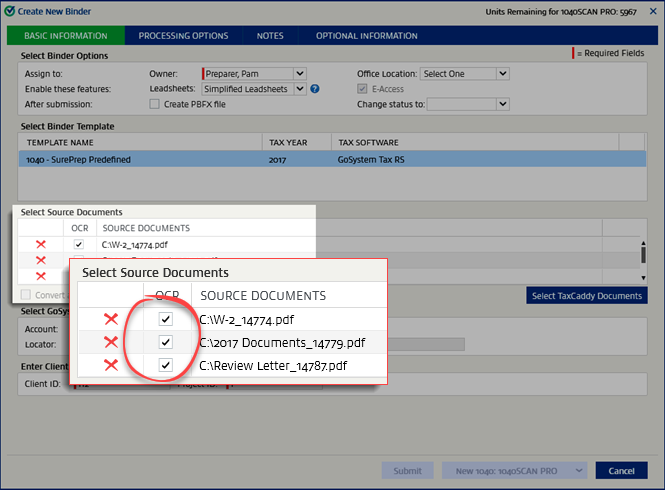
- The client's documents are imported from TaxCaddy and the documents are automatically selected to be submitted for OCR. TheUploaded Tax Questionnairedocument will be disabled and can't be sent to OCR.noteDocuments within the Schedule K-1s category will always be moved to the end of the list of documents.
- When using GoSystem, theLocatorandAccount Numberwill be populated automatically. When using CCH Axcess,Tax Client ID,Account Number, andVersionwill be populated automatically. (Version will be blank if not present). When using other tax software or if you need to make any changes, provide the additional information.

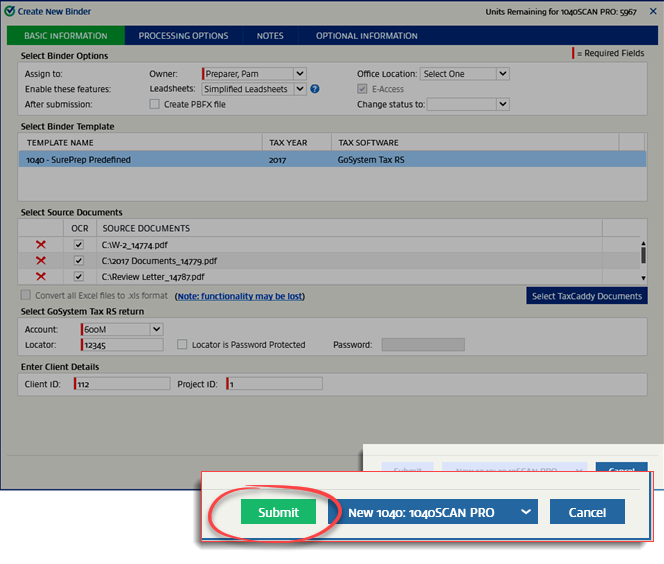
- Make sure all information is correct and then selectSubmit. The binder is created.
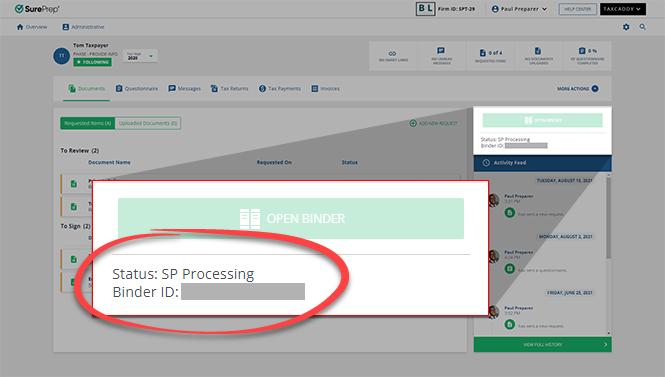
- You won't be able to add additional documents while the binder is in verification (status SP Processing). Once the binder is no longer in verification, you can add additional documents from the client's Tax Documents tab by selectingOpen Binder.
Failed Submission
The binder submission status will show an error icon if there is an error in your submission. Rectify the error in the text then select
if there is an error in your submission. Rectify the error in the text then select Create Binder
to try again.For example, in the following scenario, you'll need to correct the client's locator number. Select
Administrative
, Client Management
, then edit the client record with the correct Tax Client ID.Additional notes
The printed copy of the questionnaire, tax payments, and messages won’t be selected for OCR on the
Create New Binder
window and the OCR
checkbox will be disabled by default.Related Content
-
Create Binder and Link Binder conditions
Format: Article
-
Add documents to existing binders in TaxCaddy
Format:
Article

