
Using an iSheet - navigation and basic operations
Get started with the modernized iSheets UI
Any HighQ user can perform basic iSheet actions, such as finding a record or exporting data.
note
A site or content admin can perform additional actions, such as configuring permissions to access an iSheet, creating a form, or changing iSheet settings.
If you need to create a new iSheet, please see Creating an iSheet.
A system admin can enable or disable modernized iSheets in System Settings:
Basic iSheet definitions
An iSheet has multiple elements; the terms used to describe iSheets are similar to terms used by spreadsheets, but there are some differences:
- iSheet- each iSheet is a database that contains a set ofColumnsthat contain the values for eachRecord.
- Column- each column in an iSheet contains a type of data; such as numbers, text, images or references.
- View- a view customises which columns are visible in the iSheets window. Views help you focus on the data you need, or hide data you should not see.
- Row / Record- each row in the iSheet is a record that contains values for the columns in the iSheet; each row is sometimes called an iSheetItem.
- Permissions- iSheets includes a comprehensive permissioning system. An admin can set view or edit permissions for the iSheet, each View or column.
Open the iSheets module
The iSheets module is accessed from the navigation bar. Log in to your HighQ site, then click the
iSheets
tab to see the default iSheet.
note
An admin can rename, reorganise or remove tabs in the navigation bar - the iSheets module might be labelled
Data
, Records
, or similar.When you open the iSheets module, the default iSheet opens.
note
The site admin sets the default iSheet and the default display, including column order.

Main control area
The top of the iSheets page provides iSheet selection and control options.
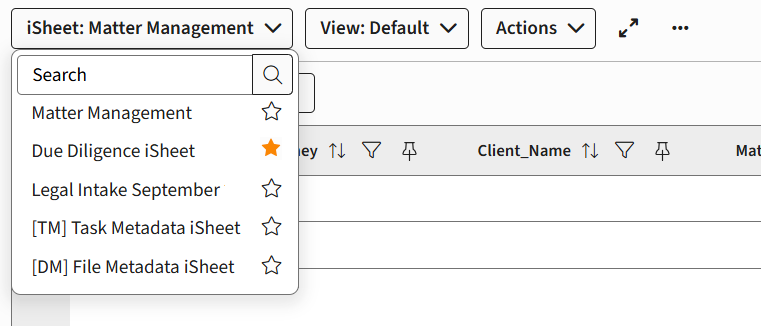
iSheet: selection
If your site has multiple iSheets, open the
iSheet:
menu at the top of the iSheet page to switch to another iSheet.
Select an iSheet from the menu:
note
Favourite iSheets
Select the star next to the iSheet name to highlight it in the list and to add the iSheet to your Favourites list.
View: selection
The second menu allows you to select a
View
. In most cases, you should use the Default
view.If views are disabled by an admin, the
View
menu is removed.
note
A site admin can create multiple views and set both the default view and the order of items in the view menu.
If you have appropriate permissions, the
View
menu also contains the Deleted items
view and Manage views
option.Actions
The main
Actions
menu is only available if iSheet rows are selected with the Select
checkbox. It allows you to perform actions on all selected rows (copy, delete, export and share).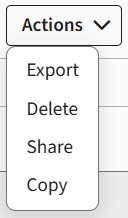
Full screen

Click to use your entire screen to display the page. Click the minimise page icon or press
Escape
to return the page to the browser tab.More actions

Click to open the actions available for this iSheet:
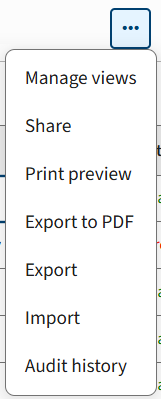
note
The options in the
More actions
menu depend on options enabled or disabled by the site or system admins.Search
Enter a search term and press enter to find the terms in the iSheet. Select the option button to see
Advanced search
.If you perform a search, the
Search Actions
menu is displayed. Select an option to Save
, Edit
or Clear
the search results.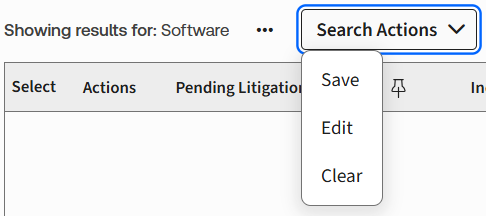
Edit cells
Inline edit is available for values in all compatible columns.
Double-click on an editable cell (most number or text columns) to change the value.
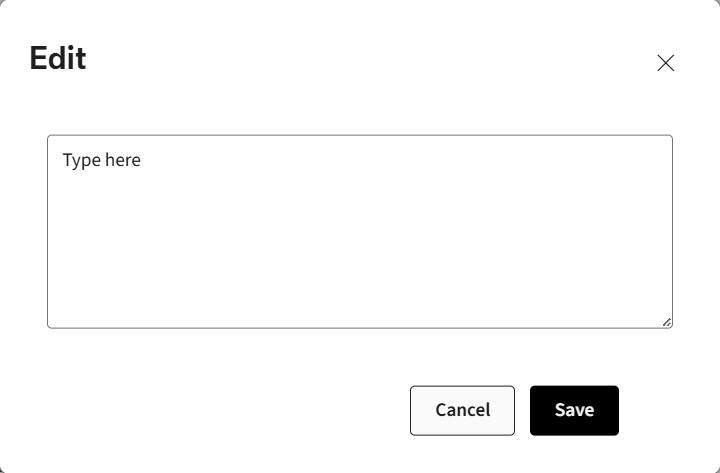
Click
Save
to keep your changes.note
Other column types cannot be edited in the iSheets module. An admin has permissions to edit additional column types, but not all.
Other options
The iSheet includes additional options, helpfully arranged above the iSheet grid:
Select All
Select the
Select All
box to select all rows. The selected count indicates the number of rows currently selected.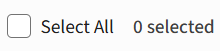
Add
Select
+ Add
to add a record.
Keyboard interactions
Select the keyboard icon to display a summary of keyboard navigation and selection commands.

Columns
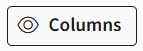
Select
Columns
to open an accessible panel to reorder all columns.Reset columns
note
Apply to all
The
Apply to all
option is only visible to site and system admins:Select this option to apply the current column order and sort order for all users. All users will see the current display as the default when they open the iSheet (but not pinned columns).
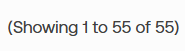
Showing...
Describes the items are displayed on the current page and the total amount of records in the iSheet.
View iSheet records
The updated iSheet interface offers intuitive tools for navigating the iSheet, filtering data as needed, and reordering columns for easy reference.
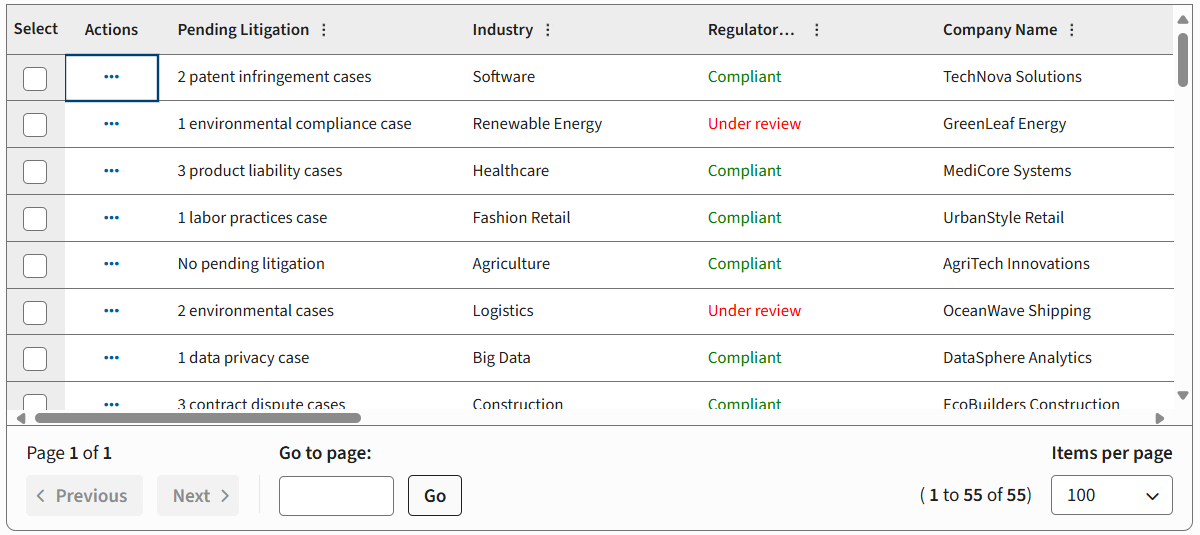
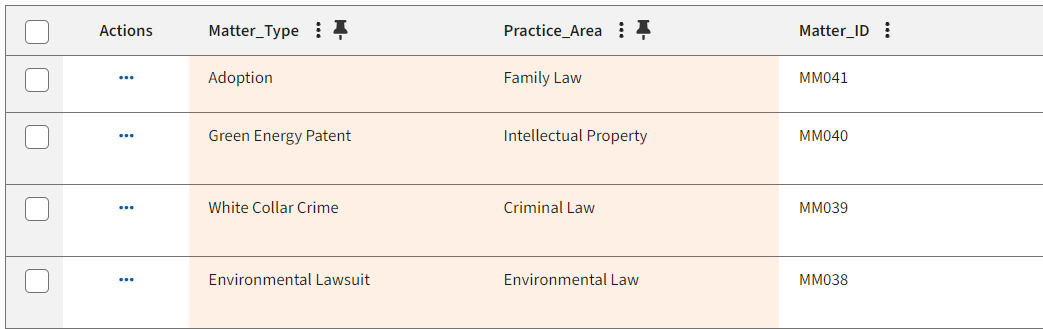
The Actions column
The
Actions
column allows you to access the More actions
menu for each row.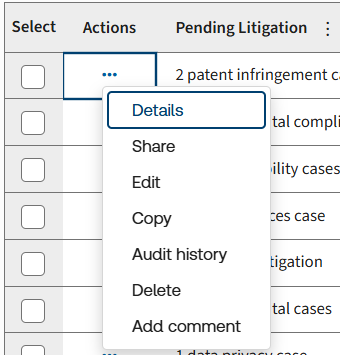
note
If you select multiple columns, available options are in the main Actions menu.
Navigation
Use the scroll bars, or cursor keys, to move records and values on the current page.
note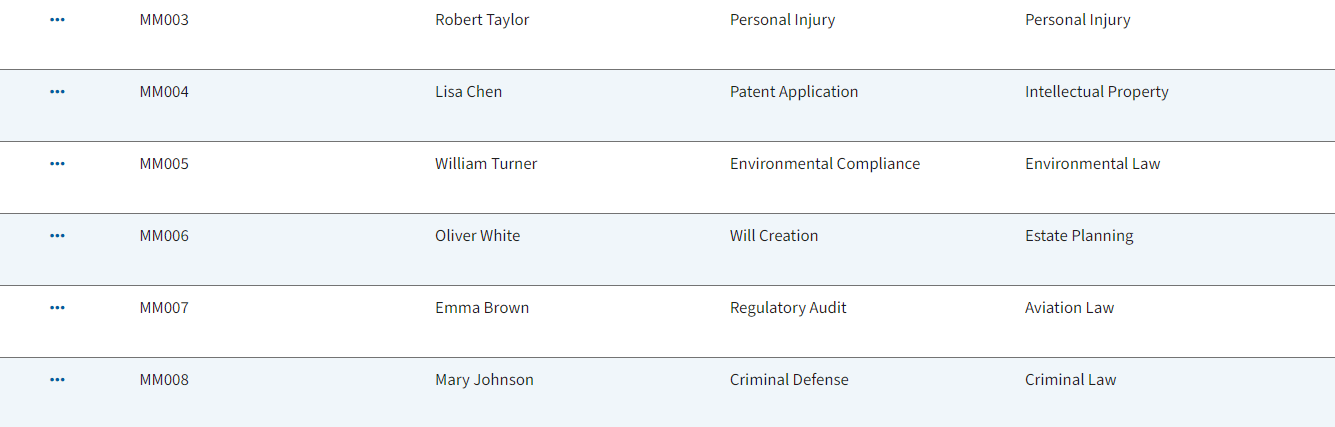
'Zebra striping' is available to aid in tracking rows; alternating between a white and shaded background for each row. Please contact your HighQ account manager to activate Zebra striping.
At the bottom of the grid, if the iSheet contains many records, you can navigate to the
Next
or Previous
page, or jump directly to a page. 
Click the
Items per page
selection box to change how many items are displayed (up to 100).Sort, filter and pin ('freeze') columns
Next to the name of the column, the heading contains a
More actions
icon (except the Action
column):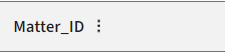
Select this icon to see three display icons (
Sort
, Filter
and Pin
):Click outside the column header to hide the icons.
note
Changes to columns or filters are retained until you clear your browser cache.
Sort - change the order of records in a column
Click the
Sort
icon to change the order of records, based on the selected column. Click once to sort values (numerically or alphabetically); click again to reverse the order.
Filter - display only the rows you need
Click the
Filter
icon to only display rows that contain selected values in that specific column. By default, all values from that column are listed and selected.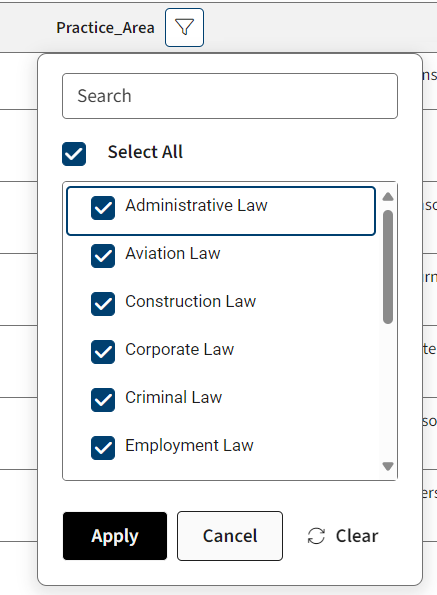
If necessary, type a search term in the
Search
box to find values that match the text.Click the box next to a value to select or deselect the value.
note
By default, all items are selected; click
Select All
to deselect all items, and click again to reselect all items.Select
Apply
to filter for the selected values, Cancel
to remove your changes, or Clear All
to remove all filters applied to this column.note
You can also select Reset all to restore the default column layout.
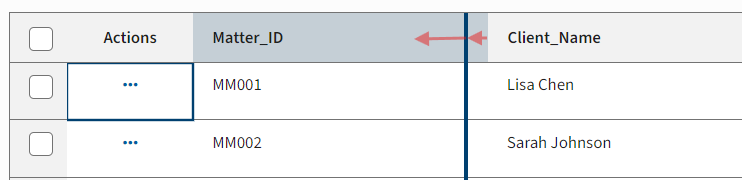
Pin - 'freeze' a column
Click the
Pin
icon to move the column to the left, next to the Actions
column and any other pinned columns. note
The pin option 'freezes' the column so it is always visible on the left of the iSheet.
The pin icon changes colour, and pinned columns are highlighted.
As you scroll left or right, pinned columns are always displayed. Pinned columns are shown in the order they were selected; however, you can drag a pinned column to a new position (see below).
note
Select Reset all to restore the default column layout.
Changing the column width
Click and hold the divider between two columns to change the width of the column on the left.
Release the divider when it is in the correct position.

Alternatively, double-click on the divider to auto-adjust the column width.
note
Columns have a minimum width, i.e. you cannot hide a column by reducing the width to 0. Column names are truncated if the column is not wide enough.
Changing the order of the columns
Click and hold the column name to drag the column to a new position.
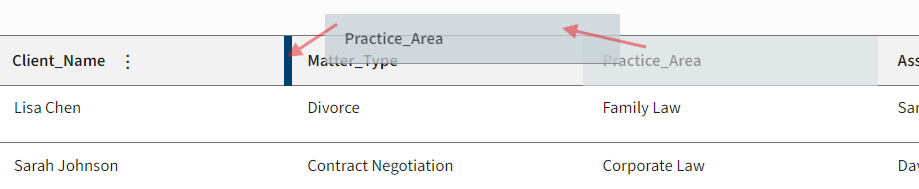
The column is moved to the position indicated by the thicker dividing line.
Moving a column only changes the column order for your account. You will see the same order the next time you open the iSheet in the same browser on this computer.
However, you will see the default order if you open the iSheet on a new computer, in a different browser, or if you clear the cache.
Should an admin change the default order of the columns, your custom order is adjusted to match.
note
If you drag a column into a set of pinned columns it is pinned to the new position. If you drag a column out of the pinned section, the pin is removed.
note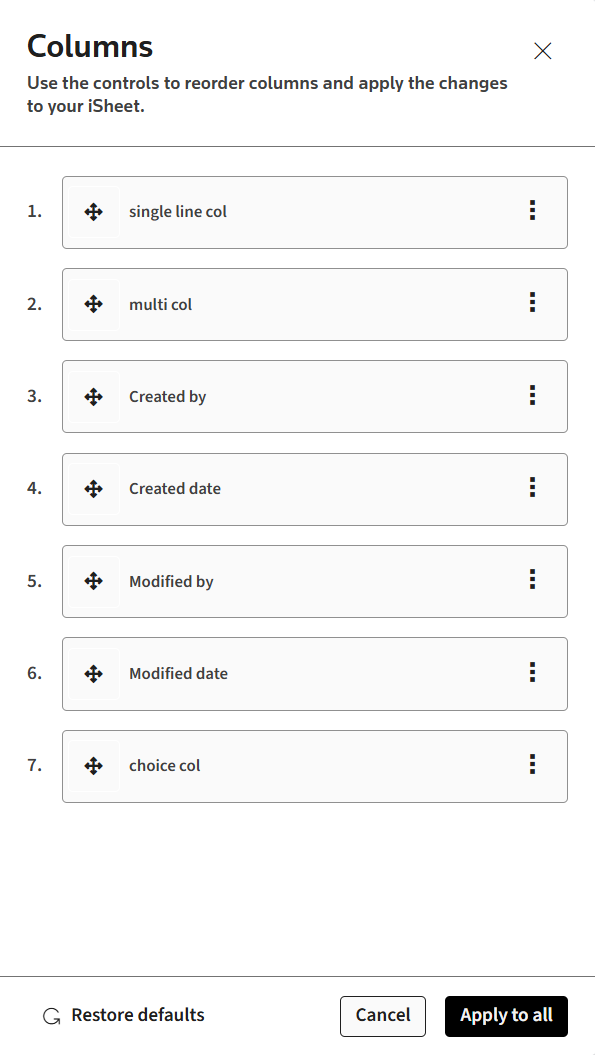
You can also select the
Columns
button to open a list of columns. Reorder the columns in this list and select Save
.Reset all or Apply to all
Select Reset all to restore the default column layout.
An admin can select Apply to all to apply the current column order and sort order for all users:
Related Content
-
Introduction to iSheets
Format: Article,
3 min read
Article,
3 min read