
Import template
The wizard is available to help identify relevant obligations. If a user knows which obligations are needed for each entity, the process can be performed in bulk via import.
Gather data for import
The first thing you will need to do is gather your data for the import.
- SelectAdministration,Company Info, thenEntities.
- SelectExportto export your entities.
- When you export your entities, be sure to have theEntity NameandEntity Codein the export.noteThis step is very important, because you will need to copy and paste the desired Entities into the Import Template. This is necessary so the Entities match the Calendar content exactly, as it will not recognize items with any character difference.
- Select to get a list of all obligations currently available from Calendar.

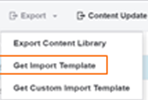
- SelectCalendar,Schedule Due Dates,Export, thenGet Import Templateto download an Excel Template that can be completed to import multiple records.
Complete import template
In this step, you will fill out the required fields for import. These include:
- Obligation ID (use the ID from the Content Export Library)
- Entity ID (use the ID from the Entity export)
- Entity Name (use the name from the Entity export)
- Year
- Year Type (start/end): Select start or end for how the year (2024) will be interpreted if the tax or reporting year is not a Calendar year. For example, if the tax year is 2024, you need to indicate if the tax year starts or ends in 2024.
note
Required fields are in bold text.
As you complete the import template, you can also import optional fields such as assigned users, overall responsibility, and custom fields.
note
Optional fields are in plain text.

Once you complete your work, be sure to save it as an XLSX file.
note
The first page of this template includes detailed instructions on how to complete it successfully.
Import the template
- SelectCalendar,Schedule Due Dates,Import.
- SelectImport Due Datesto import the completed template.
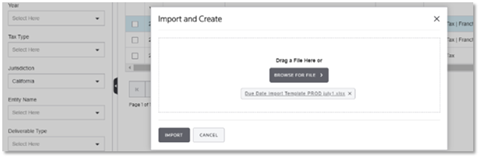
- Select the file you want to import and selectImport.
- Once you've imported the template, you can check the status of the import on theProcess Queuetab. You'll be told if the import was successful or if there were errors. If there are errors on your import, you can download the template by clicking on the spreadsheet icon and review import notes to try again .
Examples of potential statuses include:
- Success – Import successful
- Errors Found – Detailed errors will be provided on each row of the spreadsheet
- Invalid Import Template – Tab names or column names are not valid

- Failed – Import could not be completed, try again
Successful import
If the content was successfully imported, the following will happen:
- All entity / obligation combinations will be created as rows in the Schedule Due Dates grid.
- All rows will be in a Scheduled status (not pending)
- All related Due Dates will be present on the Due Dates tab.
Related Content
-
Phase 3: Data import
Format: Article,
2 min read
Article,
2 min read