
Add markup with Author Online
To create an automation template for document generation with Contract Express, you need to choose a word document which contains the text of the document and add automation logic to it. All automation logic in Contract Express is added to the template document as a field or a span.
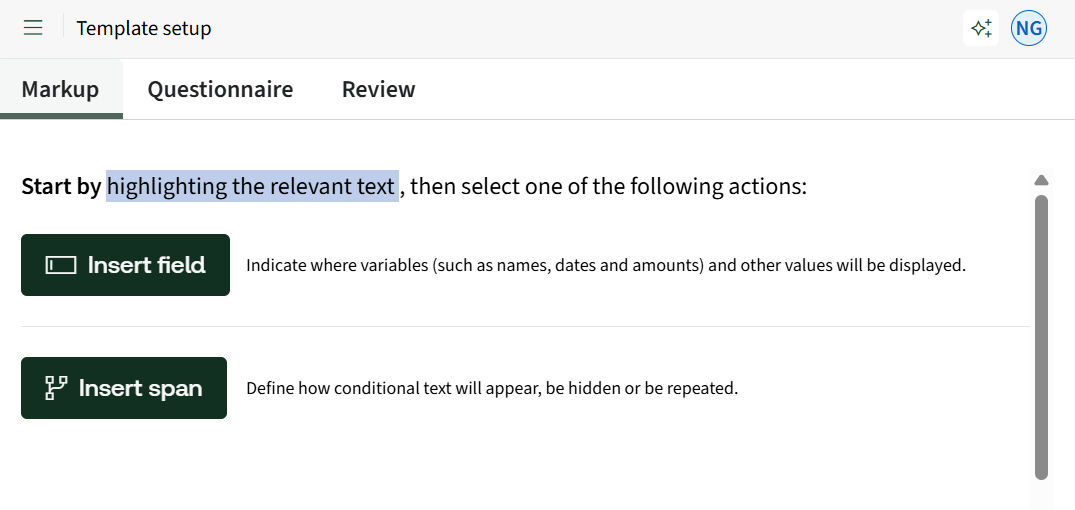
- Fieldis an insert point in the document where the dynamic information will be inserted, for example, you want to insert the names of the parties, the dates, the product names or amounts. Most commonly the information for these inserts is collected by asking questions on the questionnaire. However, it is also possible to use computations where the value of the insert is calculated based on other answers or to insert information from an external data source.
- Spanis conditional logic applied to the document text which can cover one or multiple paragraphs or just a couple of words or even letters. The most common span type is the show/hide span where the text inside the span is only included in the document if the condition specified for this span is satisfied and hidden if it is not. Another useful span type is repeat pans where some information in the contract must be repeated for multiple entities or units. For example, if your contract may have one or more tenants, you will repeat the section of the document which lists their names and details.
When you define the field or span in the template, you will use variables to specify the kind of data that is needed for the insert or to determine the conditionality.
Variable
is a data container for the dynamic data which will be collected for each generated document. Think of each question in the questionnaire as a variable which collects the answer to insert it into the document or to drive the conditional logic of a span. Note that the same answer (for example, a company name relevant to a contract) can appear multiple times in a document; therefore, the same variable is often used in multiple fields or spans. Use the
Markup
tab to create an automation template by adding fields and spans to your document. As you add fields and spans, you also define variables, which then appear as questions in the questionnaire when end users generate a document.Navigation of the Markup
The Markup tab in the new Contract Express Author Online is designed to respond to your clicks within the document.
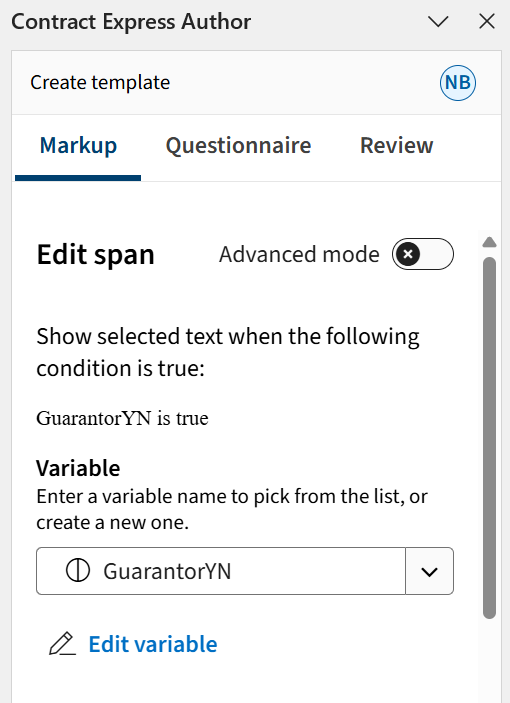
If you click outside of content control, the work pane will show options to insert a field or insert a span, along with the main markup home. When you click on a specific content control, the work pane will switch to display the details of that particular markup, also indicating whether it is a field or a span. If you click outside of the content control, the work pane will return to the home screen, offering options to add new markup. This allows for easy navigation between views—whether you are working within a content control or adding new elements.
Remember that while there are differences between Word Online and Word Desktop in what is highlighted for a single and double click on the content control lozenge, placing your cursor between the lozenges always displays the current markup in the work pane. For more info on the clicking behavior, read General Guide.
How to Apply Formatting to a Field
You can change the format of the text that will be inserted into the generated document, such as italics, underlining, or highlighting. The formatting applied to the brackets between the field lozenges will carry over to the inserted text in the generated document.
Working with Variables
Since variables can be used in multiple fields or spans, they are stored separately from the markup expressions. If you need to change the question or other details of the variable, no extra steps are required to confirm the action. Changes to variables are automatically saved without needing to click "Apply". However, if you modify the markup expression (the definition of the field or span) in a specific place within the document, you will need to click "Apply" for those changes to take effect.
Remember that if you make changes to a variable, those changes will automatically reflect across all instances where this variable is used. For example, if you modify the "Guarantor" variable, any reference to this variable in the document will be affected.
Advanced settings tab
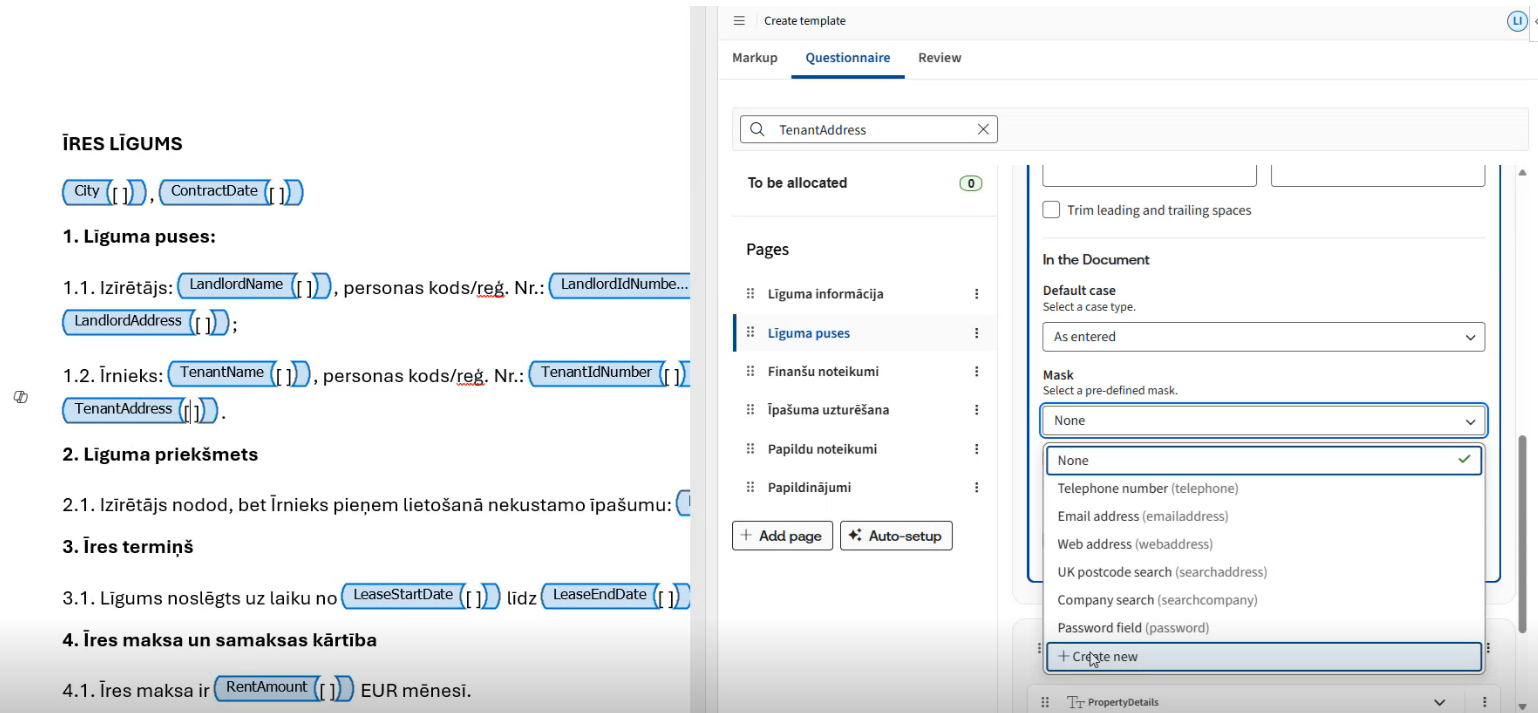
In the advanced settings tab, you have the option to define default values, set minimum and maximum values, Select a mask or create a custom one as needed, and adjust format settings. Additionally, you can select default case formatting, such as uppercase or proper case. These settings apply to all types of variables, including text, numbers, and dates.
An example of advanced settings options available for a text variable. These options may vary depending on the specific variable.

Custom Masks and Formats
You can now create new masks for variables, including special masks (e.g., for Orbis search) and enforce locale-specific masks (e.g., UK search or Dutch Companies House search). Created masks are saved within the template and can be edited or deleted as needed.
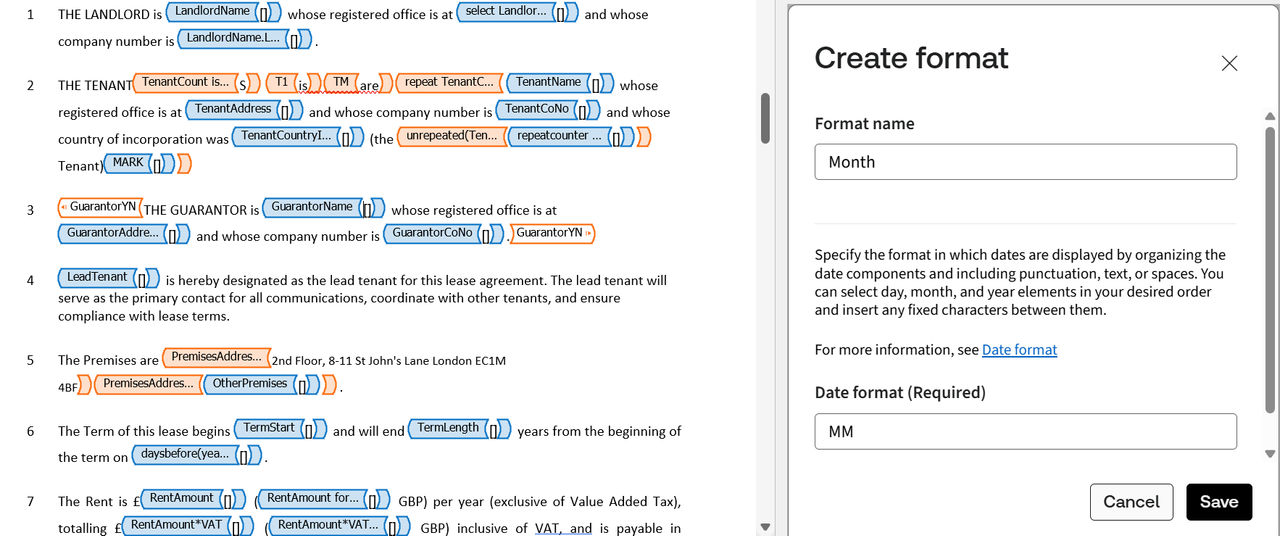
In addition to masks, you can also create custom formats for your variables. For instance, with date variables, you can create custom formats that display only specific components, such as the month and access inline help for available formatting options. Custom formatting is supported for date, time, whole number, decimal number, multi-select, and multi-line text variables.
Set default selections for text variables
Text selection variables now support setting default choices. To set a default option for any text selection variable, click
More Options
and choose Set as default
to select any of the proposed options as the default.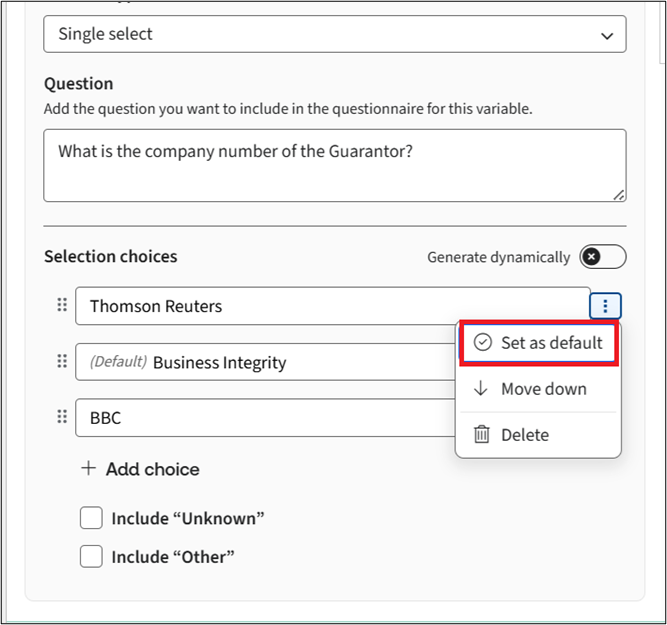
In single-select mode, you can set one default option, while in multi-select mode, multiple defaults can be selected.
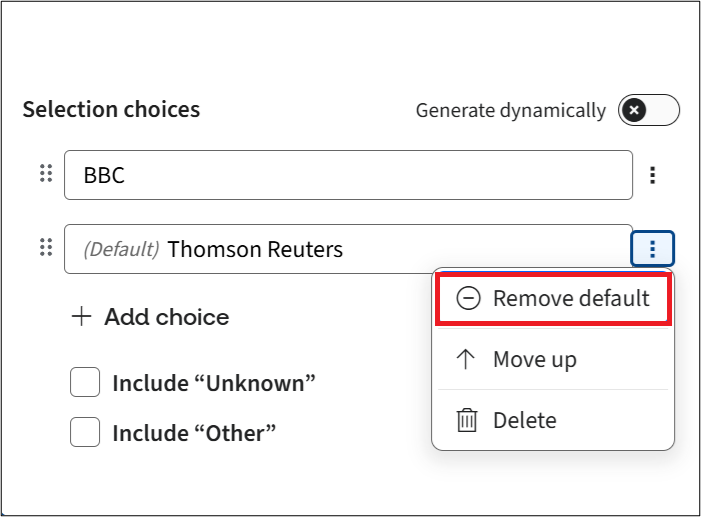
If you wish to remove the option as the default or want to change the default option, select
Remove default
.
Working with Externally sourced variables
Author Online now supports templates that use external dictionary variables from traditional character-based markup by displaying those variables as
read-only
, showing clear indicators
of their dictionary links, and allowing authors to convert
them into locally editable
variables when needed.note
Ensure that the external dictionary is imported into the character-based markup tool before moving the template into Author Online.
When a template that includes externally linked variables is imported into Author Online, those variables appear as
read-only
.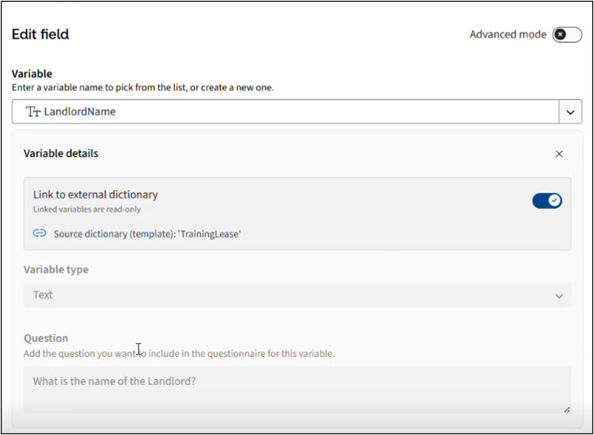
The variable detail panel displays the variable in a read-only state, indicating its link to an external dictionary along with the dictionary name, and a link icon  to visually identify externally sourced variables.
Although the externally sourced variables initially appear as read-only, you can still edit them by enabling the
Link to externally dictionary
toggle button and work on the variable as normal.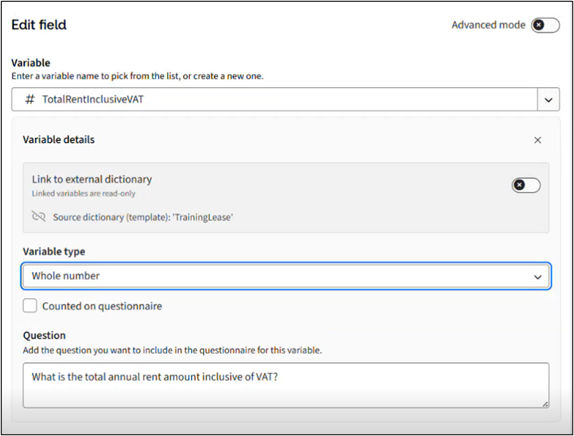
To learn more about how to source and work with externally sourced variables in your templates, see Using an External Dictionary Across Multiple Templates.
Related Content
-
Using Advanced mode
Format: Article
-
Run AI Markup Suggestions
Format:
Article
-
Insert Field
Format:
Article
-
Insert Span
Format:
Article