
Managing themes
Managing Contract Express look and feel with themes
Contract Express allows managing its colour scheme and logos by using themes. You can also apply custom themes to subsites, so every subsite can have its own styling.
Creating themes
To create a new theme:
- Go toAdmin>Themes.
- ClickAdd theme.
- DefineThemename andDescription.noteYou wouldnotbe able to change theme name upon saving.
- Upload new logos by clicking the corresponding areas in theLogos uploadsection.
- Wide- used when browsing on a desktop or laptop (recommended size is 210x40).
- Tablet- used when browsing on a tablet device or if the browser window is minimized to a similar width (recommended size in 150x30).
- Mobile- used when browsing on a mobile device or if the browser window is minimized to a similar width (recommended size in 100x20).
If you upload only one logo, Contract Express will use it for all views. - Define the colours for general elements inGeneral elementssection.
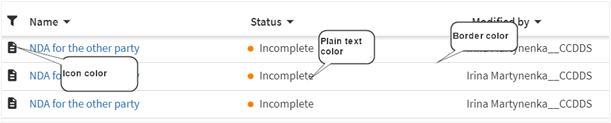 You can input HEX code for the color or click the colored square and select the color from the palette.
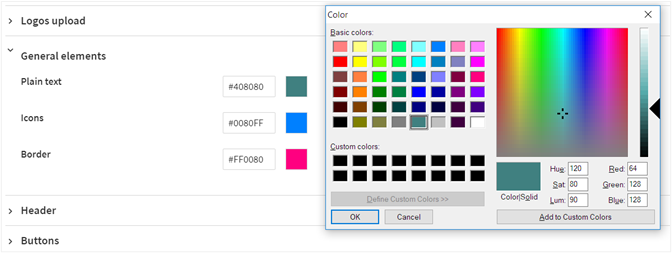 noteThe palette is not available in Internet Explorer or Safari browsers, so if you are using these browsers, you should input the color code manually.
 - Define the colors for headers inHeadersection.
 Apart from selecting solid colors, you can define gradient forHeader bar backgroundandTemplate header background. Check theGradientcheckbox and select the second color for the gradient.
 - Define the customtab namesin the header section.noteThis customisation is only available when the language for the user interface is set to English.You can apply custom tab names to “Matters”, “Documents” and “Tasks” to better reflect the names your company uses to describe documents and tasks. Insert plural and singular forms of the tab name. Special characters are not allowed, with the exception of # & . - / : + *E.g. : #Tasks, P&G Documents, A+N Tasks, A/N Tasks, Self-contained deals.
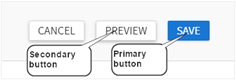
- Define the colors for primary and secondary buttons inButtonssection. You can specify their background, border and text color. Check theGradientcheckbox and select the second color, if you want to apply gradient to the buttons.
- Define the color for footer in theFootersection. Check theGradientcheckbox and select the second color, if you want to apply gradient to the footer.
- To customise the page that is displayed to Guest users after they close the questionnaire, use the options provided in theFinal guest page section. You can change the page title, the text of the notification URL and the text displayed on the Edit questionnaire button. Also, there is an option to add more text to this page in the description section which will appear below the page title.
When the theme is ready, you can apply it to the main site (see Setting up default theme) or a subsite (see Creating sites).
Editing themes
To edit a theme:
- Go toAdmin>Themes.
- Select the required theme and make the changes.noteYou cannot change the name of the theme. All other parameters are configurable.
- ClickSave.
Deleting themes
To delete a theme:
- Go toAdmin>Themes.
- Select the required theme and clickDelete.
note
If you delete the applied theme, Contract Express will automatically revert to the built-in theme.