
Flowchart Builder (Expertise Automation)
Working with flowchart templates
Contract Express 8.5 introduced the concept of Expertise Automation.
Like document automation, users complete an online questionnaire but instead of generating a document as the output, the user will be presented with a bespoke final screen containing guidance relevant to their answers.
Expertise Automation questionnaires and their outputs are created using a new flowchart template type.
Creating a flowchart template
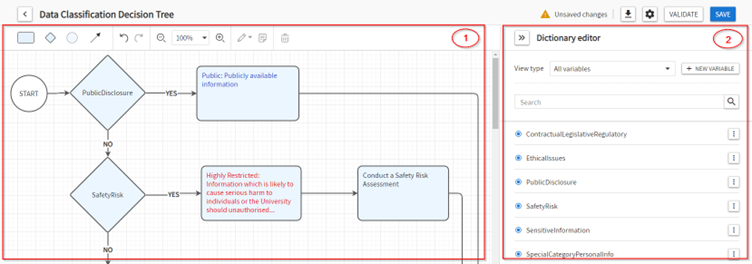
Flowchart templates are created via an online authoring tool that contains two core elements:
- Flowchart builder(1) - to visualise the questionnaire logic and outputs.
- Dictionary editor(2) - to define and order the questionnaire elements.
To create a new flowchart template:
- Go to theTemplatespage.
- Select theFlowchartstab and click theNew Flowchartbutton.

Using the flowchart builder
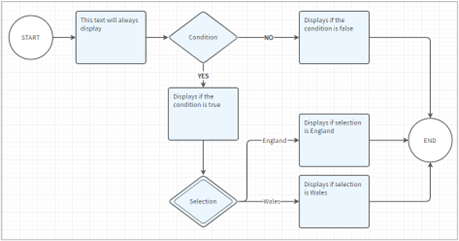
The flowchart builder is used to define the rules that determine what will display on the questionnaire's final guidance page, and to author that guidance.
The flowchart builder uses five shapes:
Shape | Description |
|---|---|
 | Guidance rectangles contain guidance text. |
 | Condition diamonds define the rule or condition that determines which guidance will be displayed based on a Boolean decision. |
 | Selection diamonds have a double border and contain a selection list variable whose selections determine which guidance will be displayed. |
 | Circles are the Start and End shapes. |
Arrows are used to connect two shapes. |
Adding shapes to the flowchart area
The easiest way to add shapes to the flowchart is by dragging an arrow from the existing shape to create a new connected shape.
- Hover over the existing shape’s waypoints until you see a blue circle.

- Click on it and drag an arrow.
- Once the arrow is of the necessary length, release the mouse. A menu will appear with the list of available shapes.
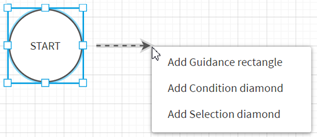
- Select a shape to complete the action and create a new shape connected to the existing one.
Alternatively, you can drag a shape from the toolbar and drop it at the desired position in the flowchart area.

To attach an outgoing connector arrow to an existing shape, select the shape in the flowchart area and click on the arrow icon in the toolbar.
To attach the end of a connector arrow to another shape, click on the arrow, select the grab point at the relevant end and drag it towards a shape. When the connector is in position, the shape's border will turn green.
note
You can use shortcut functions for Undo (
Ctrl+Z
) and Redo (Ctrl+Y
) or the toolbar buttons, as well as Copy (Ctrl+C
), Cut (Ctrl+X
), and Paste (Ctrl+V
), with the toolbar options available under the edit button.To manipulate multiple shapes at once, hold Ctrl key and click on the shapes. You can move them all at once without disconnecting the arrows or right-click your mouse to copy, delete or cut.
Adding guidance text
Double click on a shape to add or edit text.
You can use active text (i.e. variables) within a shape to display the questionnaire answer in the final guidance. For example:
Thank you for completing a Privacy Impact Assessment for {ProjectName}.
When you add active text to a shape, a corresponding variable will be added to the dictionary, if it is not already there.
When editing a
guidance rectangle
, a rich text editor opens on the toolbar to enable text formatting.
Adding a Boolean condition
When adding a rule to a
condition diamond
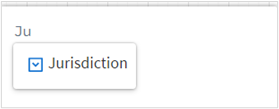
, you should use the same business rule expressions as you would for spans in Word-based templates. Most often, condition diamonds will contain a Yes/No variable. Enter the variable name into the condition for it to be automatically added to the dictionary as a Yes/No variable. Alternatively, you can add to the condition a variable that already exists in the dictionary. Start typing the variable name to see the existing options in the predictive text.
A business rule in the Boolean condition diamond can be any expression that evaluates to true or false. For example, a business rule based on the answer to a whole number variable SalesPrice might look like:
SalesPrice ismorethan 1000
Boolean logic can also be applied to a selection list variable by checking if a specific option was selected:
VariableName is "Answer A"
For more information about business rule expressions, see Marking and controlling optional text in the template.
Since condition diamonds are Boolean, they have only ‘Yes’ and ‘No’ arrows as the outgoing connectors. To add the arrows:
- Click on the diamond and locate a waypoint.
- Click on the "+" to drag an arrow, completing the action by choosing the next connected shape.
The first connector added will be the ‘Yes’ connector and the second will be the ‘No’ connector.
You can swap the ‘Yes’ and ‘No’ arrows by right-clicking on an arrow and selecting “Swap arcs”.
Adding a Selection condition
Selection diamonds
use text selection variables and enable flowchart logic that is based on the option selected from a list. A variable added to the selection diamond will be added to the dictionary automatically as a text selection variable. Each arrow drawn from the selection diamond will need to be assigned one of the selection list values.
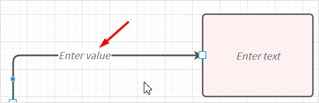
The values can be added to the arrows in the flowchart. When you first draw an arrow from the selection diamond, it will display text “Enter value”. Double click on it and enter the value.
Once you have drawn all arrows and added all values, you will need to sync the values with the dictionary. Follow these steps:
- In the Dictionary Editor, locate your variable, click on more icon (
 ) and select Edit.
 - Go to Constraints tab and click
 button. This will add all selection list values from the flowchart to the variable.
If you prefer to start with the variable creation, you can add the variable and all values in the dictionary first. In this case, the variable name will be suggested by predictive text once you start entering it in the selection diamond.
The values added to the Constraints tab will be available for selection when you double click on ‘
Enter value
’ on the arrow.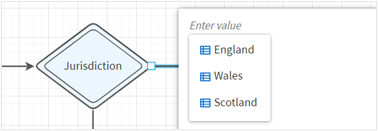
To check if all values have been assigned in the flowchart, review the Constraints tab of the text selection variable in the dictionary. A green tick will appear on all values that have been used in the flowchart.

To reorganise your flowchart by swapping the values on two selection diamond arrows, select two arrows at once (click both while holding Ctrl key), right click on one of the arrows and click “
Swap selected arcs
”.Validation and issues
Contract Express validates the flowchart in real time as you build it. If an error is identified, the relevant shape will turn red until the error has been corrected. You can also see a list of all unresolved errors by clicking on the
Issues
link above the dictionary editor.
Adding Notes to the shapes
Notes can be used to add comments or drafting notes to the flowchart objects to assist with flowchart maintenance and updates. They are visible to the flowchart authors only.
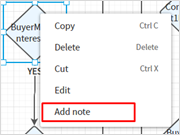
You can add a note by selecting a guidance rectangle or condition diamond and clicking on the Note icon  in the toolbar. “Add note” option is also available if you right click on the shape.
Using the dictionary editor
The dictionary editor is used to define and manage the template variables and organize the questionnaire pages. To access it, click on the double arrows next to the ‘Dictionary Editor’ heading on the right.
Adding variables
Click on
New variable
to manually add a variable to the dictionary.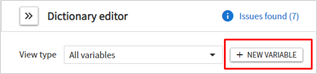
Variables are also added automatically to the dictionary when active text is used within a shape.
You don’t need to use curly brackets when adding a variable to a condition or selection diamond as its content is always treated as business rule expression. However, curly brackets are needed in the guidance rectangles as they can contain both regular text and active text.
Editing variables
Click on the  next to the variable name to edit its attributes. For more detail about variable attributes, see Editing variables.
more button
next to the variable name to edit its attributes. For more detail about variable attributes, see Editing variables.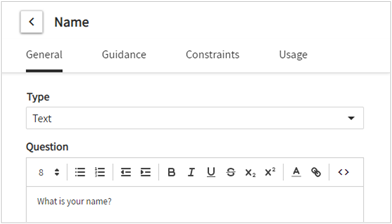
Searching variables
To search the variable from the existing list you will need to insert the variable name you are searching and hit enter or
Search icon
button and see check search results.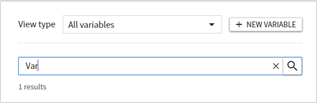
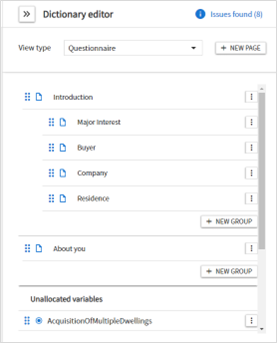
Organising the questionnaire pages
Use the dropdown at the top of the dictionary editor to switch between editing the variables and organising the questionnaire pages.
To add pages and groups to the questionnaire:
- Click onNew pageorNew groupas appropriate.
- Click on the correspondingmore buttonto edit the attributes.
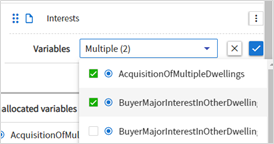
To add a variable to a group:
- Click more button and choose “Allocate variable” option from the menu or expand the group and click on the “Allocate variable” button.

- Select one or more variables you would like to add to the questionnaire group. Confirm by clicking on the blue tick button.
You can change the order of pages, groups and variables by selecting the blue dots and dragging the item to the desired location.
Setting the template properties
To set the template properties, click on the
cog
above the dictionary editor.
Enter details as appropriate:
- Generated document name(mandatory) - the name that will be given to each completed questionnaire on the Documents page. For example:PIA response from {Name} for {ProjectName}
- Version(optional) - used to identify different versions of a template; if left blank, the 'save' timestamp will be used.
- Description(optional) - displayed on the Templates page and when selecting a template to launch a new questionnaire.
Downloading flowcharts
To
download
the flowchart as a jpg image, click the download icon above the Dictionary Editor.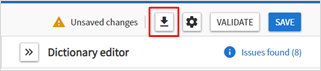
Managing flowchart templates
Flowchart templates are managed in the same manner as Word-based templates. You can assign profiles and configure other properties.
This section covers the profile settings that are specific to flowchart templates and Expertise Automation.
Assigning a profile
When the Expertise Automation feature is enabled, a profile titled
ExpertiseApp
will be added automatically to your license space. This profile contains our recommended configuration for flowchart templates. You can edit or clone the profile and apply it to your flowchart templates as desired.
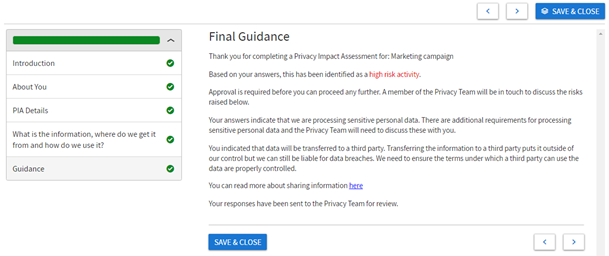
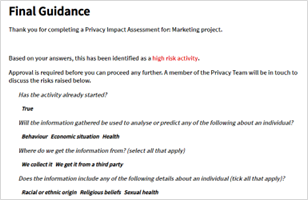
Final Guidance
A new Final Guidance section has been added to Profiles. It contains three settings that can be enabled to test your questionnaire logic:
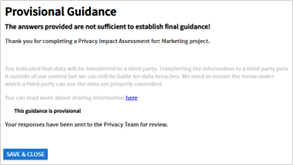
- Include unresolved guidance messages on the final guidance page- when enabled, a Provisional Guidance page will display in place of the Final Guidance page, if any questions that determine relevance have not been answered.
- Include irrelevant guidance messages on the final guidance page- when enabled, all guidance will display on the final guidance page, with the irrelevant guidance struck through.
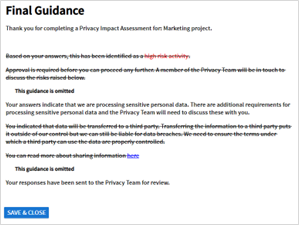
- Show those values that contribute towards each guidance message- when enabled, the questions and answers that determined a specific guidance message to be relevant are displayed below that guidance.
Generating an answer document
When Expertise Automation is enabled, a Word template titled
ExpertiseAppGuidance
will be added automatically to your license space. You can add this template to your Expertise Automation profile to generate a Word or PDF document of the final guidance, in addition to displaying it as the final page of the questionnaire.
You can edit the template as needed to change the layout and formatting or to add your company logo, for example.
To add an answer template to a profile:
- Go toAdmin > Profiles.
- Select the profile.
- Search forTemplate reference of answer document(s).
- Add the Template reference (template name).
- Apply a Guest restriction, if desired.
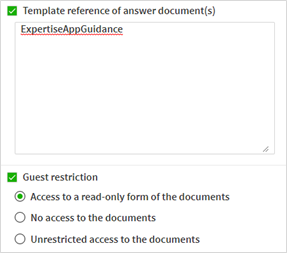
- Save.