
Modifying matters
Matter details page
This page contains the attributes of a Matter and is the landing page after initially creating a Matter.
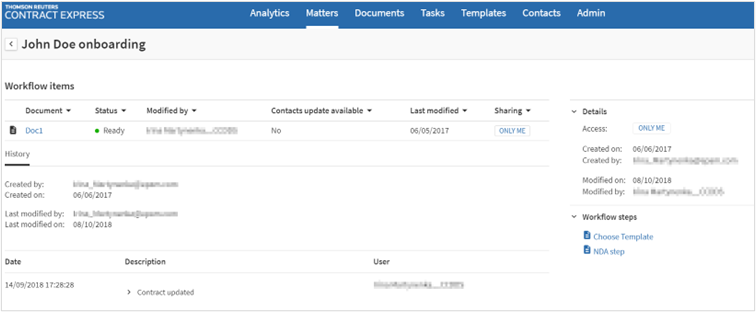
Workflow steps
: There is a list of possible workflow steps located on the right-hand side of the page. The options displayed in this list depend on the Workflow Steps that have been configured by an Author or Admin user. See Configuring workflow steps for more details.Workflow items
: A list of Documents that have been created using a Workflow Step in a Matter. History
: A consolidated history of all workflow Items. History entries that are specific to the entire Matter will have the Metadata column checked. Matter setup
Once a Matter has been created, the next steps to progress through the matter will be displayed within the
Workflow steps
area. There are three types of workflow steps: - Workflow Steps with pre-assigned templates: This option will direct the user straight into the questionnaire using the Template that was configured for the Workflow Step (see Creating workflow steps for more details). On completion of the questionnaire the user will land on the document details page for the workflow item created by that workflow step. From there it is possible to navigate back to the matter by clicking on the matter link on the document details page.
- Workflow Steps which offer user the option to select a Template: This option will direct the user to a list of Templates to choose from. The Templates in this list will be the same list of templates a user is able to access by theNew documentoption on the documents page. Once a template is selected the user will be redirected to the questionnaire and then on completion of the questionnaire the user will land on the document details page for the workflow item created by that workflow step. From there it is possible to navigate back to the matter by clicking on the matter link on the document details page.
- Workflow Steps that create multiple Workflow Items: Workflow steps may be set up so that when clicked, they automatically create multiple workflow items based on data entered in an existing workflow item within the matter (see Creating workflow steps for details about configuration). Clicking on this workflow step does not require any user input so you will not be directed to the questionnaire, but the new workflow items can be found in the workflow items section of the matter.
Editing matters
Editing the data of a Matter can only be done from the datasheet on the Matter details page.
- ClickEdit Matterbutton on matter details.
- Edit the values.
- Save the changes.
Alternatively, to rename a matter, hover over its name and click the pencil icon.
Sharing matters
To share a matter with other users within the site:
- Select the required matter.
- Click theAccessbutton.
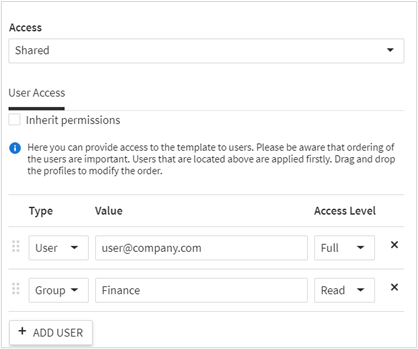
- Define permissions in the opened panel.
- By default, the matter will retain the permissions set on the folder that it sits within or if it is in My Matters it will default to that user. Uncheck theInherit permissionsto set up the permissions. You can grant access to a user, role or group.
- ClickAdd userbutton.
- DefineType- user, group or role.
- DefineValue- name of the user, group or role.
- DefineAccess level- Read, Write, Full or None (more details on access levels, see Document permissions).
- ClickSave.
Matter history
The
History
section is a consolidated history of all Documents within the Matter. History entries that correspond to the Matter will have a tick within the Matter column and entries for individual work items will be left blank.Deleting matters
To delete a matter:
- Select a matter on theMatterstab.
- ClickDelete.
note
The Matter and all associated documents that are a part of that matter will be deleted permanently.