
New Request from Template
To create a new request from an existing template, click
New Request from Template
.
If no templates currently exist within the system, the below system message will appear:

If the system already contains one or more template, clicking
New Request from Template
will open the Select Template
pop-up. Name the new request and select a template from the drop-down. Once a template is selected, click Use Selected Template
.
Once
Use Selected Template
is clicked, the pop-up will refresh into the Edit Request
pop-up, complete with a vertical menu bar on the left. The tabs on the vertical menu bar are described in more detail in the subsections below.
Request Information
When the
Edit Request
pop-up is first opened, the Request Information
tab will be opened by default. Name the request and set a priority and due date. The below options are available for priorities:- Low
- Normal (Default)
- High
- Critical
Once all information is set, click the
Save Request Header Information
button.
Once the request has been saved, the below system message will appear on the screen:

Request Email
The
Request Email
tab can be used to draft a request e-mail to a designated recipient. You have two options for how to draft an e-mail, both of which are described in more detail below.Save Email Information
To write a new e-mail from scratch, enter a subject and draft the e-mail in the
Request Email
window. Once the e-mail has been drafted, click the Save Email Information
button.
Load Email from Template
To write an e-mail based off a pre-written template, click on the
Load Email from Template
button.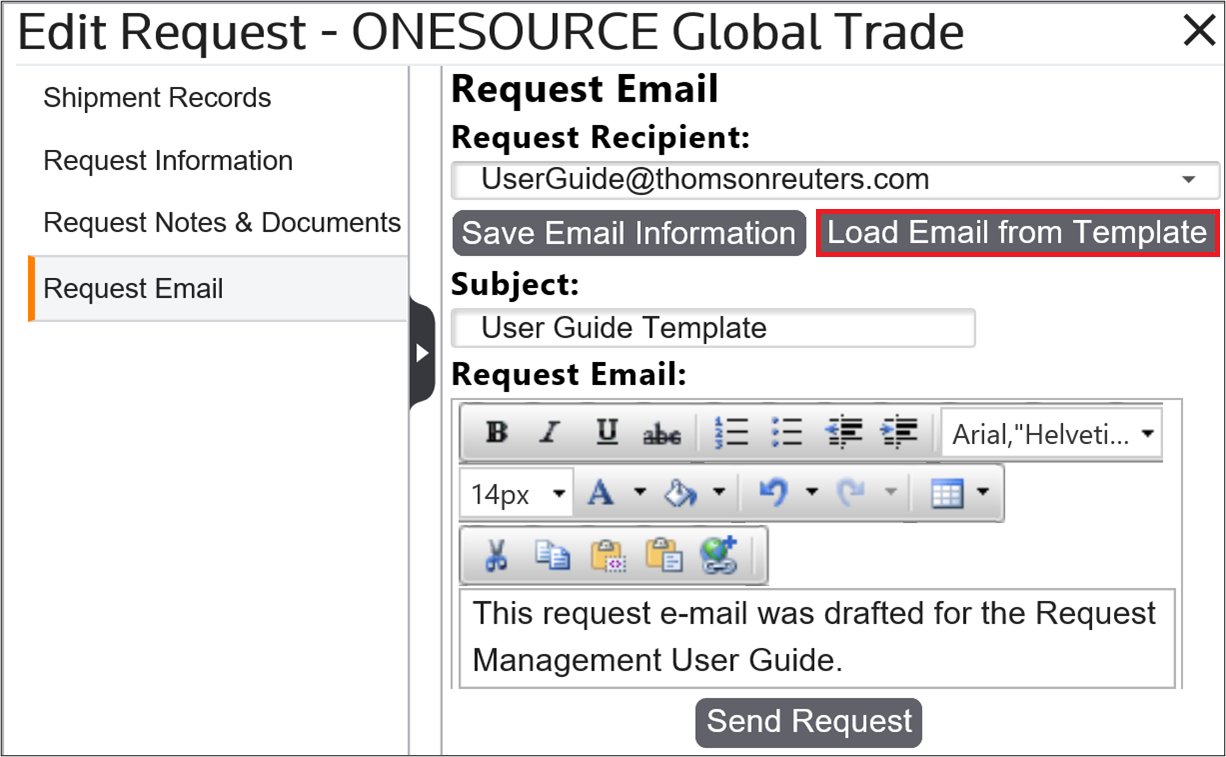
Clicking
Load Email from Template
will open the Email Template Selection
pop-up. Select a template from the drop-down and click the Use Selected Template
button.
Request Notes & Documents
The
Request Notes & Documents
tab can be used to add notes and documents to a request.
Adding a Note
To add a note to a request; enter the note, select a note type, and click the
Add Note
button.
The note will then appear in the notes grid.

Adding a Document
To add a document to a request, click the
Add Document
button.
Clicking
Add Document
will open the Upload Document
pop-up. Click the Browse
button and choose a document from the local drive. Once this document has been selected, click the Upload
button. You can also add a memo to the document.
The documents will then appear in the
Provided Documents
grid.
To open the document, click the
Document
link. A separate browser tab will open, containing the document.
To remove the document, click the
Delete
link.
Shipment Records
The
Shipment Records
tab can be used to add shipment records to the request. Records can be added two different ways: by source and manually. Each of these methods is described in more detail in the subsections below.
Add New Records From Source
To add a new record from a source, click
Add New Records From Source
.
Clicking
Add New Records From Source
will open the Request Key Selection
pop-up. Choose one or more records from the grid by checking their corresponding boxes. Once all desired records have been selected, click the Use Selected Records
button.
Add Blank Records
To manually add a new record, click
Add Blank Records
.
Enter a ship order number and then click
Add Record
.
The records will then appear in the
Shipment Records
grid.
Edit a Record
To edit a shipment record, choose a record from the grid and click its corresponding
Edit
button.
Clicking Edit will open the Requested Fields tab. Make any necessary changes and then click
Back
.
Remove a Record
To remove a shipment record, choose a record from the grid and click its corresponding
Remove
button.
Clicking
Remove
will open the Confirm Removal
pop-up. It is important to note that removing a record will also remove all existing fields (required and informational), documents, and child records. Click OK
to proceed.
Related Content
-
Request Management
Format: Article