
Adding an Invoice
Invoices can be added to a declaration by clicking
SELECT INVOICE
or by manually creating an invoice in the declaration.important
About the
SELECT INVOICE
button: After transmitting the declaration, the button will not be visible to add or remove invoices. After rejection from custom, the button will be visible, and you can add or remove invoices. Adding an Existing Invoice to a Declaration
To add an invoice to the declaration.
- ClickSELECT INVOICEto open a pop-up which lists all processed invoices that have not already been attached to a declaration.
- Review the list of invoices to determine which one to add to the declaration.importantTo better view and analyze these columns, you can perform sorting and filtering options described in the section “Sorting and Filtering Grids” in the User Setup user guide.
- Once the invoice to be added is found, check the box of the invoice you want to add.
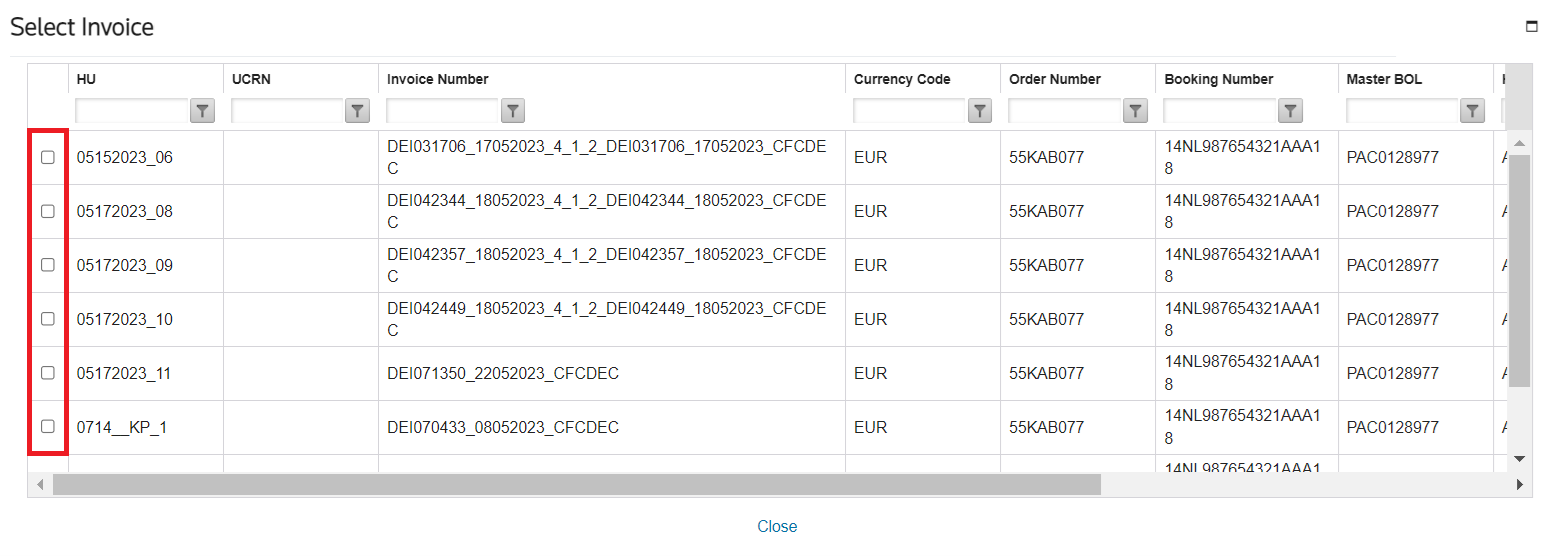 After selecting an invoice, the list automatically refreshes and is sorted based upon grouping criteria.
 - ClickClose.
The header, parties and goods items information will be added to the declaration and the record for the
Goods Items
tab.
Removing Invoices of a Declaration
To remove an invoice you selected, simply click
SELECT INVOICE
to open the pop-up and uncheck the box of the invoices you want to remove.
Manually Adding an Items to a Declaration
To manually add an invoice.
- Open theDE Export Declarationscreen.
- Use theFind Declarationfield to locate the desired declaration.
- Click on theGoods Itemstab.
- ClickNew.

- TheGoodsItempop-up opens which contains a list of relevant data fields to be entered for an invoice. Enter all fields to create the invoice.
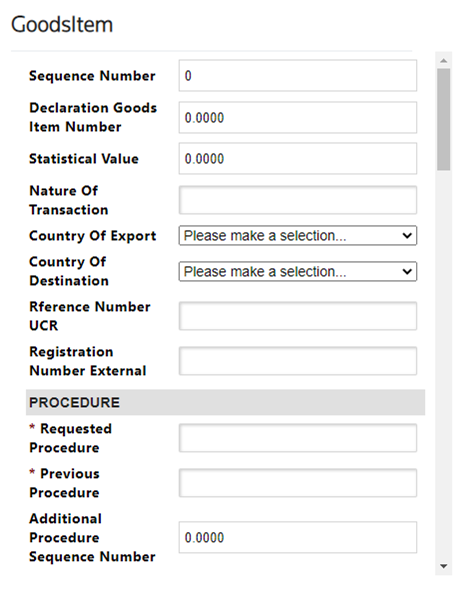
- ClickSaveat the bottom of the pop-up when you are finished orCancelto drop all changes and close the pop-up.
- After saving it, the system will create a new line for the goods item under theGoods Itemtab. This tab contains multiple sub-tabs, which (when opened) will access additional information under each goods item (e.g. Packages, Containers, Documents, etc.).
- Complete the fields in these tabs with their respective required data. If a field has an asterisk (*), it is a required field and cannot be omitted.

- ClickSave and validateto run a validation process to ensure the declaration adheres to Customs rules and regulations. Errors will be displayed in theValidationstab.If any errors occur, do the following:Go to the location listed in theValidationstab and make the change to fix what appeared in theWarningcolumn.TheWarningcolumn will provide a definition for the error. TheLocationcolumn will define which tab and field contained the error.ClickSave and validateto revalidate.
- After all validation errors have been resolved and the declaration is complete, theTransmitbutton becomes available.
- ClickTransmitto send the complete declaration to Customs.
This section highlights the process to follow when creating and submitting a full declaration to Customs. However, the ONESOURCE Export Declaration System accounts for various message types.
The next section will explain the process you will follow for different message types.
Related Content
-
DE Atlas Export
Format: Article