
Line Items
Note: Most licenses require a Quantity (with a Unit of Measure) per line. However, in some countries, agencies issue licenses where no Quantities are required.
The
Line Items
tab is used for entering lines covered by the Export License, such as line, classification, and unit of measure.To enter a new line item to the Export License, open the
Line Items
tab, and then click Add New Record
. This will open the Edit License Detail
pop-up.
Enter information as it relates to the item. Repeat as needed for any related items.
To save the line item and keep the pop-up open for further editing, click
Save
.To save the line item and close the pop-up, click
Save and Close
.To drop all changes without saving, click
X
.
The contents of the
Edit License Detail
pop-up are in a form view. Depending on how the system was configured, the fields on this tab may be broken into one or multiple sections, as indicated by a gray bar.
Hiding/Expanding Sections
To hide a section, choose a section to hide and then click its corresponding arrow on the far right.

The fields for that section will now be hidden on the screen. Clicking the arrow a second time will make the fields visible again.

Fields
Fields with a red asterisk (*) beside the field name are required fields and cannot be omitted.

If the user attempts to save the line item and a required field is blank; the system will generate an error message, similar to the one shown below:

Filter Form Fields
Each section will have a
Filter Form Fields
search box. As the user types a value into this textbox, the section will refresh to only show fields matching what was typed.
Show Required Fields
To filter a section to only show the required fields, check the
Show Required Fields
box. The grid will refresh to only show required fields.
Show Empty Fields
To filter a section to only show the empty fields, check the
Show Empty Fields
box. The grid will refresh to only show empty fields.
Edit Line Item
To edit an existing line item, go to the
Line Items
tab and find the line item that needs to be edited. Move the cursor over the downward arrow to the left of the Line
column.
When the options menu appears, click
Edit
.
Clicking
Edit
will open the Edit License Detail
pop-up. Make any necessary changes.To save the line item and keep the pop-up open for further editing, click
Save
.To save the line item and close the pop-up, click
Save and Close
.To drop all changes without saving, click
X
.
Delete Line Item
To delete an existing line item, go to the
Line Items
tab and find the line item that needs to be deleted. Move the cursor over the downward arrow to the left of the Line
column.
Once the options menu appears, click
Delete
.
To remove the party, click
OK
in the confirmation pop-up.To cancel the deletion and close the pop-up, click
X
or Cancel
.
Associated Products
The
Associated Products
sub-tab is used for entering products that fall under a line item’s grouping.To expand and make the
Associated Products
section visible, click the expansion arrow.

Adding a New Associated Product
To add a new associated product, click
Add New Record
.
In the
Add License Product
pop-up, use the Product Number
drop-down to choose which product(s) to associate with the line item.To associate all products to the line item, click
Add all eligible products
.
If a Product Number has the same classification as a line item detail in ONESOURCE Global Classification, the pop-up will populate with the same classifications.
To store the product with the line item and license details, click
+
. Repeat until all the required products have been associated to the line item.To store the product information and keep the pop-up open for further editing, click
Save
.To store product information and return to the
Associated Products
tab, click Save and Close
.To close all changes and return to the Associated
Products tab
, click X
.
Deleting an Associated Product
To delete an associated product, go to the
Associated Products
tab, find the product that needs to be deleted, and click Delete
.
To remove the product, click
OK
in the confirmation pop-up.To cancel the deletion and close the pop-up, click
X
or Cancel
.
Allocations
The
Allocations
tab shows information pertaining to the fields below:Fields | Description |
|---|---|
OrderNumShip | Links to the shipment where a license was allocated. |
ProductNum | Product Number. |
Quantity | Displays total product units shipped using license per OrderNumShip. Quantity is calculated based off the license’s unit of measure (UOM). |
Value | Total value of product used on the shipment. |
Status | Shipment status. |
Allocation Date | Shipment date, indicating the day the license was allocated. |

Note: When allocating products to a license(s), the remaining value will decrease by entering a positive value or increase by adding a negative value. If Currency Conversion is enabled, the
Currency Code
field from the License Header tab will appear in this pop-up.
After saving an allocation, any notes that were entered will appear in the
Allocation Notes
tab.

Manual Allocation
Allocation is typically done when a shipment is processed, but licenses can also be allocated manually. It is important to note that manual allocations do not allocate from existing invoices in Export Management. This functionality exists so users can adjust a license based on a shipment made outside of ONESOURCE Export Management.
To perform a manual allocation, go to the
Allocations
tab and click Add New Record
.
Enter the allocation information into the pop-up.
To save the manual allocation and keep the pop-up open, click
Save
.To save the manual allocation and close the pop-up, click
Save and Close
.To drop changes without saving, click
X
.
Only manual allocation records can be edited or deleted.
Editing a Manual Allocation Record
To edit a manual allocation record, move the cursor over the record that needs to be edited. Move the cursor to the downward arrow on the left side of the allocation record and click
Edit
.
Make any necessary changes in the
Edit License Allocation
pop-up, and then click Save and Close
.
Deleting a Manual Allocation Record
To delete a manual allocation record, move the cursor over the allocation record that needs to be deleted. Move the cursor to the downward arrow on the left of the record and click
Delete
.
To remove the record, click
OK
in the confirmation pop-up.To cancel the deletion and close the pop-up, click
X
or Cancel
.
Returns
There are some types of licenses that allow exporters to allocate values/quantities back to a license in situations where goods are returned to the country of export. In these instances, a Returns sub-tab will appear on the screen if the license type has been configured to permit returns. The
Returns
sub-tab will appear after goods are first allocated to the license.
Adding a New Return
To add a new return, click on the
Add New Record
button.
Clicking
Add New Record
will open an Add Return
pop-up, where the user can enter information for the return. Complete all required fields and then click Save
.
Attempting to save without completing all required fields will cause a validation message to appear on the screen, including the names of the fields that need to be completed:

Once all required fields are complete and
Save
is clicked, a confirmation pop-up will appear on the screen. Click OK
to create the return.
The new return will then appear in the Returns grid. In addition, the
Returned Qty
and Returned Value
will be populated in the grid line above. New Remaining Qty
and Remaining
Value amounts will be calculated accordingly.
Removing an Existing Return
To remove a return, choose a return from the
Returns
grid and click on its corresponding Delete
button.
A confirmation pop-up will appear on the screen. Click
OK
to confirm the deletion.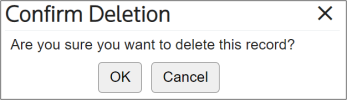
Once the return has been deleted, the below validation message will appear on the screen:

The values in the
Remaining Qty,Returned Qty, Remaining Value
and Returned Value
fields will be updated appropriately.Related Content
-
License Management (CCL, ITAR, etc)
Format: Article