
![]()
Triva isn't available right now.
Check out the support page for our phone number and hours
![]()


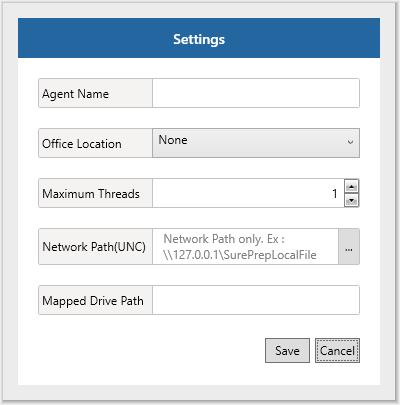
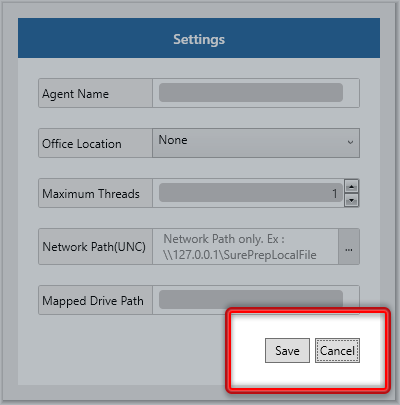
Option | Description |
|---|---|
Agent Name | Enter a unique agent name for each office location (letters, numbers, or a combination). |
Office Location | Specify the Office Location option as None if you want to download binders for all office locations associated with your firm's domain, irrespective of office location. |
Maximum Threads | Enter the number of binders that can be downloaded simultaneously (Recommendation 5-10) |
Network Path (UNC) | Select a local server path where the service will download the files. This can be different at each location. The path should be a UNC path (for example, \\10.2.1.100\SurePrepLocalFiles or \\MachineName\SurePrepLocalFiles). The network path should be limited to only 1 sub folder. |
Mapped Drive Path | This needs to be the same in all office locations and mapped to the path defined by network path (UNC). ex.: M:\. |


 Article