lets your firm integrate SurePrep with your tax software. Activation lets SurePrep the ability to communicate information with your tax software. To integrate UltraTax CS (local/desktop) 2024 and prior, you can follow the instructions in this article to set up a default location to save UltraTax CS data.
Firms using UltraTax CS (Virtual Office or SaaS) you'll need to use a different method to turn on SurePrep integration.
Follow these steps to define the default location:
Go to
FileRoom
,
Admin
,
Account Setup
, then
Tax File Activation
.
Open the PBFX file once it completes downloading.
note
- The download window might look different based on your browser.- In Chrome and Edge, you can select
Always open files of this type
to open the PBFX file the next time you need to create a binder or update your
Tax File Activation
settings.
When the
Tax File Activation
window appears, select the
UltraTax CS
tab.
There are three options to select UltraTax CS tax software:
UltraTax CS (Local/Desktop)
: Select this option if you are only using a local copy of UltraTax installed on your desktop.
UltraTax CS (Virtual Office CS or SaaS)
: Select this option if you are only using a virtual server copy of UltraTax CS. Follow the remaining steps in the linked article.
(Legacy for older tax years) Activate UltraTax Virtual Office CS
for 2021 and earlier tax years
.
Both
: Select this option if you are using both the local and virtual install.
The selected option will reflect on the template displayed on the
Create New Binder
window.
Select
Add New Path
to set a new account. A blank row will appear.
On the
UltraTax CS Data\Installation Folders
field, go to the network or local path location where the UltraTax CS file is.
UltraTax S:
View instructions on which UltraTax CS installation folder path needs to be selected.
Make your UltraTax CS Folder selection with the following steps:
Open
UltraTax CS
.
On the
Setup
menu, select
User Preferences
.
On the
User preferences
window, select the
File Locations
tab. Note down the path up to the
WinCSI
folder (for example, C:\\WinCSI\).
Go to
FileRoom
,
Admin
,
Account Setup
,
Tax File Activation
, then
UltraTax CS
tab. Select the installation (WinCSI) folder path that appeared in the previous step.
note
In the
Nickname
column, you can provide a nickname/alias to help identify your location (for example, Chicago Office). This field is optional.
Select the
Save
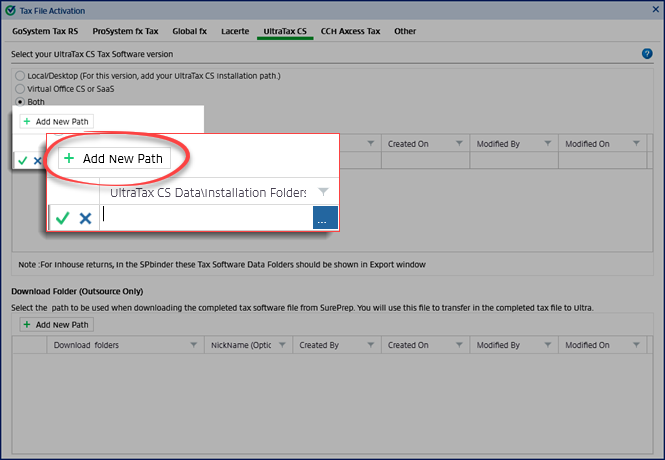
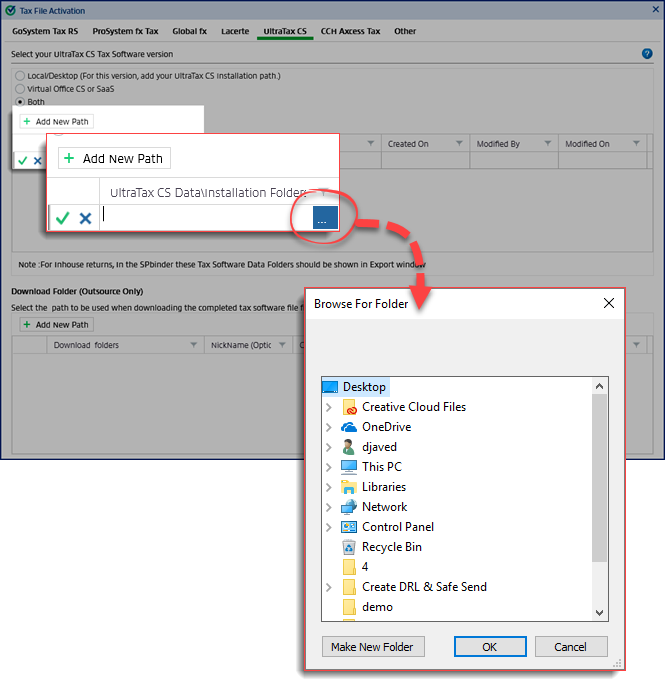
icon to save the details or select the
Cancel
icon to close without saving any changes.
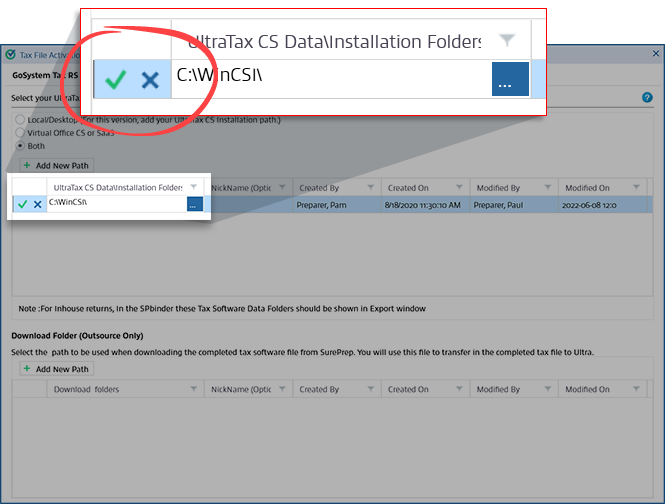
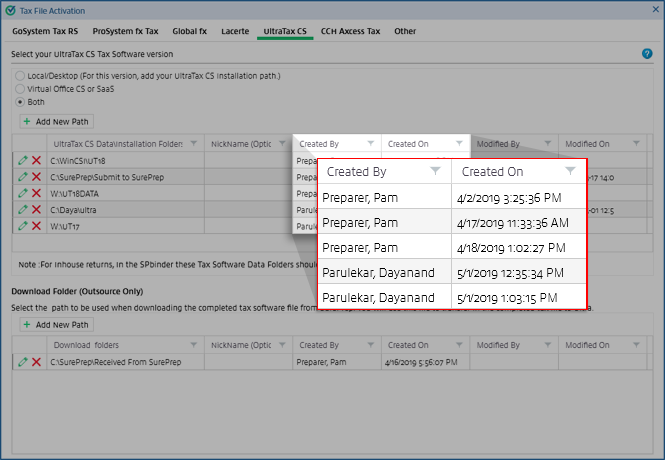
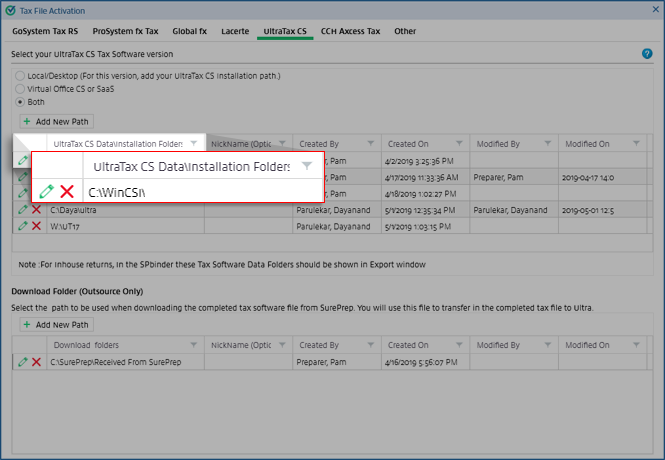
The
Created By
,
Created On
,
Modified By
, and
Modified On
fields auto-populate with the User Name and the system date and time.
This newly added path appears with the title and path.