
![]()
Triva isn't available right now.
Check out the support page for our phone number and hours
![]()

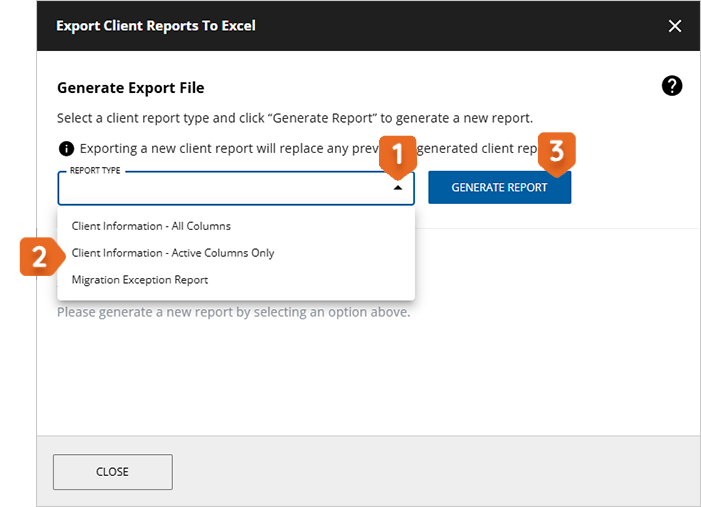
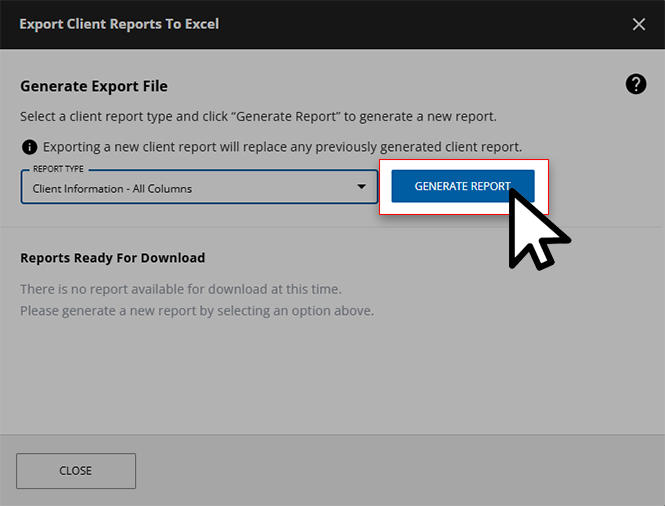
Client Information... | Description |
|---|---|
All Columns | Exports client records with all columns even if they are not actively visible on screen. |
Active Columns Only | Only exports client records with columns that are currently visible on the screen. |

 Article