Follow these steps to configure TaxCaddy permissions in your firm. By setting permissions, you can decide to give tax professionals at your firm access to TaxCaddy, TaxCaddy's
Administrative
tab, and the SurePrep Mobile App. You can also grant the ability to transfer documents between different TaxCaddy accounts and alter the 7216 Consent status of a client.
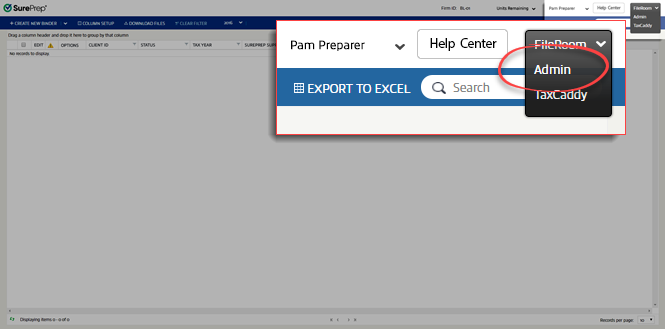
On the upper right, point to the dropdown menu, then select
Admin
.
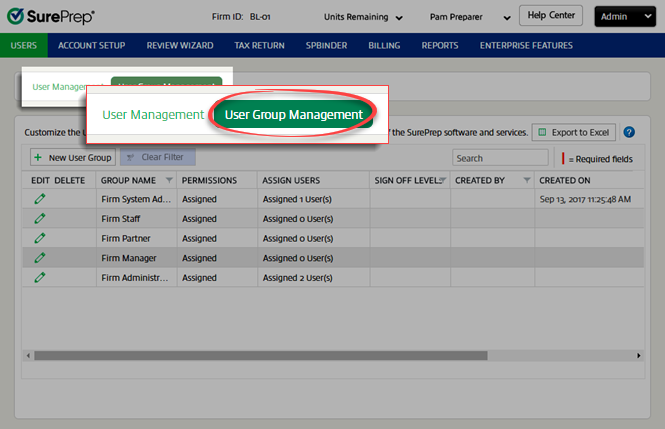
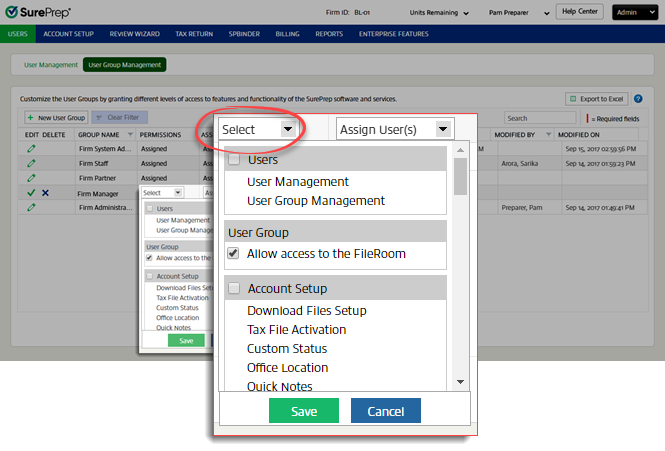
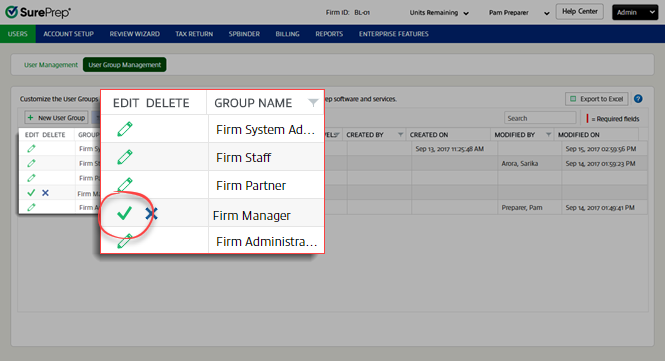
Select
User Group Management
.
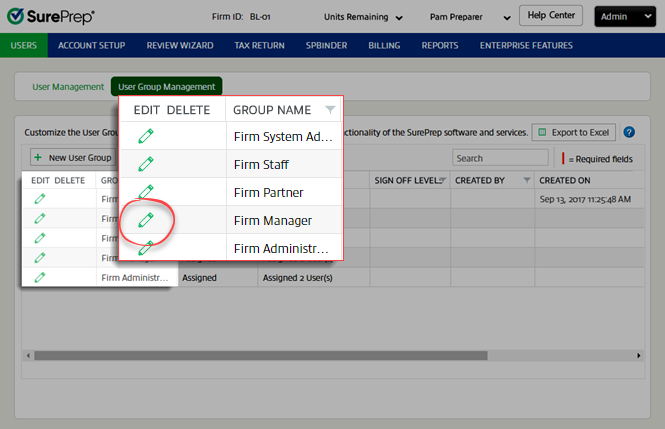
Select
Edit
next to the group you want to assign permissions.
In the Permissions column, select
Select
. The Permissions dropdown opens.
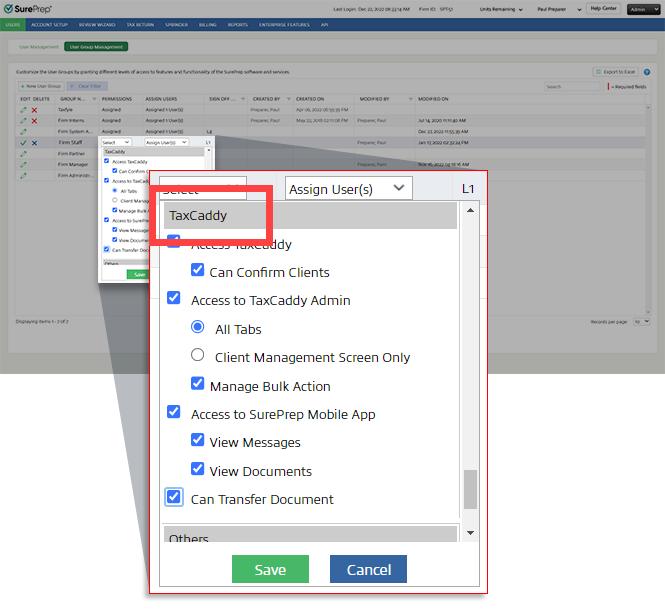
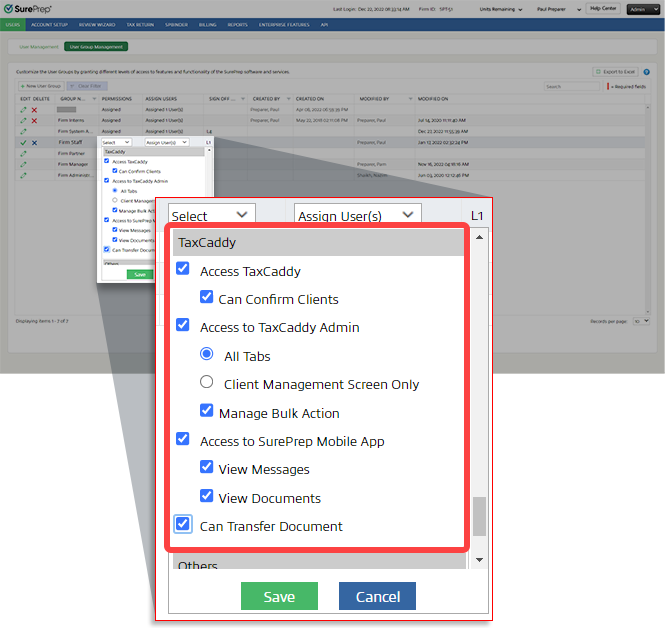
Scroll down to the
TaxCaddy
section.
All Tabs
: Allows users access to the TaxCaddy
Administrative
tab and modify information in all sections, including
Client Management
,
Templates
,
Document Request List
,
Firm Details
, and
Admin Connections
.
Client Management Screen Only
: This only allows users to open
Client Management
in the TaxCaddy
Administrative
tab.
Manage Bulk Action
: Allows users the ability to perform
MANAGE CLIENTS
actions in bulk to all eligible clients in the firm on the
Client Management
. Users with this permission can send invites, reminders, letters, Questionnaire, Create Custom DRL, Send DRL, and Delete Clients for all eligible clients on the domain when they select
All Eligible
.
note
The number of Eligible clients can change based on the current filter or search results. Under TaxCaddy, select
Access TaxCaddy
to allow users in that group access to TaxCaddy. For user groups who should have access to Admin sections, also select
Access to TaxCaddy Admin
and then select either
All Tabs
or
Client Management Screen Only
.Select the checkboxes applicable to the user group:
Access TaxCaddy
Allows users to access to TaxCaddy
: Allows users to make sure the identity of a client before sharing potentially sensitive documents. Verification is only needed for clients that were unable to complete two-factor authentication (for example, Missing phone number in Client Management, landline, incorrect number, etc.).
Can Confirm Clients
Access to TaxCaddy Admin
Allows access to the TaxCaddy Admin tab. It requires the additional selection
All Tabs
or
Client Management Screen Only
.
Can Transfer Documents
Allows users the ability to transfer documents from one TaxCaddy account to another.
Can undo 7216 Consent Received
Users with this permission can remove
7216 Consent
from binders and their associated TaxCaddy Client Profiles. If the consent was already granted, then users can remove the consent from FileRoom.
note
Removing 7216 Consent will remove users as Owners and Assigned Members if they are assigned to a group with (7216)
Restrict Access
permission assigned to them. Additionally, the binder and client profile won’t be visible to 7,216 restricted users in FileRoom and TaxCaddy.

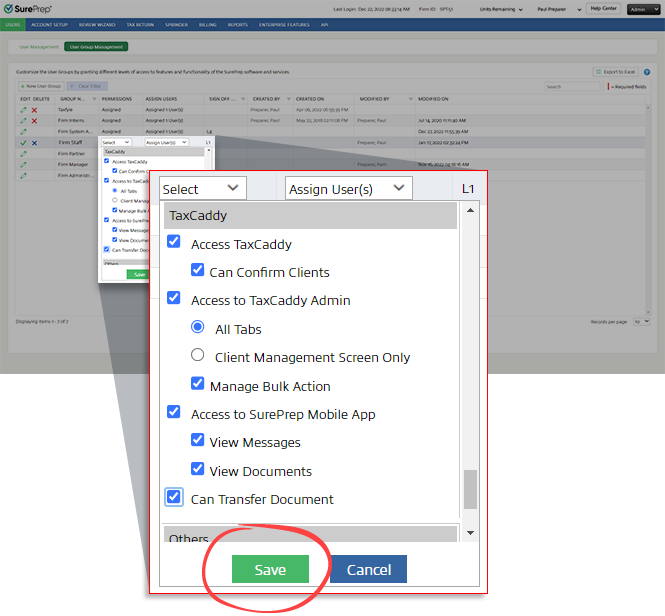
 to save all changes to the group.
 Article