
DPS Management: Escalating Blocked Parties and Email Alerts
The process for escalating a search result is generally the same between client companies with only one escalation group and multiple escalation groups. The only difference is the list of permissions available to the escalation group levels.
Depending on the escalation group level, certain options may be enabled or disabled. If no escalation groups were set up in the system, the command link turns gray and cannot be opened.
Escalate
may not appear as an option should any of the following occur:- The search is not blocked. Therefore, no DPS hits were received
- The search already has anOverriddenorDeniedstatus
- The search has already been escalated to the highest escalation group
- The user belongs to the highest escalation group
- No escalation path has been set up
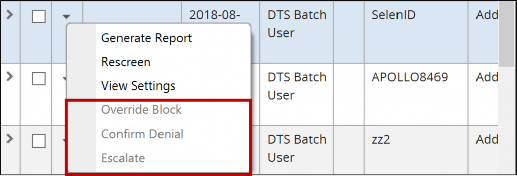
Hovering your cursor over a record causes a tool tip to appear, providing an explanation for why an option is not appearing.
Escalation Through DPS Management
Conduct a search through the
DPS Management
screen. After the search is complete:
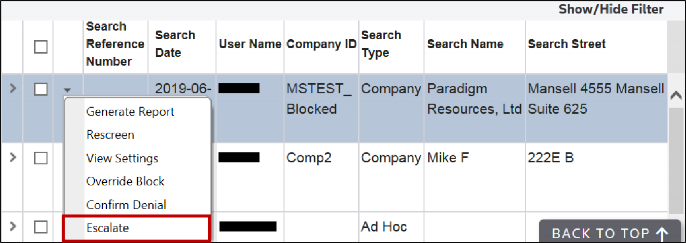
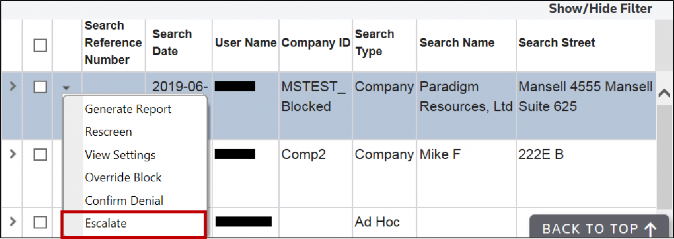
- Click which record in theSearch Resultstable needs to be escalated.
- Hover your cursor to the right of the record’s checkbox until an option menu appears.
- ClickEscalateto open theEscalate Searchwindow.A company or ad hoc search result can be escalated as many times as there are escalation groups set up. However, if you do not belong to an escalation group, they can only escalate a search result once.
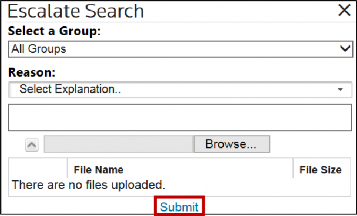
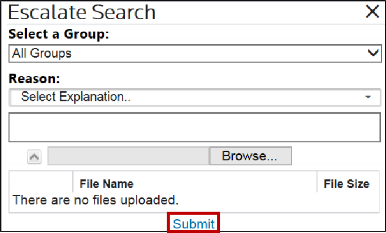
- Click theSelect a Groupdrop-down menu.
- Click the group the search will be escalated to. The escalation group appears as an option if a search can be escalated to that group.IfAll Groupsis chosen from this drop-down menu, the notification is sent to all escalation groups configured in the system.
- Click theReasondrop-down menu.
- Use the text box below theReasondrop-down menu to write any further notes.
- Attach documents as needed.
- SelectSubmit.
In the
Search Results
table, the search status for the escalated search changes to Escalated
. The Escalated
status carries over to the screening in the Blocked
status.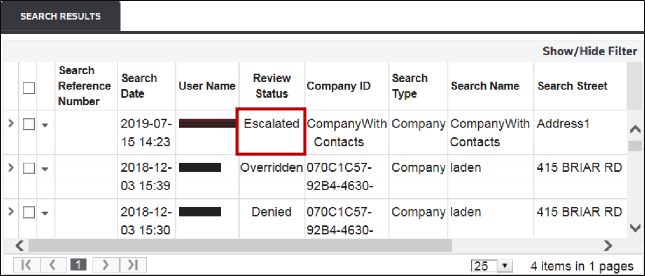
Re-screening Escalated Parties
If an escalated company is re-screened and the status is cleared, the
Escalated
status is removed from the Review Status
column.If an escalated company is re-screened multiple times, the first screening will have an
Originally Escalated
status. The most recent screening will have the Escalated
status. All screenings between the original and most recent screening will have a blank status.If a company screening is resolved (Denied or Overridden), the system closes all related previous escalations with an
Originally Escalated
or Escalated
status.For ad hoc searches, escalation statuses do not carry over to re-screenings or future screenings.
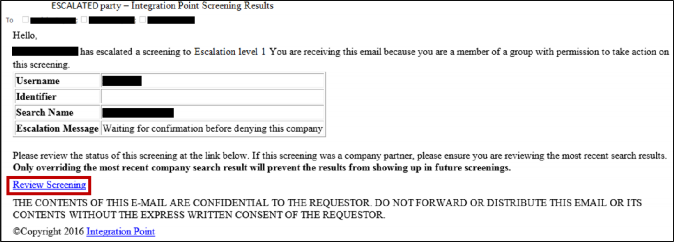
Action on Escalated Companies via E-mail
If the group the search was escalated to has been set up to receive e-mail alerts, the escalation will trigger an e-mail, notifying the group members that a search was escalated. The contents of these e-mails are configurable.
To act on an escalated company:
- ClickReview Screeningto be redirected to theDPS Managementscreen. The escalated search results appears in theSearch Resultstable below. If the screening was a stored company, previous searches will also display for reference purposes.
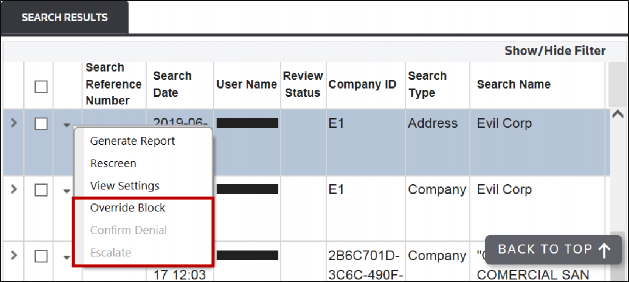
To act on the escalated company:
- Hover your cursor to the left of theSearch Reference Numbercolumn until the options menu appears.
- From there, clickOverride Block, orConfirm Denial.
- If you belong to a mid-level escalation group and need to escalate the search results to the next escalation group, clickEscalateto open theEscalate Searchwindow.
- Click theSelect a Groupdrop-down menu.
- Click the group the search will be escalated to. The escalation group will only appear as an option if a search can be escalated to that group. IfAll Groupsis chosen from this drop-down menu, the notification will be sent to all escalation groups configured in the system.
- Click theReasondrop-down menu.
- Use the text box below theReasondrop-down menu to write any further notes.
- Attach documents as needed.
- ClickSubmit.
- AfterSubmitis selected, the status for the search result will change toOverriddenorDenied, depending on what you chose in the previous step.
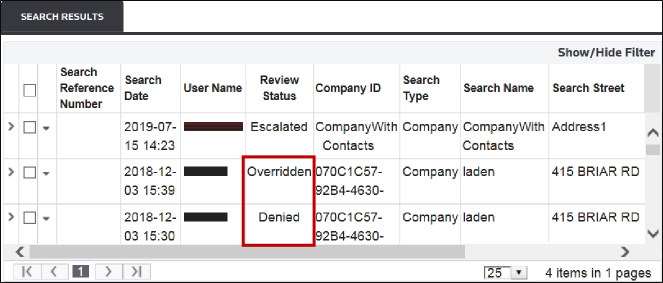
- After a search result is overridden or denied, theEscalate,Override Block, andConfirm Denialoptions will be disabled from the options menu.
Related Content
-
DPS Quick Screening: Post-Screening Actions - Reports, Email, Entity Management, Denial Confirmation, and Escalation
Format: Article,
10 min read
Article,
10 min read
-
DPS Settings: Escalation Group Configuration
Format:
Article,
3 min read