
Configure a custom status
You can define custom statuses and then apply them to binders from FileRoom or from within the SPbinder. Creating custom statuses can help you track the progress of your client's binders.
Follow these steps to configure a custom status:
- SelectFileRoom,Admin,Account Setup, thenCustom Status.

- On theCustom Statustab, you can add or delete custom statuses.

- You can also send an email notification to the owner when the binder status changes. To enable email notification, mark the checkbox forSend an email notification to Owner when binder status is changed.

- When closing SPbinder, your firm's users will need to select the current status of their binder. They can choose the blank status (first option) or select one of the designated custom statuses.
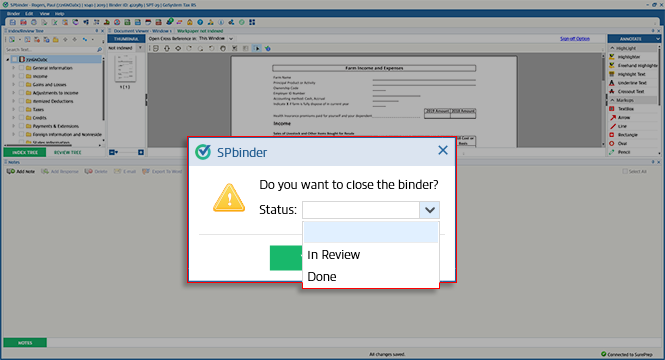
- The binder's status will change to the custom status you selected when closing the binder. To update the binder status, open the binder, select a different option when closing the binder.
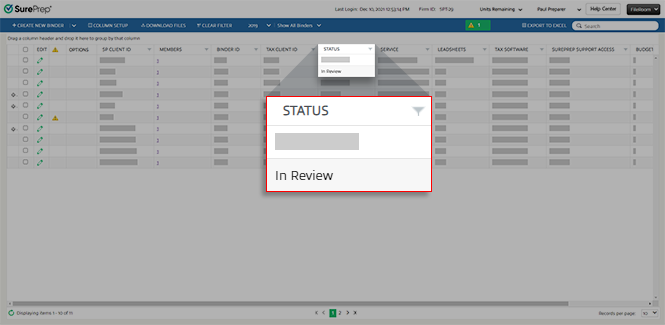
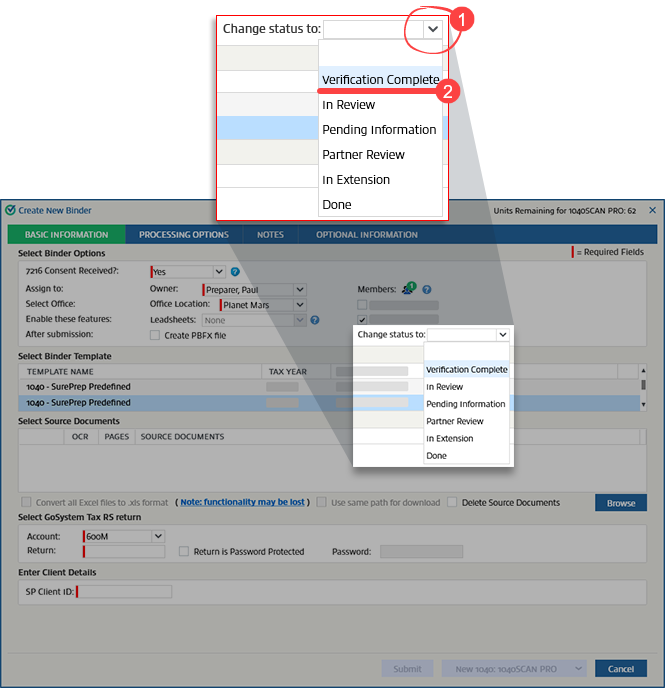
- You can also change the binder status by updating binder information without opening the binder.tipBy default, once the binder's verification step is complete, the binder's status appears blank/empty in FileRoom. When creating a binder, you can select that status that the binder should update to after submission. On theCreate New Binderwindow, select a custom status from theChange status todropdown.
 tipYou can organize your FileRoom view by grouping binders by status.
 You can also narrow down the binders list by filtering binders based on different statuses.
Related Content
-
Add a custom status
Format: Article
-
Change the display order of custom statuses
Format:
Article
-
Edit a custom status
Format:
Article
-
Delete a custom status
Format:
Article
-
Export custom statuses to Excel
Format:
Article

