
Integrating GoSystem accounts with SurePrep (For Outsource Only)
Tax File Activation lets you integrate GoSystem Tax RS account(s) with SurePrep and enter the GoSystem user login(s) to be used by SurePrep on Outsource binders. Once that's completed, you can transfer proforma files and export files from and to GoSystem Tax RS.
Before you start
You must fully activate your GoSystem integration with SurePrep before completing the additional integration steps for Outsource services highlighted in this article.
GoSystem integration for Outsource services
For Outsource services, you must complete these additional integration steps to enable SurePrep to exchange information with GoSystem Tax RS.
GoSystem User Logins (For Outsource only)
In FileRoom, users can select
Admin
, ACCOUNT SETUP
, Tax File Activation Web
, GoSystem Tax RS
, then User Login Configuration (for Outsource Users Only)
to add new user logins for the GoSystem Account if the return is to be submitted to SurePrep for full preparation.
Enter the
GoSystem Firm
(this is the same account ID that you use to login to GoSystem Tax RS).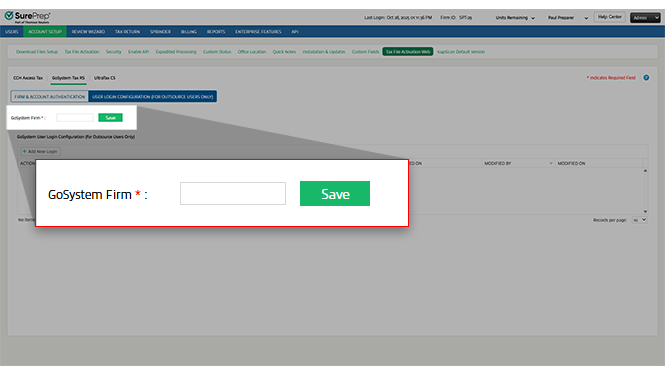
Select
Add New Login
. A new row will be added wherein you can enter the following:User Login:
Enter your user login. Password:
The password must be 8 characters to 40 characters in length and contain an uppercase letter, a lowercase letter, and a number.
GS GROUP LOCATION:
Enter the location through which you have set-up the login with GoSystem Tax RS. 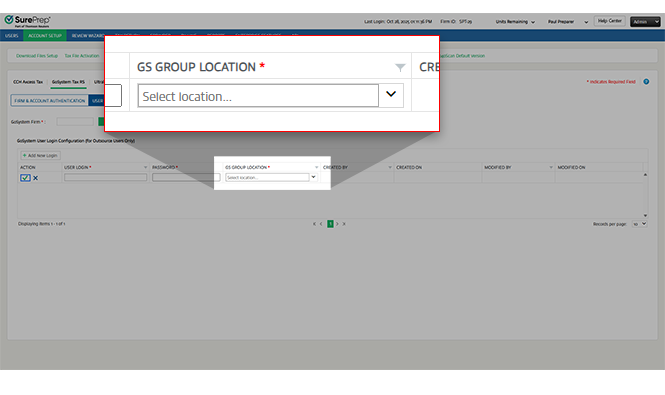
Select the  icon to save the settings.
Save
icon to save the settings.Select the  icon to discard changes.
Cancel
icon to discard changes.Created By
, Created On
, Modified By
, and Modified On
fields will be auto-populated. 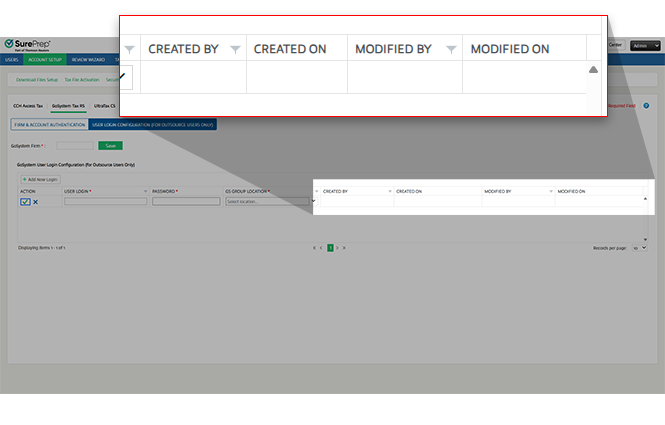
Select the  icon to see the help section for GoSystem tax file activation.
Help
icon to see the help section for GoSystem tax file activation.Related Content
-
Assigning Locator to SurePrep (For Outsource Only)
Format: Article
-
Creating SurePrep User Group and Users in GoSystem Tax RS for SurePrep - (For Outsource Only)
Format:
Article
-
Tax File Activation on web for GoSystem Tax RS API
Format:
Article