
Step 8 - Finalization - for Simplified Leadsheets and without leads binders
This step appears only if you submitted a binder without leads or with Simplified Leadsheets.
This window indicates the completion of the Review process. On the Review wizard, Simplified Leadsheets and Without Leadsheet (that is, none) binders will have the checkbox auto-selected for
Export data to (GoSystem Tax RS / CCH Axcess Tax RS)
. Applicable to 1040SCANverify and 1040SCAN PRO/PRO+.
note
- In the New Form Review (NFR) step, SurePrep verifiers (that is, 1040SCANverify service) may leave some documents unmatched if a clear match can't be found. However, if your firm has chosen to skip the NFR step, the unmatched form will be added as a new entity in theINDEX TREEtab in SPbinder. In theFinalizationwindow, if you have opted to automatically export data to the tax application (that is,Export data to _____), the exported data will appear as a new form in the tax application instead of populating the existing proforma form. To avoid this, we recommend closing the export window when it opens.
- The ability to auto-export data is not available for UltraTax CS and Lacerte.
The steps under Finalization are exporting data to the related tax application, opening SPbinder and converting the file into a SPbinder PDF.
note
The selected checkboxes are saved on the machine. You don't need to reselect the same checkboxes each time for subsequent returns.
Open SPbinder
By default, the option
Open SPbinder
will be auto-selected. It has 2 sub-options:- Enable SPbinder e-Access
- Create PBFX (Portable Binder Format)
Enable SPbinder e-Access
Select
Enable SPbinder e-Access
to upload the images of the source document file attached to this binder on the server.This lets you access the binder from any machine that doesn’t have the
SurePrep Download Folder
path setup as defined in .If you clear the
Open SPbinder
checkbox, this option won’t be displayed.This option will be turned off with an auto check mark, if the binder is already selected for e-access while submitting.
Create PBFX (Portable Binder Format)
Select the
Create PBFX file (Portable Binder Format)
checkbox to access and save the binder at the location.Once you select the
Finish
button, save the PBFX to your SurePrep Download Folder.note
Select
Save
to save the binder at the location defined in section. You can change the location, if required.A confirmation window appears when you select
Save
. Select OK
to close the window.SPbinder opens once the file gets saved at the location.

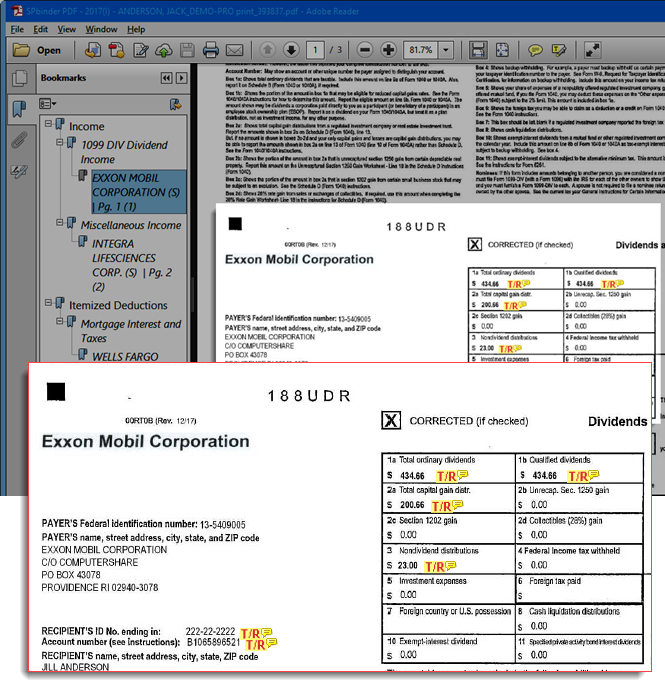
SPbinder PDF
Select the
Create SPbinder PDF
option in the Finalization window. This function enables the creation of a bookmarked PDF file containing the source documents of the binder submitted.To create a SPbinder PDF, select
Finish
.When the
Print Setup
window appears, select the print options. The options default to the one selected in the section.View detailed explanation on Print Options.
When the
Print Setup
window appears, you can change options for this binder, then select Print
.
You can create the SPbinder PDF later either from FileRoom or from within SPbinder.
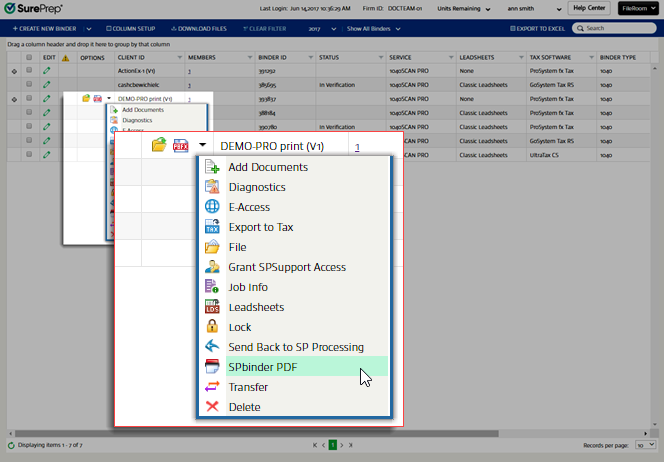
Print SPbinder PDF from FileRoom:
Select the binder from FileRoom, select the dropdown from the Options
column, then select SPbinder PDF
.
Print SPbinder PDF from within SPbinder:
select the Print
icon  on the SPbinder toolbar.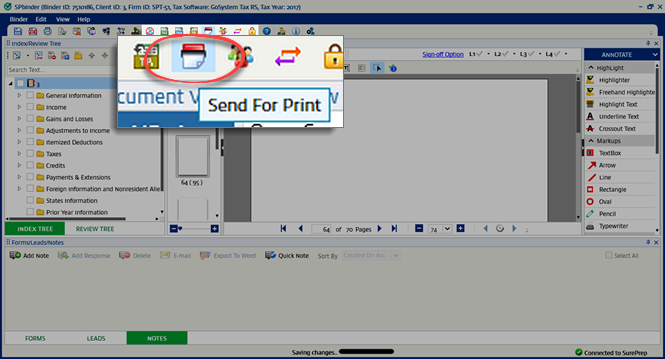
Related Content
-
Review Wizard overview
Format: Article

