Workpaper Tools (sticky notes, cross-references, notes)

Workpaper Tools
section is only visible in the
Annotate
panel if the selected document is a PDF, Word, and Excel file type.
Workpaper Tools
help you indicate important and necessary information related to a particular value or field, which aids in return preparation.
The following options are available under Workpaper Tools:
Tolls in the Annotate panel

Sticky Notes

Sticky Notes
are used to:
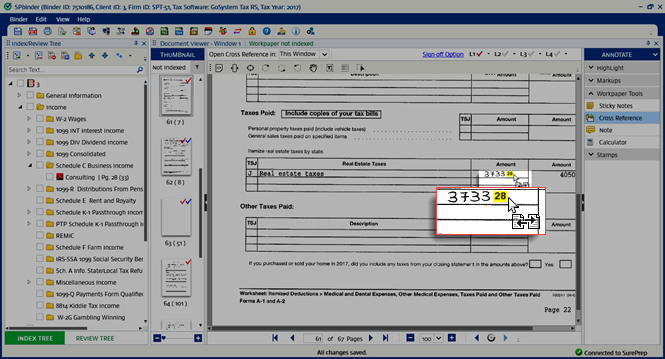
Communicate with references:
Add references for amounts proforma'd in the tax application but not provided on the source documents.
Display Calculation:
The user name, date, and time of the note created appears on the Sticky Note title bar.
To add a Sticky Note, choose
Sticky Notes
 from
Workpaper Tools
and select the document where you want the Sticky Note to be added.
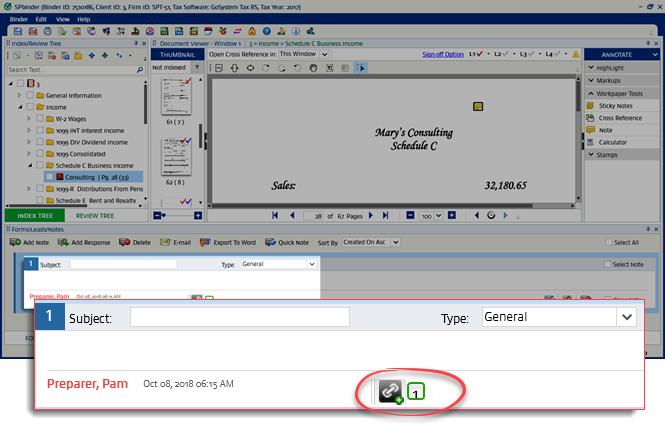
A Sticky Note indicating the user name along with the date and time of creation will appear on the document. You can begin typing your note.
Select Sticky Notes
If you need to make changes to an existing note then double-click the Sticky Note to edit the text.
Type into the sticky note
You can also move, edit, and resize the Sticky Note by selecting it and dragging one of the handles.
Resize the sticky note
Point to the Sticky Note to display details of the user who created it.
Review the sticky note details
note
The preceding feature can also be printed and viewed in DreamWorkpapers.
Delete Sticky Note
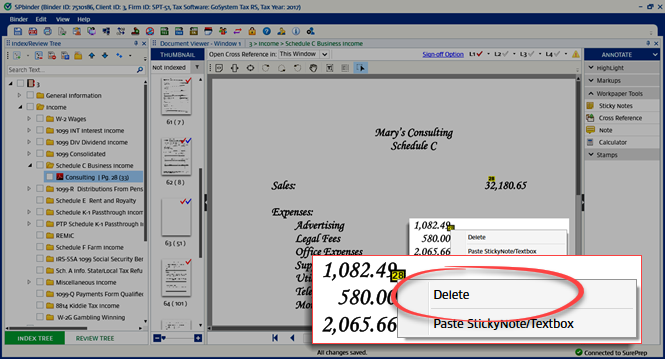
Select the Sticky Note, right-click it, and select
Delete
to delete the Sticky Note. 
You can also delete the Sticky Note by using the delete button on the keyboard.
Select Delete
When the
Delete Confirmation
window appears, select
Yes
 to delete the Sticky Note, select
No
to cancel.
Select Yes
Editing Text
Right-click the Sticky Note and select 
Edit Text
to edit the Sticky Note.
Select Edit Text
Sticky Note Properties
Right-click the Sticky Note and select
Properties
to view the 
Sticky Note properties
window.
Select Properties
Changing Appearance
On the
Sticky Note properties
window, if the 
Appearance
 tab is not selected, then select the 
Appearance
 tab to change the
Sticky Note
appearance.
Select the
Fill
color to change the background color.
Select
Opacity
to change the transparency for the Sticky Note.
Appearance tab
Changing Font
Select the 
Font
 tab to change the font settings. You can change the Font Size, Text Alignment, and Text Color of the Sticky Note here.
Font tab
If you want to set your changes as default, you can select the checkbox for
Make Current Properties Default
.
Select
OK
 to save the changes made.
note
References should be placed outside the Sticky Note.
Copying and pasting a Sticky Note
You can copy and paste a Sticky Note from 1 page to another.
Right-click the Sticky Note and select
Copy StickyNote/Textbox
.
Select Copy StickyNote/Textbox
Go to the page on which you want to paste the Sticky Note. Right-click the document and select 
Paste StickyNote/Textbox
.
Select Paste StickyNote/Textbox
You can also copy multiple Sticky Notes from a page. Drag across multiple Sticky Notes to select them. Right-click and select 
Copy Sticky Note/Textbox
. Go to the page, right-click, and select 
Paste StickyNote/Textbox
.

Cross-reference

This functionality enables you to reference an amount from 1 page on another page.
First, select 
Cross Reference
under 
Workpaper Tools
Select Cross Reference
Next, go to the document then select once to place the 1st cross-reference. On the same page or a different page, select again to place a 2nd cross-reference at the location you'd like to link. 
Locate where you'd like to place the reference
Once the 2 cross-references are created, a cross-reference will display the page number on which the other cross-reference exists.
Place the reference
When you select a cross-reference, you'll be taken to the corresponding cross-reference. If you point to the cross-reference, you'll see a tooltip that shows who the cross-reference was created by.
Review the reference details
You can choose to open cross-references in the same window or a new window. The 
Open Cross Reference in
menu is located in the 
Document Viewer
between the breadcrumbs and the 
Sign-off Option
feature.
Open Cross Reference in menu
Within that menu, you can choose to open cross-references in 
This Window
or a 
New Window
.
Select from the Open Cross Reference in menu
Open Cross Reference in
This Window
: Opens the cross-reference in the existing window. This option is set by default.
New Window
: Opens the cross-reference in a new window.
Multiple references in the document
Each window will have a unique number displayed after the 
Document Viewer
label.
Document Viewer label
The
Open Cross Reference in
option will be displayed in all windows except the 4th window (main monitor plus 2 new windows), because you can't exceed 4 windows. If you select a cross-reference on the 4th window, it will take you to the subsequent cross-reference in the existing window.
Your selection is remembered per window and per user. For example, if you select the option
New Window
, in window 3, your selection will be saved.
Delete Cross Reference
To delete a cross-reference, right-click a cross-reference then select
Delete
on the shortcut menu. You can also select to select the cross-reference then press Delete on your keyboard.
Select Delete

Note

To add a
Linked Note
, select the
Note
 option and select the document where you want the note to be placed.
Note icon in the annotate panel
You can add text within this note from the
Forms/Leads/Notes
section. The Linked Note will have a reference number on it, letting you link directly to the workpaper.
Note added form the FORMS/LEADS/NOTES panel
Right-click the note to delete the link and delete the note, with the options
Delete Link
 and
Delete Note
 on the shortcut menu.
Select Delete Link or Delete Note

Related Content

error-icon

Triva isn't available right now.

Check out the support page for our phone number and hours

error-close