
Adding an invoice
The invoice section lets you add an invoice by uploading a PDF copy.
note
When you upload an invoice, SurePrep charges 1 TaxCaddy Deliver unit once (if the Deliver unit hasn’t already been charged for the client's current tax year/tax return).Additional Stripe transaction fee rates apply separately based on payment type.Use this link to learn more about Stripe pricing.
Follow these steps to add a new invoice:
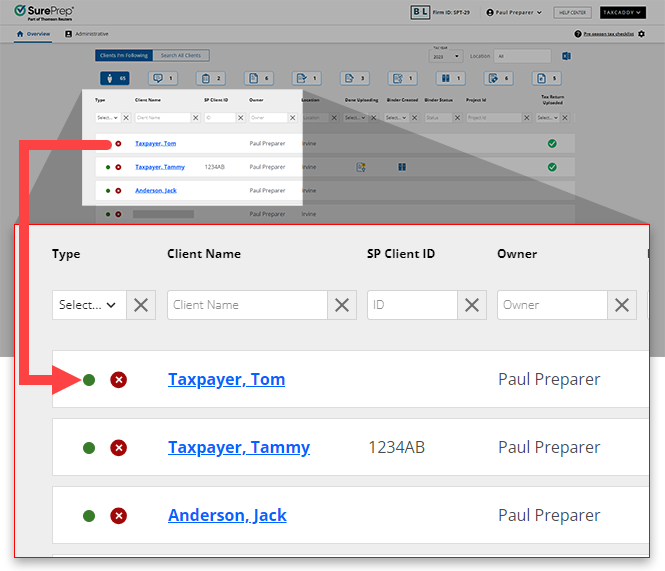
- On theOverviewscreen, select a client tile to view the client profile. You can also search for a client then select the client tile from the search result.
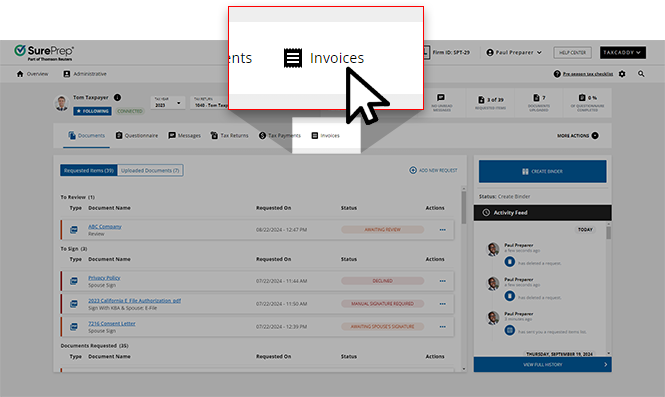
- Select theInvoicestab.
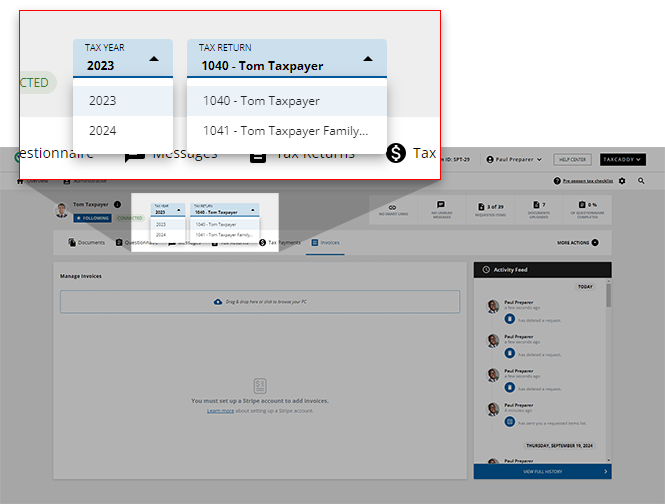
- Select the tax year.
- Drag & Droplets you drag your PDF file inside the drop zone. You can also upload a document when you select theDrag & Dropbox.If you selected the
 Drag & Dropbox, select a file to upload from your device.
 - When theAdd Invoice for Tax Yearwindow appears, you will see the file upload progress bar.
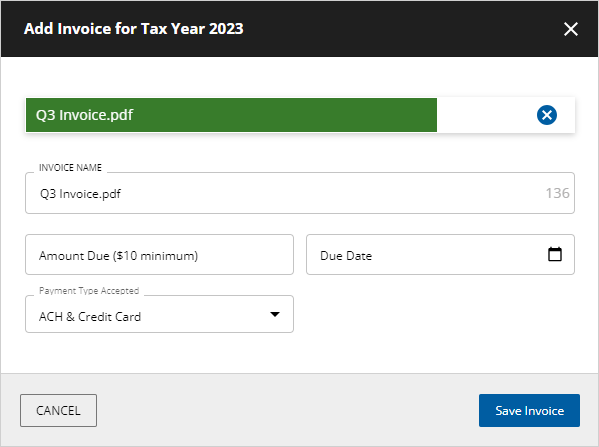
- A PDF icon appears on theAdd Invoice for Tax Yearwindow once the file is uploaded completely. If you have mistakenly added the wrong PDF file, select theDelete
 icon on the top-right corner of the PDF file to remove this document.
On the window, you can drag and drop the correct PDF inside the file upload area or select the file upload area and select the correct file.
icon on the top-right corner of the PDF file to remove this document.
On the window, you can drag and drop the correct PDF inside the file upload area or select the file upload area and select the correct file.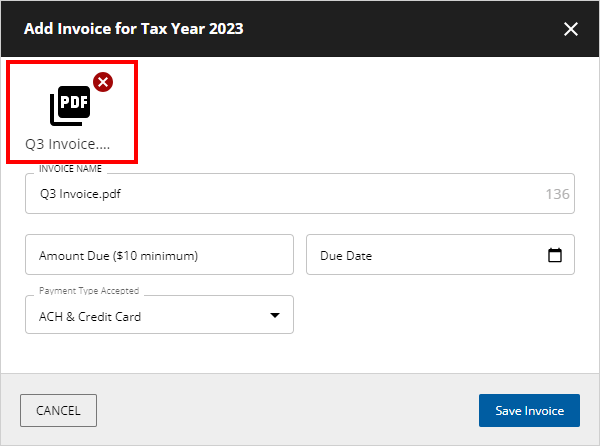

- Fill out the following fields:noteInvoices Name,Amount Due, andPayment Type Acceptedare required fields.
- Invoice NameOnce the file has been uploaded completely, the PDF file name will be auto-populated into theInvoices Namefield. However, it can be renamed if needed. Text can't exceed the 256 character limit and should be limited to standard special characters.
- Amount DueOnly accepts a numeric value (for example, 123456); You can also insert a decimal as a special character. Enter a minimum of $10 or above.
- Due DateEnter the invoice due date. When entering data, follow the MM/DD/YYYY format (04/15/2019). If no due date is entered, then the due date will be saved asN/A.You can also select theDate Picker
 icon to select a date.
  You can navigate between different months/years. Select the due date on the calendar to enter the date in theDue Datefield.
- Payment Type AcceptedLets you select how your client can make a payment.
- Credit Card Only: Only accept Credit Card as a method of payment. On an iOS device, this includes Apple Pay. On an Android device, this includes Google Pay.
- ACH Only: Only accept ACH as a method of payment (Visa, Mastercard, American Express, Discover, Diners Club, JCB).
- ACH & Credit Card: Accepts both Credit Cards and ACH as a method of payment.
noteYou can avoid changing your accepted payment type each time you create a new invoice by selecting a default option fromTaxCaddy, Administrative, External Conection, then Stripe.
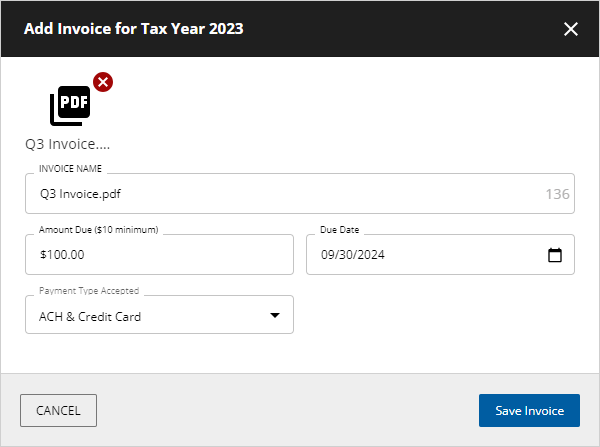
- SelectSAVE INVOICEto save this as a new invoice or selectCANCELto close the window without adding a new invoice.
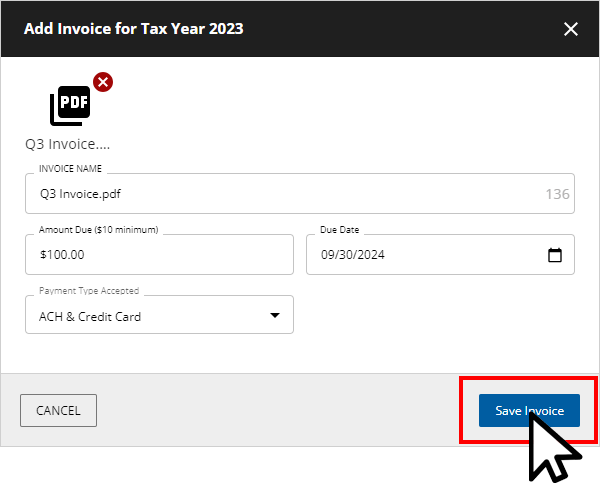
- The saved invoice will appear on top of theManage Invoicespanel.
 noteIf status notifications are enabled by the user, then in 24 hours only a single notification email will be sent to the user for each notification type (add, edit, delete, refund, or mark as paid). For example: If you add 2 invoices, and delete one, then only 1 invoice notification will be sent for adding an invoice, and one for deleting an invoice.
Related Content
-
Editing an invoice
Format: Article,
3 min read
Article,
3 min read
-
Deleting an invoice
Format:
Article,
3 min read
-
Downloading an invoice
Format:
Article,
3 min read
-
Marking invoice as paid
Format:
Article,
5 min read
-
Refunding an invoice
Format:
Article,
5 min read
-
Messaging your client about their invoice
Format:
Article,
2 min read
-
Invoices Overview
Format:
Article,
2 min read
-
Editing an invoice
Format:
Article,
3 min read
-
Deleting an invoice
Format:
Article,
3 min read
-
Downloading an invoice
Format:
Article,
3 min read

