
Upload files to client's Uploaded Documents
Follow these steps to upload files to a client's
Uploaded Documents
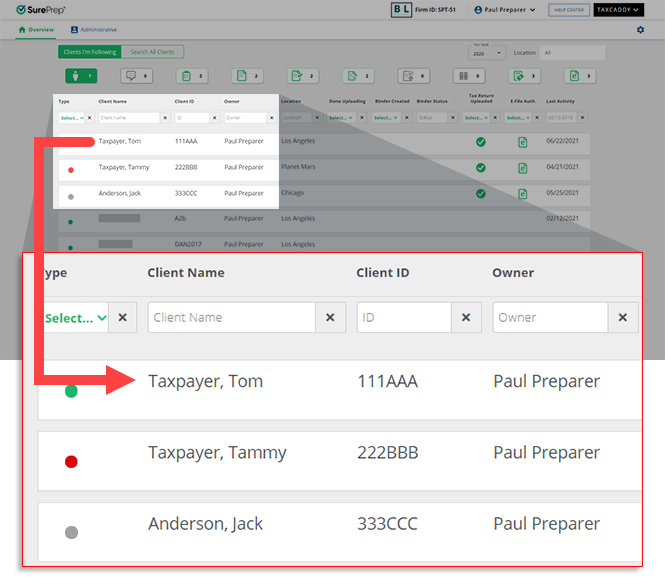
tab:- Sign in to TaxCaddy and go to a client profile by selecting a client tile on theOverviewscreen.
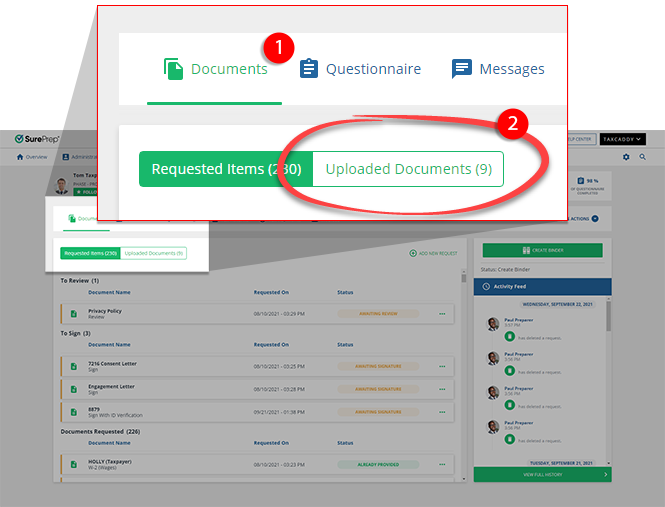
- SelectDocuments, then selectUploaded Documents.
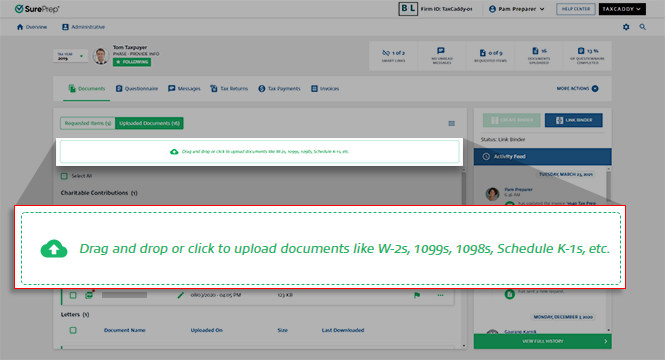
- SelectDrag and drop or click to upload documents. You can also drop the file in the drop area.
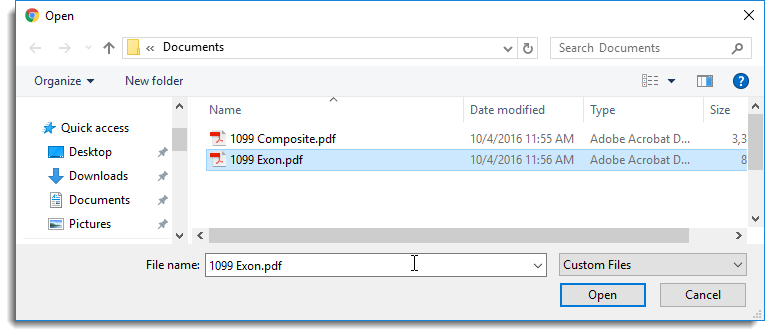
- When theOpenwindow appears, select a document to upload.noteAccepted file formats are: PDF, DOCX, XLS, and XLSX. You can upload multiple files to the same category at 1 time.
- When theUploaded Documentswindow appears, select aCategoryandTax Yearfor the document.noteIf you are uploading multiple files that need to be filed to separate categories, selectDecide Later. After the file is uploaded, you can move the document to another category or add a new category if necessary. .If you have enabled 1041 tax return profiles on this account, select the correct
 Tax Returnin addition to theTax Yearbefore selecting theCategory.
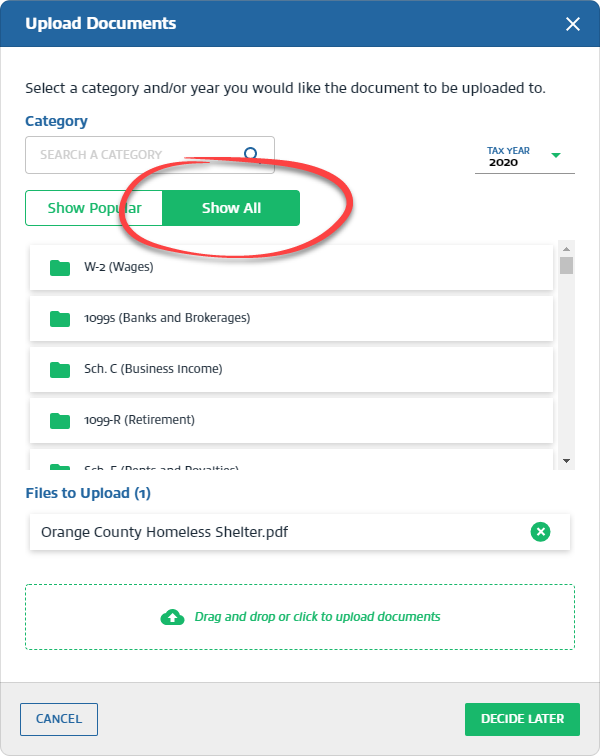
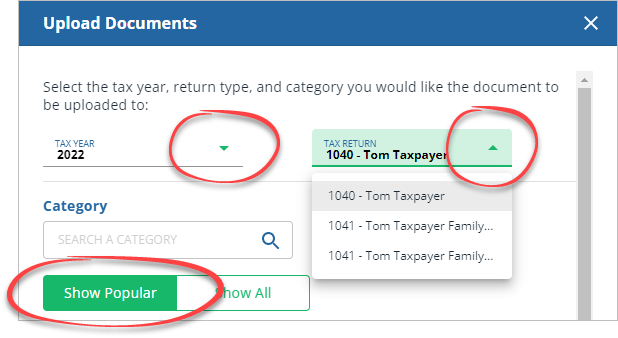 noteSome categories only apply to 1040 tax return types and won’t appear when moving a 1041 specific document and vice versa.If you are unable to find a category, select theShow Alltab.
 You can also use the search bar to find your category.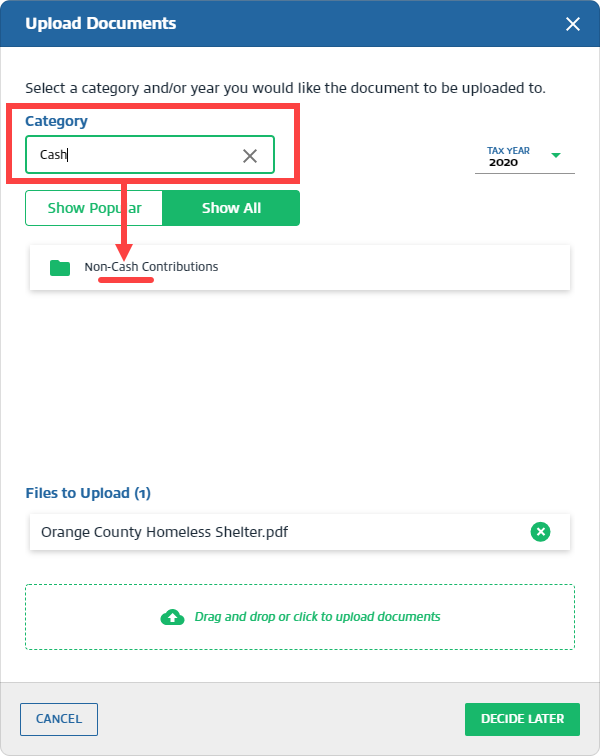
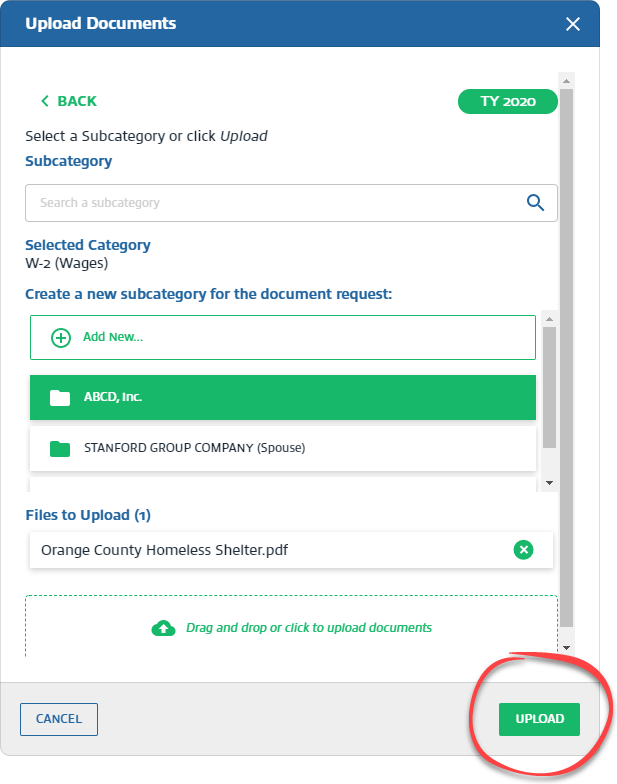
- After you select the category name, you can select an existing subcategory or create a new subcategory for the document. To create a subcategory, selectAdd New.

- SelectUpload.
- Once the file upload completes, selectClose.
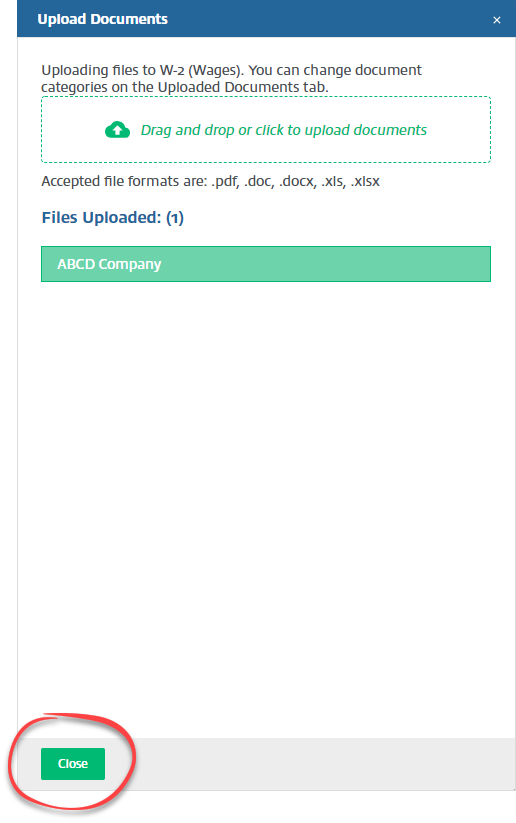
- The uploaded document appears on theUploaded Documentstab, under the selected category and tax year.

note
Fillable PDFs directly uploaded to TaxCaddy's
Uploaded Documents
section should be manually flattened/printed before sending to SurePrep for processing. To flatten the PDF, open the PDF then press Ctrl + P
or File
, then Print
to print/save a flattened PDF.Related Content
-
Document auto-categorization in TaxCaddy
Format: Article
-
Mark documents as Viewed and Unviewed
Format:
Article
-
Add SurePrep barcode from TaxCaddy
Format:
Article
-
Manage Done Uploading status for the client
Format:
Article
-
Troubleshoot: Uploaded file errors in TaxCaddy
Format:
Article
-
Document validation check
Format:
Article
-
Document flags
Format:
Article
-
Troubleshoot: Upload documents for tax return types not supported by TaxCaddy
Format:
Article
-
Mark documents as Viewed and Unviewed
Format:
Article
-
Manage Done Uploading status for the client
Format:
Article
-
Document validation check
Format:
Article
-
Document flags
Format:
Article
-
Delete documents
Format:
Article
-
Move documents to another category or tax year
Format:
Article
-
Viewing clients' tax documents
Format:
Article

