
DPS Quick Screening: Post-Screening Actions - Reports, Email, Entity Management, Denial Confirmation, and Escalation
Override Block
Authorized users can indicate that a given hit has been approved by changing a
Blocked
status to an Overridden
status.- Conduct a search on the company as defined in the Conducting a Search section of this User Guide.
- Analyze the hit(s) and perform any needed research to confirm that the blocked party is not the same person as the listed denied party (e.g. False Positive).
- After confirming, clickActionson the right of the screen and clickOverride Block. A pop-up will open.

- Choose a reason from theSelect Explanation… drop-down.

- Add a note in the textbox to justify overriding this party. There is an 800-character limit.

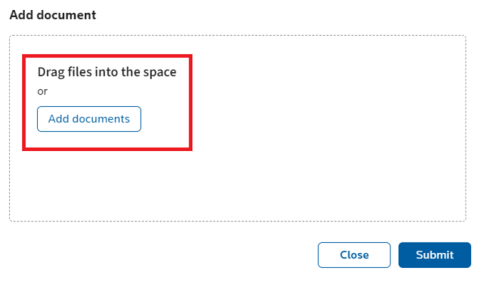
- Attach any required documents by dragging files into the space or adding files from your local drive.

- ClickSubmitto confirm orCloseto drop your changes.
Once the override is submitted, the party status changes to
Overridden
and the Override Date
changes to the current date (or the most recent date the company was previously screened).
The notes and files will be added to the
Notes and files
tab in chronological order with a time stamp including the username of the author.note
It is important to note that if additional information comes out about an overridden party, they may show up as “blocked” again on future re-screenings. This will only occur if one of the critical fields in Global Trade Content has changed.
Create Report
Once search results are displayed on the
Quick Screening
screen, you can generate and extract a screening detail report in PDF format.- ClickActionson the right of the screen.
- ClickCreate Report.

- TheCreate Reportpop-up will open. Choose one of theNote options:Include all notesor Includeonly the most recent notes.

- ClickDownload.

Your report will start processing and will automatically download to your local drive when it is ready.
E-mail Report
The Email Report action will become available after clicking
Create Report
.- ClickEmail Report.

- A pop-up will open with the template loaded as per the status of the searched company (i.e. Clear or Blocked).

- Use the To and CC fields to designate the recipient(s). This can be done manually or by loading a default e-mail address, assuming a default recipient e-mail was configured in the user’s DPS Settings. The CC field is not mandatory and can be left blank.
The
Subject
and Description
fields will preload with data from the template. The Subject
field is not mandatory and can be left blank.Different style tag options can be applied to the
Description
text (e.g. bold, italic). Different rich text options are also available for editing the text in the e-mail body.The generated report will automatically be attached to the
Attachments
section.
To remove the report from the e-mail, uncheck the report.

Insert Code Snippet
can be used to get values (like Company Name, # of Hits, Status, User Name, and Search Reference Number) inserted into the e-mail body.To e-mail out the report, click
Send
. Recipients in the “To” and “CC” fields will receive the e-mail with the specified Subject line, attachments and description mentioned.note
The same steps for
E-mail Report
can be followed on screening a company via the Ad hoc text search
option. Confirm Denial
After a party has been screened and blocked, you can set the party to a Denied status. That means the party was not only screened and blocked, but that you confirmed the block as valid.
note
The screened party status must be blocked.
- Conduct a search on the company as defined in the Conducting a Search section of this User Guide.
- Click Actions on the right of the screen and clickConfirm denial. A pop-up will open.

- Choose a reason from theSelect Explanation… drop-down.

- Add a note in the textbox. There is an 800-character limit.

- Attach any required document by dragging files into the space or adding files from your local drive.
- ClickSubmitto confirm the denial orCancelto drop.
The notes and files will be added to the
Notes and files
tab in chronological order with a time stamp including the username of the author.Escalate
If you are not at a high enough authorization level to determine whether a flagged company should be denied or overridden, you can escalate the search results to associates who belong to the next escalation group.
The
Escalate
option will only appear for blocked searches with hits. However, there are three instances where Escalate
will not appear, even if the searched company is blocked:- You belong to the highest-level escalation group.
- You belong to all established escalation groups.
- Only one escalation group exists, and you belong to this group.
The escalation functionality varies slightly depending on two factors: search type (ad hoc vs. company search); and the number of escalation groups. For more information on setting up escalation groups, please refer to the DPS Settings - Escalation section of this User Guide.
Acting on an ad hoc screening will not impact future ad hoc screenings of the same name/address. Future ad hoc screenings will not impact the escalation status of past screenings.
When a company is escalated and you do not belong to the group the company was escalated to,
Escalate, Override Block, and Confirm Denial
will be disabled.If you try to escalate the search a second time, a validation error will appear:

Depending on how escalation groups were set up in the system, any search result can be escalated a minimum of one time and a maximum of three times.
- Conduct a search on the company as defined in the Conducting a Search section of this User Guide.
- ClickActionson the right of the screen and clickEscalate. A pop-up will open.

- Click theSelect person or group for escalationdropdown and select the group the search will be escalated to. The escalation group will only appear as an option if a search can be escalated to that group.
 noteIfAll Groupsis chosen from this drop-down, the notification will be sent to all escalation groups configured in the system.
 - Click theSelect reasondropdown and select a reason to justify escalation this party.

- Use the textbox to write a custom note. There is an 800-character limit.

- You can attach documents by dragging files into the space or adding files from your local drive.

- ClickSubmitto confirm orCloseto drop your changes.
The notes and files included will appear in the
Notes and files
tab in chronological order with a time stamp including the username of the author.If the group the search was escalated to has been set up to receive e-mail alerts, the escalation will trigger an e-mail, notifying the group member(s) that a search was escalated.
Related Content
-
DPS Company Maintenance: Managing Partner Data
Format: Article,
8 min read
Article,
8 min read
-
DPS Management: Batch Actions - Rescreening and Status Management
Format:
Article,
6 min read
-
DPS Management: Escalating Blocked Parties and Email Alerts
Format:
Article,
5 min read
-
DPS Management: Generating History and Results Reports
Format:
Article,
5 min read