
How do I set up notifications from users and entities in In Out?
This functionality allows you to
associate tables/entities
with a user so that every time there is a processing error in the tables or processing notification by entity, that user is notified of such failures by email. However, it is worth emphasizing that it is not enough to create the entity
, it is necessary to schedule the notifications in the encoding of the peripheral system.Adding a user notification
- Access the menuInterfaces > User Notification.
- ClickAdd
 .
. - On theNotification of Updates/Errors by Tables/Entitiestab, choose thetableorentityto which theuserwill be associated.
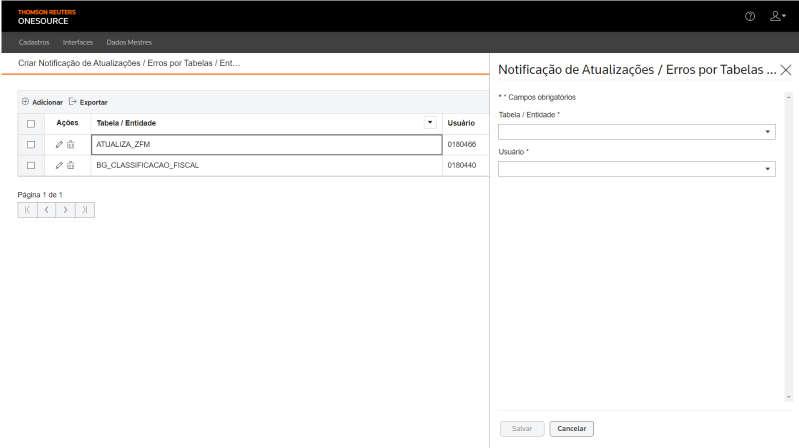
- ClickSave.
Editing a user notification
- Access the menuInterfaces > User Notification.
- On theCreate Notification of Updates/Errors by Tables/Entitiesscreen, click theEdit
 button of the record whose information will be updated.To delete a record, click theDelete
 button.
 - In theNotification of Updates/Errors by Tables/Entitiesside panel, change the required information.
- ClickSave.Table data can be organized using theHide Filters
 , Show Grouper
 , and Show/Hide Columnsbuttons
 .
.
Exporting user notification data
- Access the menuInterfaces > User Notification.
- On theCreate Notification of Updates/Errors by Tables/Entitiesscreen, select the tables/entities whose data you want to export.
- To export data from all rows in the table, this marking is not required.
- Table data can be organized using theHide Filters, Show Grouper, and Show/Hide Columnsbuttons.
- ClickExport
 .
.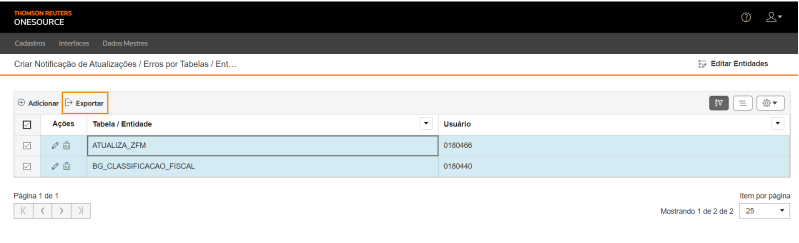
An Excel file will be generated with the 
tables/entities
and users
marked, for example:Changing user notification entities
- Access the menuInterfaces > User Notification.
- ClickEdit Entities
 .
. - On theEntities Filterscreen, click theEditbutton for the row of the entitywhose information you want to update.
- To view or delete an entity, click theView
 and Delete
 buttons, respectively.
 - You can export the table information to an Excel file. To do this, select the desired entities and clickExport. To export data from all rows in the table, this marking is not required.
- On theEntitiesscreen, click theEditbutton for the translationline to be changed.To delete a translation, click theDeletebutton.
- In theTranslationsside panel, change the translationdescriptionortitle.
- ClickSave.Table data can be organized using theHide Filters, Show Grouper, and Show/Hide Columnsbuttons.
Adding an entity
- Access the menuInterfaces > User Notification.
- ClickEdit Entities.
- On theEntities Filterscreen, click theAdd button.
- On theCreate Entitiesscreen, enter anentityand clickAdd to enter, in the side tab, the language,description, andtitleof the translation.
- ClickSave.
- To export the table information to an Excel file, mark the desired translations and clickExport. To export data from all rows in the table, this marking is not required.
- Table data can be organized using theHide Filters, Show Grouper, and Show/Hide Columnsbuttons.
Related Content
-
How do I create and manage interface groups in In Out?
Format: Article
-
How do I register and configure interfaces in In Out?
Format:
Article
-
How do I create and manage interface schedules?
Format:
Article
-
How to monitor and manage data imports/exports in In Out?
Format:
Article
-
How do I check the status of the interfaces?
Format:
Article
-
How do I resolve data import errors in In Out?
Format:
Article
-
How do I resolve data import errors in In Out?
Format:
Article
-
How do I take manual appointments of interfaces in In Out?
Format:
Article
-
How to register and manage machines in In Out?
Format:
Article